
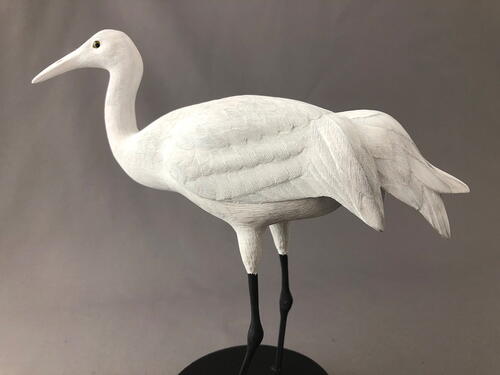
Miniature Whooping Crane
Part One: Carving and Texturing
You can carve it life-size, but this requires a lot less wood.
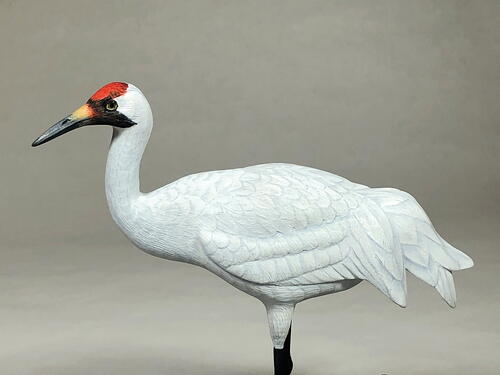
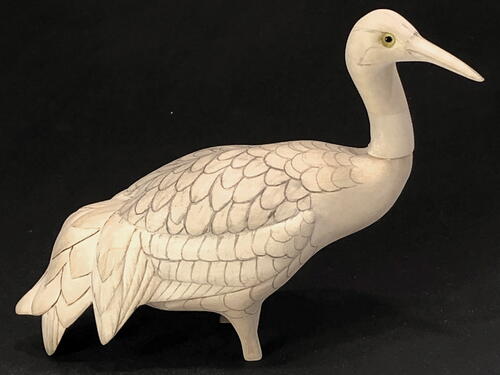
Standing at about five feet tall, the whooping crane (Grus americana) is North America’s tallest bird species. It is also one of the rarest. In 1942 there were only 21 wild and 2 captive whooping cranes left in the world. Attempts to restore the birds to a sustainable population have involved innovative measures. Cranes hatched in captivity are cared for by people in crane costumes to prevent human bonding. Others have conducted experiments to condition young cranes to follow ultralight aircraft as guides for migration. In spite of these and other efforts over the past 80 years, today’s world population is only around 800 birds and the whooping crane remains an endangered species.
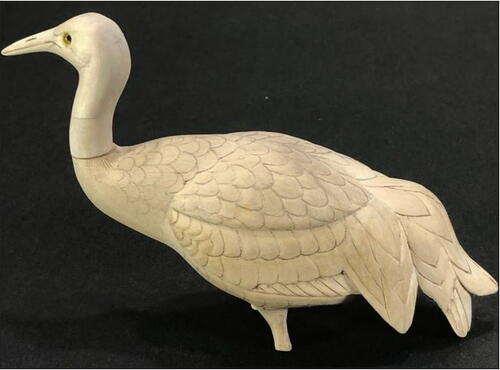
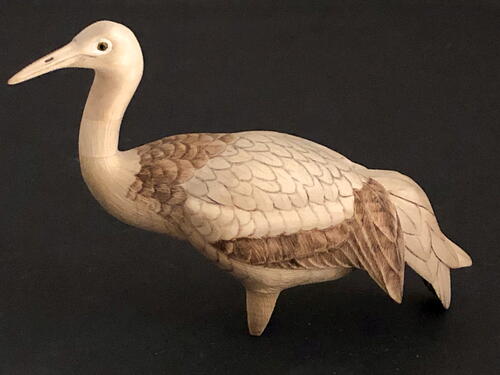
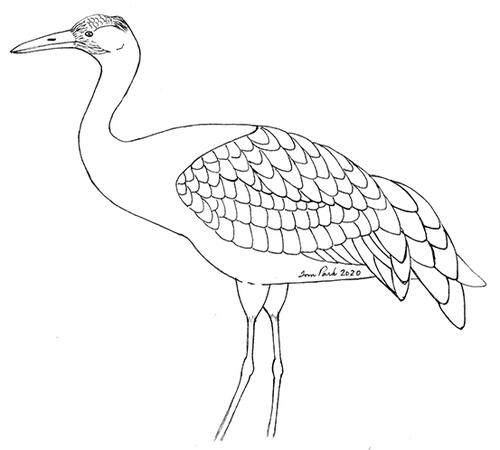
I am a firm believer that the more you know about a species the less likely you are to make mistakes in your carving. Most of us will never get the chance to observe a live whooping crane but fortunately there is plenty of photo and video reference available. A good starting point is the Spring 2013 issue of Wildfowl Carving Magazine. Rick Burkman’s informative reference article will get you started on learning about this rare and gorgeous bird. Jean Minaudier’s pattern and color guide in the same issue will be a huge help, too. Two notable features of the whooping crane should get special attention as you carve. The first is the head, the only area in this carving apart from the legs that is not completely white. Outstanding features are the long bill, yellow eye, black moustache, and the nearly featherless red area on the crown. The other outstanding feature is the “bustle,” that combination of tertial and tail feathers that always seems to be in disarray but adds to the crane’s striking appearance. This carving will be a miniature, approximately six inches long. The pose is simple with the head slightly turned. It will be standing in water so there will be no need to make feet. I developed the pattern by studying the numerous pictures available on the Internet. I selected several photos that had good profile views. I also chose some that had close-ups of the head. The final pattern was a conglomerate of various photos and it features the bird in a simple standing position with feet in water.
Instructions
-
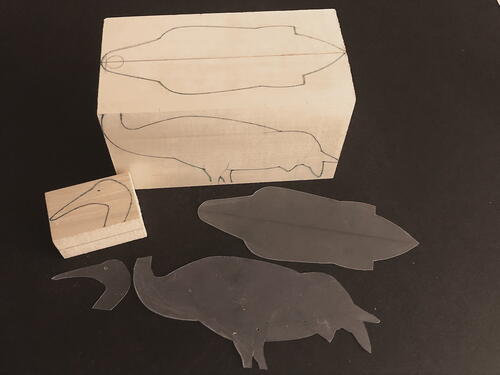
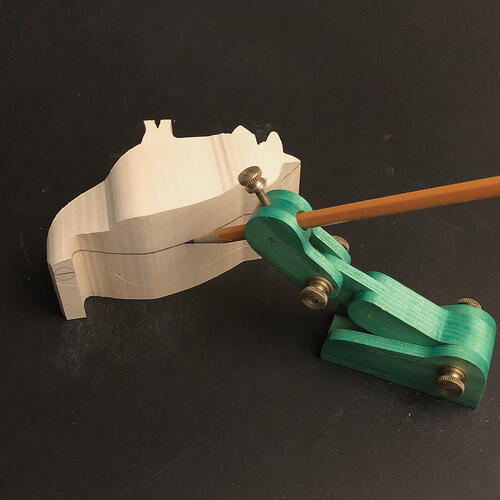
I first cut the top and side profiles of the pattern from template plastic and use them to transfer the pattern to a basswood block approximately 51/2" x 3" x 3". I will cut the head separately from the body. That will make it easier to give the head a slight turn. It also allows me to align the bill perfectly with the grain.
-
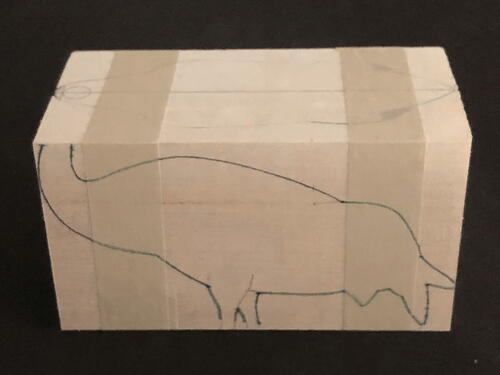
It is important that the band saw blade is exactly 90 degrees to the table surface so I always check this before cutting a blank. Once that’s established, I make sure the block is square on all sides. Then I align the two templates on the block and cut around the top profile.
-
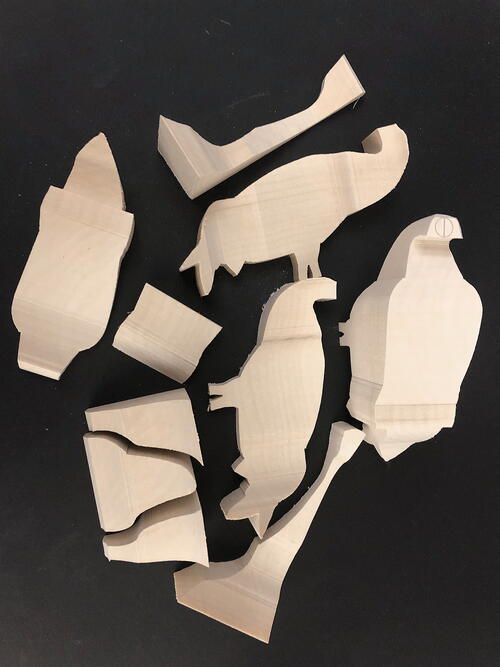
After cutting the top profile, I place the three parts back together, carefully align them, and tape them back together with masking tape at both ends of the block.
-
Now I cut the side profile. I keep all of the off-cuts for now.
-
I place the blank back on one of the side off-cuts and draw a centerline using my center-marking tool. If you don’t have a center-marking tool you should consider making one. You can find the pattern in the Fall 2010 issue of Wildfowl Carving Magazine or on my website at https://tpark193.wixsite.com/mysite.
-
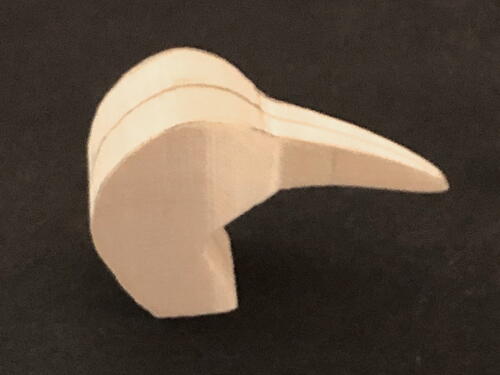
For the head/neck portion I cut the side profile first. I then place the head back on the bottom off-cut and roughly cut the top view on the band saw. I cut the top view a bit outside the lines, leaving everything slightly oversize. This will allow minor adjustments, especially in the bill and neck areas. Note: This operation puts your hands close to the band saw blade as the part is very small. Anyone who is not experienced and comfortable with the band saw should consider doing this by hand (knife or coping saw).
-
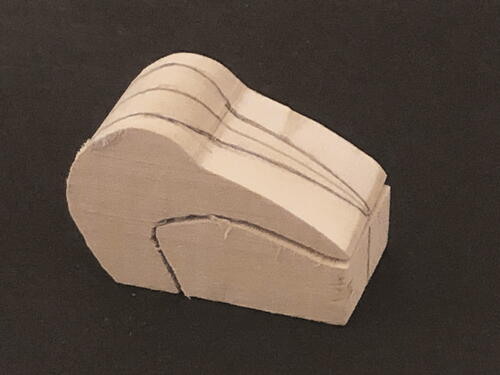
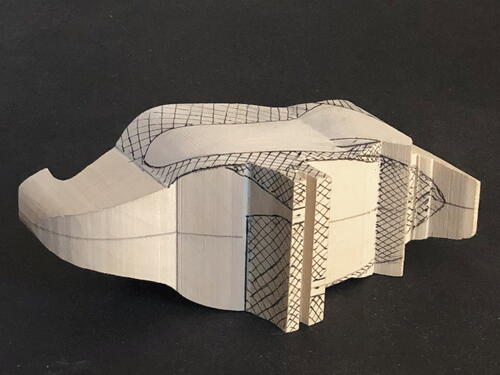
Using the pattern as a guide, I draw the major feather groups (but not individual feathers) on the blank. I will carve away some of these lines before they are used but it’s useful to have them there so I know where I’m heading.
-
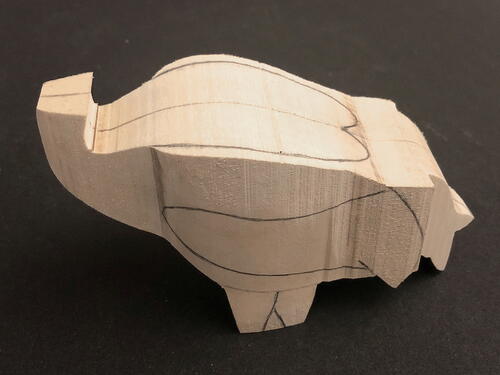
The cross-hatched areas indicate where to start the carving. I remove these areas using the “square carving” method. In each area I carve straight down along the top lines and straight in along the side lines. When the two cuts meet, they should form a 90-degree angle. After removing all these cross-hatched areas, you should have a square bird.
-
The cross-hatched areas have all been removed. A careful check shows that the cuts all meet at 90-degree angles so I can be confident that the final carving will be very close to the pattern. We can now start rounding.
-
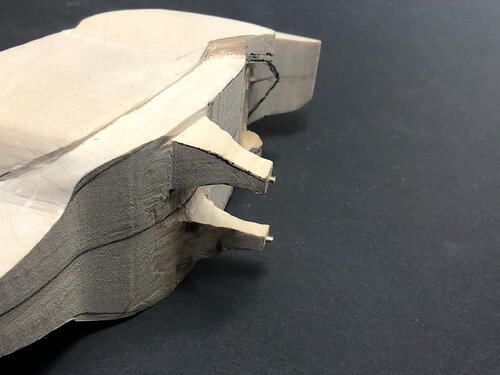
One weak area on the blank is the upper legs (“drumstick”) area where cross-grain leaves it susceptible to breakage. To add temporary strength, I drill holes for the legs and then insert pins into each hole. I cut the pins (brass rod) short enough that they won’t interfere with the carving but long enough so I can remove them with pliers before I insert the real legs. These pins will add strength and prevent cracking while I work in this area.
-
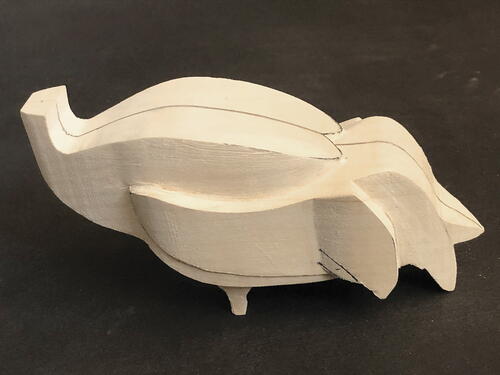
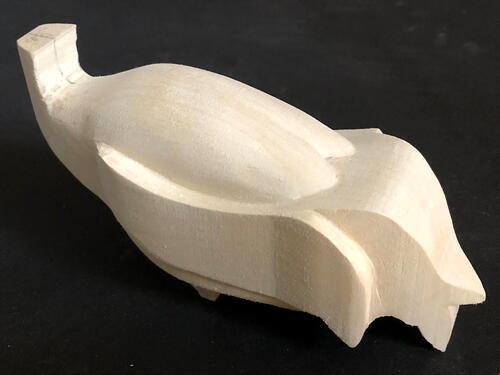
It doesn’t really matter where you start rounding the bird. I start on the back. I round between the top centerline down to the area where the top of the wing feathers will tuck under the feathers of the back.
-
Next, I round over the wings and tail feathers.
-
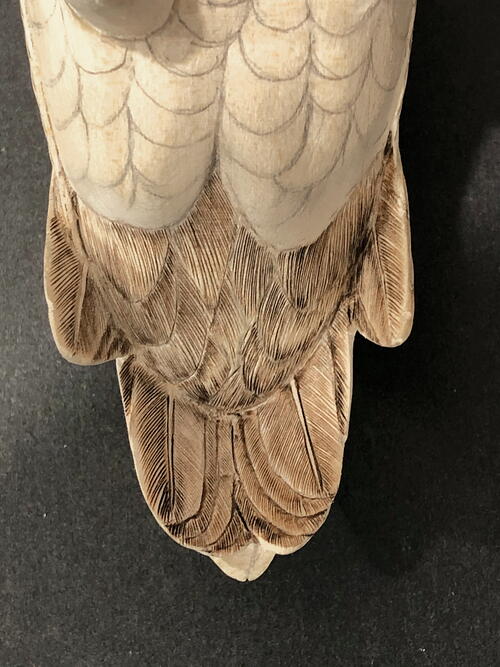
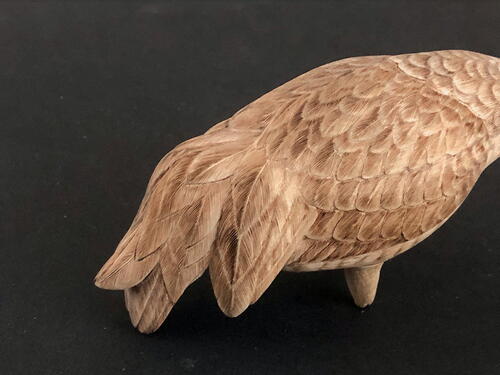
On the underside of the body, I round from the bottom of the wings to the bottom centerline. Pay special attention to the area around the tail. A lot of material has to be removed to form the under-tail coverts and to make the tail feathers stand out from the body. I leave the drooping feathers a bit thick for now and will remove additional wood when I carve the individual feathers.
-
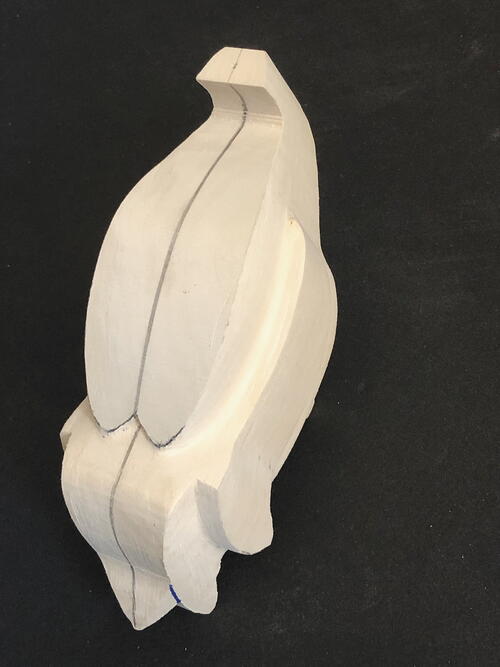
The underside of the crane is ready for a bit of landscaping. I sketch in the lines and then go around them with a small diamond ball.
-
Next, I round the grooves back in all directions until the underside is ready for the layout of individual feathers.
-
The head has been temporarily attached with a wire pin but no glue. I prefer to keep the head separate for ease of working while setting the eyes and carving the detail. The wire pin generally holds the head firmly enough to allow power carving the neck area. If not, you can use a small spot of hot melt glue to hold it temporarily.
-
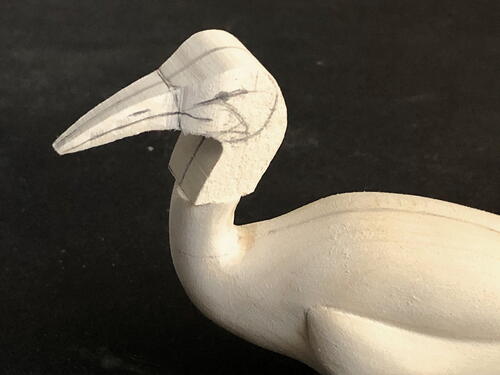
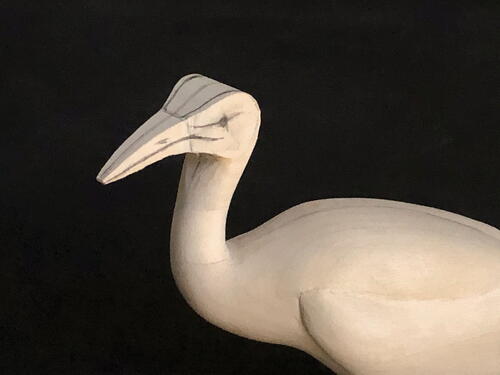
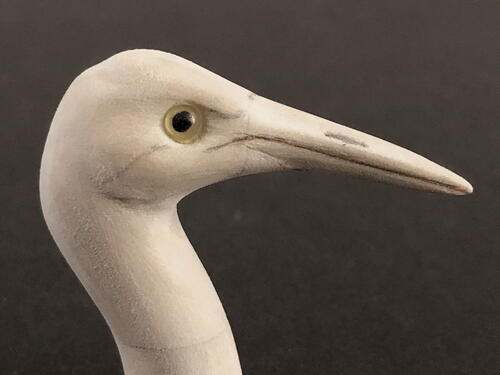
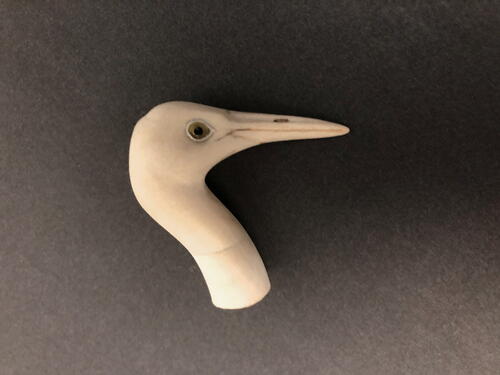
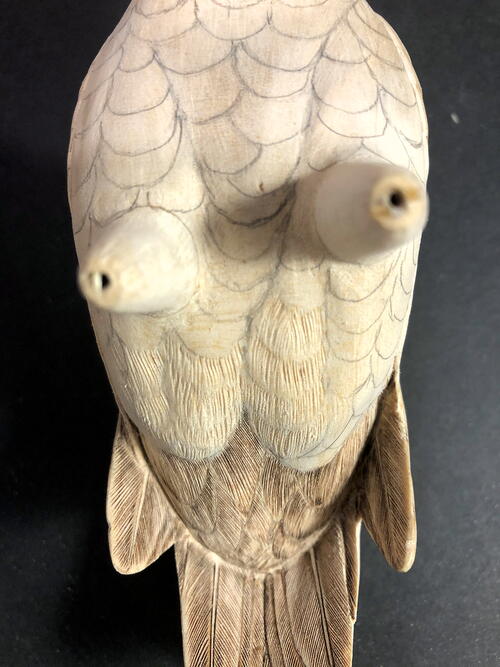
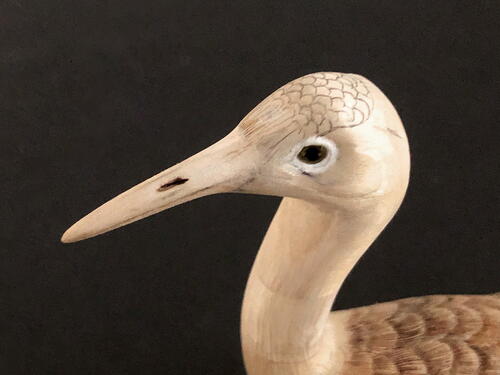
After I blend the neck portions together, I begin detailing the head. I’ve established the eye position and drawn lines to show the mandible separation line and the width of the top of the head above the eyes. For the head and bill detail it is important to have good reference. Use it to establish bill shape (top and side), nostril placement, mandible separa - tion, and the red featherless (or almost featherless) patch on the head. This patch extends from the cheeks toward the bill, in front of the eye, and over the top of the head.
-
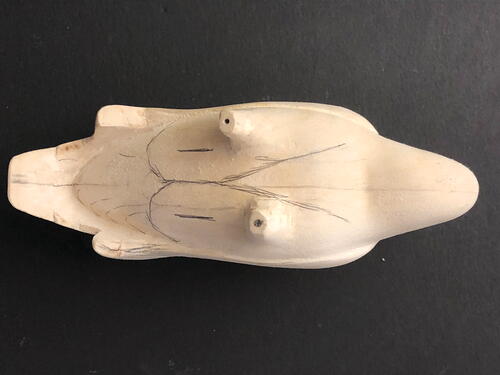
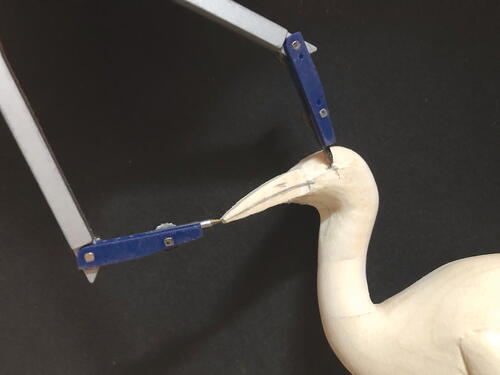
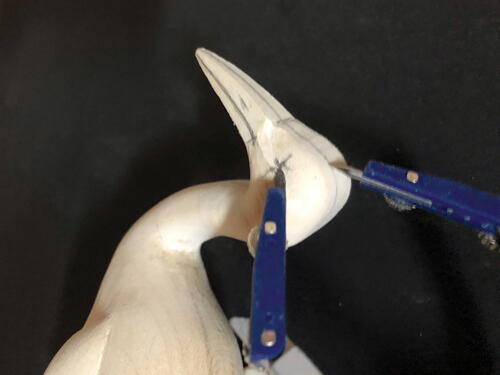
Here is how I position the eyes. Referring to the pattern, I transfer the position of one eye onto the blank with a compass or caliper. Then I use a special compass with articulating arms to transfer the position to the other side of the head. I take a measure - ment from the center of the bill tip to the center of the eye and transfer that measurement to the other side of the head.
-
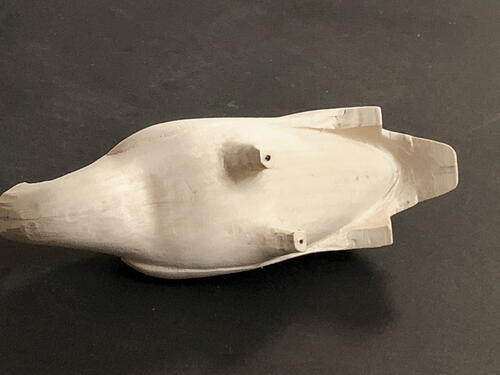
Then I measure down from the top centerline to the center of the eye and transfer that measurement to the other side of the head. The spot where the two lines cross will mark the center of the other eye. I drill holes for 3 mm eyes, leaving a little extra room for proper eye adjustment. While refining the shape of the head I modify the shape of the eye sockets and constantly dry fit the eyes. Once I’m satisfied with the head shape and eye placement, I will set the eyes permanently.
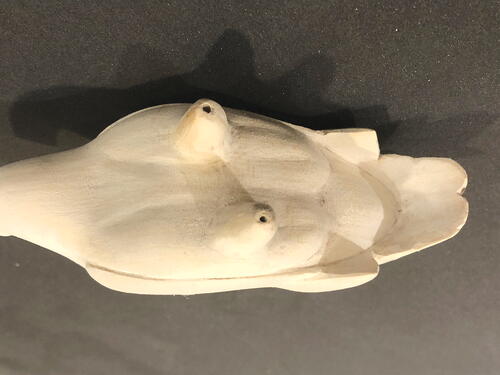
-
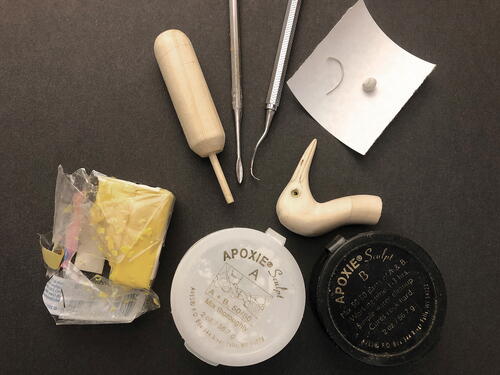
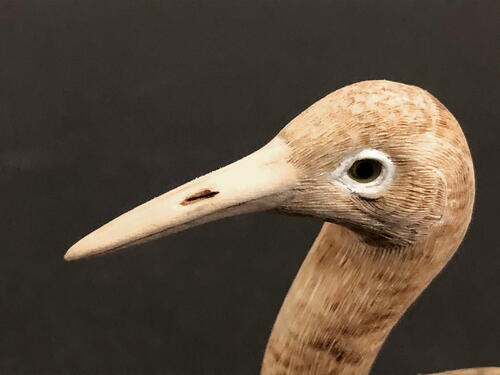
I use yellow Super Sculpey clay to set the eyes. I place a small ball of the clay in each eye socket then press the eyes in with a small eye-setting tool. I use a toothpick to clean up any clay that squeezes out and continue to adjust each eye until I get the look I want.
-
I want the eyes to be straight up and down or tilted slightly inward at the bottom. I also want them to be tilted toward the tip of the bill.
-
Once I’m satisfied that the eyes are correctly positioned and balanced, I form the eye ring with 2-part epoxy putty. Now I permanently attach the head and smooth out the neck joint. I use 2-part epoxy to join the two parts. After the epoxy sets up, I do some cleaning up and some light sanding to create a near invisible joint.
-
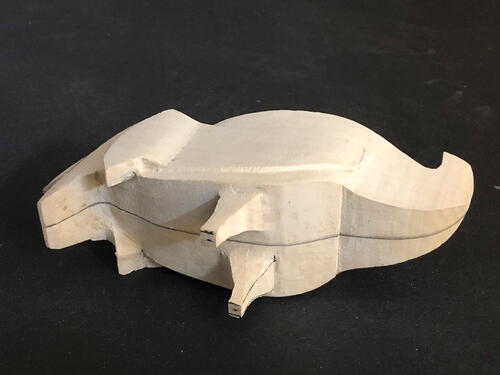
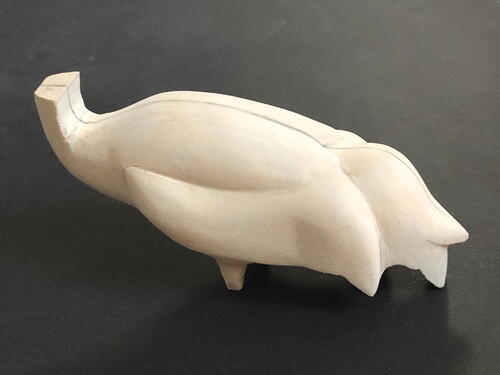
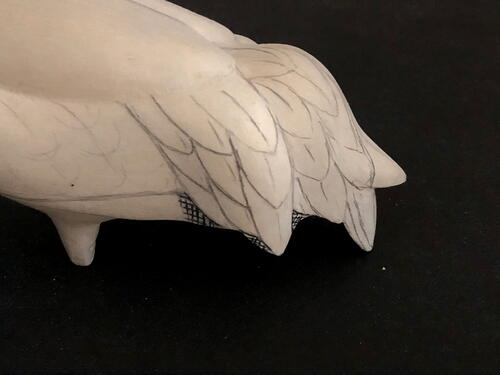
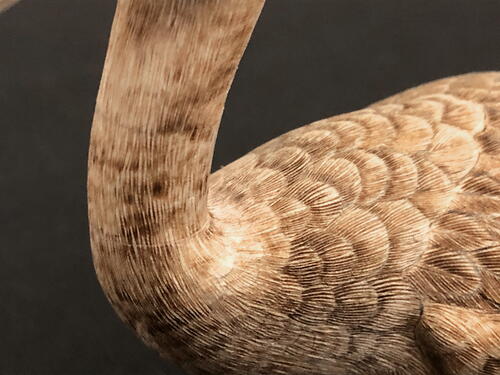
With the basic shaping of the crane more or less completed it’s time to turn to feather detailing. After sketching in some feather layout I remove a bit more material below the “bustle” to make all the feathers fit.
-
Then I carve in the feather detail. These feathers are ready for burning.
-
I have sketched individual feathers on the cape, back, and wings. Except for the bustle, individual feathers don’t stand out and the crane appears very smooth. In fact, it is very difficult to discern feather patterns even on the best photos. With white birds like this crane and the egret, it helps to search for images of the juveniles, where color differences better define the individual feathers and feather groups.
-
I will do minimal shaping of individual feathers as shown here.
-
I use a medium woodburning skew turned on its side to layer the feathers on the lower wing.
-
The underside of the flight feathers (tail, tertials, etc.) will be burned while the remainder will be stoned. I have not carved any individual feathers on the areas forward of the under-tail coverts. This part of the bird is very smooth. I will rely on stoning to delineate individual feathers.
-
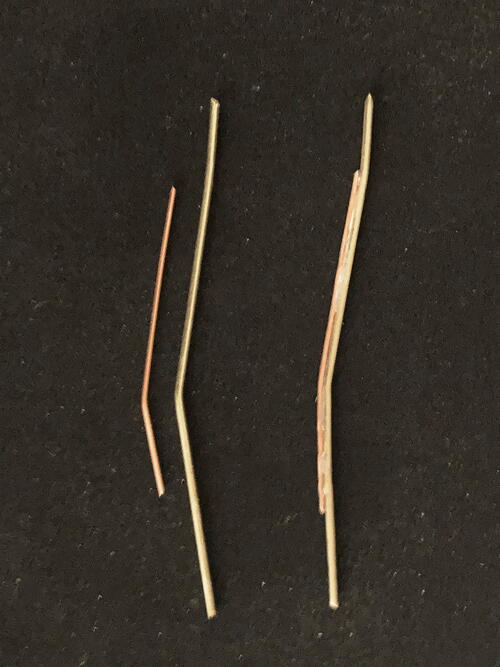
Before starting any burning or stoning I fit the legs. They are brass rod later filled out with 2-part epoxy. Because the crane will be standing in water there will be no need to make feet. I use 1/8" brass rod and 20-gauge copper wire. The copper wire helps form the tendon up the back of each leg and adds strength.
-
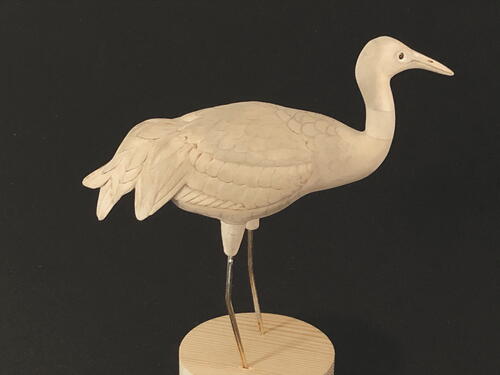
Before soldering the two pieces together, I insert the brass portion of the legs into the bird, place it on a temporary base, and adjust the angles to get a natural look. After I solder the two parts together, I again insert the legs and do any fine-tuning.
-
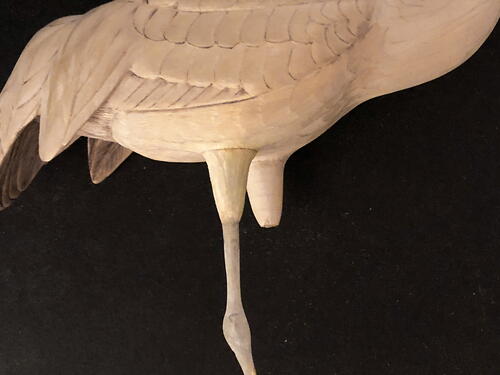
The crane leg is quite slender so I will add a minimum amount of 2-part epoxy—mostly to smooth out the joints where the wires meet and add more bulk to the upper parts. Reference photos show that the crane’s leg is quite lumpy at the “ankle” and there is scaling on the tarsus. I use a small triangle file to add the scales on the front. On the upper part of the leg I press in some texturing with dental tools.
-
For the final fitting, I slim down and texture the “drumstick” area. A bit more epoxy putty ensures a smooth and realistic joint. I will remove the legs and set them aside until I finish the rest of the texturing and burning.
-
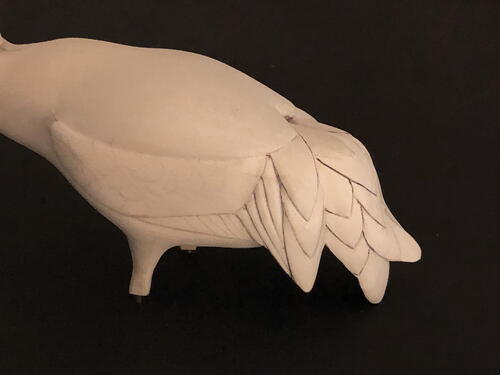
With the feather layout complete on the underside, I start burning the individual feathers. I will mostly stone the rest of the feathers on the underside but will do a bit of burning to soften up some.
-
With the larger showy feathers of the bustle, I first use a small diamond ball to create a few ripples before burning. Then I turn the skew on its side and burn in the shafts of the larger feathers.
-
I use a small skew to burn all the feathers of the cape, back, wings, and tail.
-
I sketch the feather detail on the head then use a small skew to burn the head detail.
-
For the neck and upper chest, I both stone and burn.
-
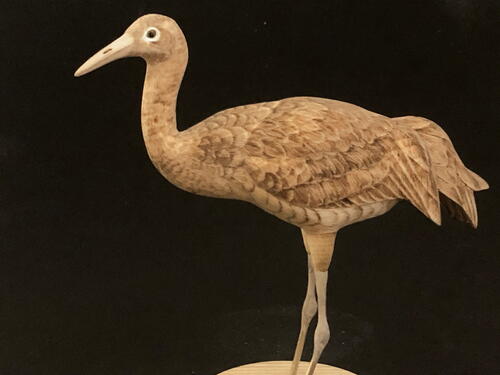
The detailing is now complete and the legs have been glued permanently in place with 2-part epoxy.
-
After receiving a coat of gesso, the crane is ready for paint and habitat. I will cover both of these subjects in the next article.


PATTERN
-
Whooping Crane (Miniature)
By Tom Park © 2020
Tom Park began woodcarving when he retired in 1997 after 38 years as a teacher and principal. He is a past chair of the board of the Prairie Canada Carvers Association. He frequently offers courses in carving songbirds, shorebirds, and raptors and does multiday workshops in habitat design and construction. You can contact Tom at tpark@mymts.net and visit his website at https://tpark193.wixsite.com/mysite.

Read NextMaking Feet

