
Black Duck from the Jersey Shore, Part One
Time to get the lead out as you create this contemporary antique.
Scientists estimate that 70% of the black ducks that migrate along the Atlantic Flyway winter in New Jersey. If you look at a coastal map of the state, you can see why. New Jersey has thousands of small tidal creeks that drain the marshes and make up what is called the salt meadows. The area provides a perfect habitat for wintering waterfowl, especially black ducks. These meadows line the eastern side of the state, while the western side has the Delaware Bay and River. With so much coastal waterfowl habitat, it’s no wonder New Jersey has a rich decoy history.
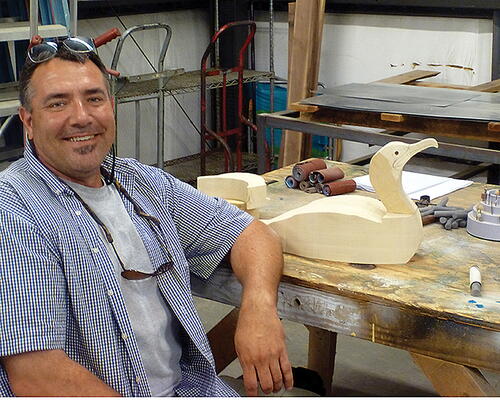
For this article, I contacted Jamie (JP) Hand, a New Jersey native and historian who has been carving traditional decoys for 48 years. I met Jamie at a carving workshop where he was teaching how to carve a traditional hollow-bodied New Jersey black duck. Jamie is from Cape May County and learned to carve from Hurley Conklin (Manahawkin, New Jersey, 1913–1993) and Harry V. Shourds II (1930–2017). He explained that two basic carving styles came out of New Jersey and that they coincide with the state’s two coastal regions: the east coast salt meadows and the west coast Delaware Bay/River. The Delaware River school decoys often have nicely carved, raised wingtips and use a flat lead pad on the bottom of the decoy for ballast. I’ll save this style for a later date. This article will cover a well-known decoy pattern that originated in the east coast and is often called the Barnegat Bay school. Because this covers a much larger area than just Barnegat Bay, many refer to the style simply as the Jersey Shore school.
I didn’t think I would be revisiting the black duck so soon, but after I learned that a great uncle of mine had been a well-known decoy carver from Northfield, New Jersey, I wanted to dig deeper into the history with a 100-year-old puddle duck pattern. My curiosity was sparked by an old black duck I managed to get from George Strunk that had been carved by Joseph Eugene (Gene) Hendrickson (1899–1971). It was in rough but original shape. Once I got my hands on the decoy, I found the body shape was a good bit different than the Jersey Shore school black duck decoys we carved in Jamie’s class. It had a steep hump on its back and the bottom ballast weight was cut into the bottom of the old block.
-
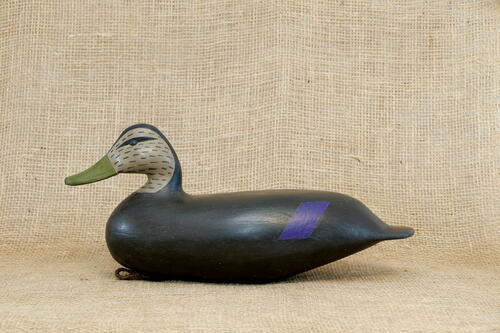
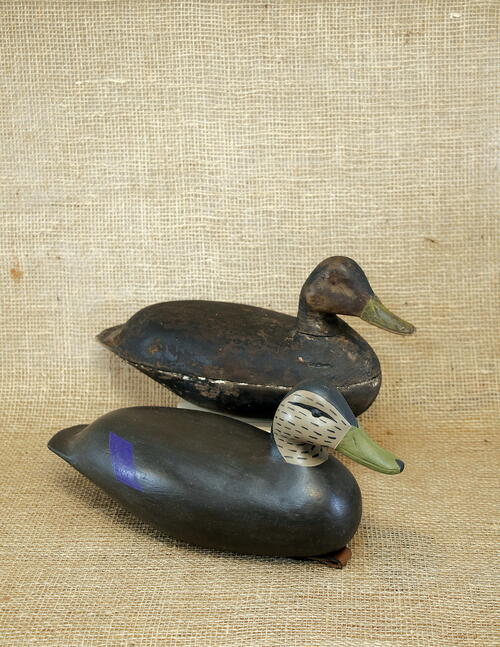
Gene Hendrickson’s original decoy is at the top. My carving replicates his style, but I took some liberties with the painting.
-
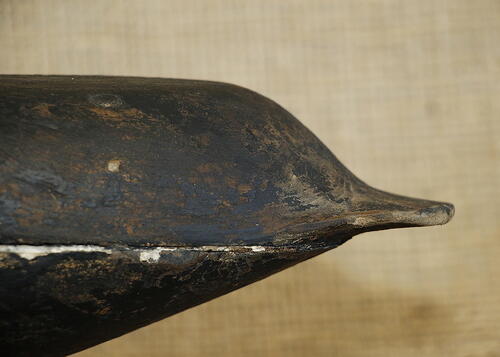
One of the early decoy characteristics shared by H.V. Shourds, Mark Kears, and Gene Hendrickson was the humped, deep-drop tail.
-
My initial research on the old block showed that Gene carved close to the same pattern as his neighbor and close friend, Mark Kears (1888–1972). The elder Kears’ carving was influenced by other nearby carvers: Harry V. Shourds and Mark English. Shourds (and later his son and grandson) carved many black ducks that showed the same tall, humped style called a deep-drop tail, so most likely the pattern was a family pattern. Decoy makers back then often shared patterns, so it would not be unusual for Kears to pass his pattern along to Hendrickson. Even though the carvers used the same pattern, we can identify their work because they had unique carving styles.
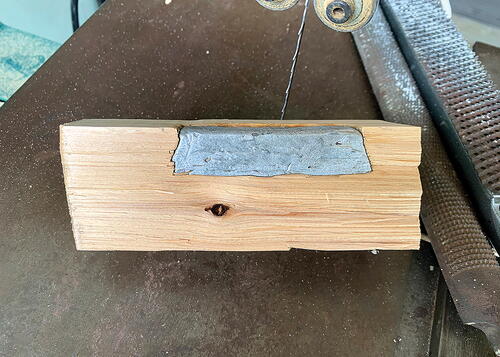
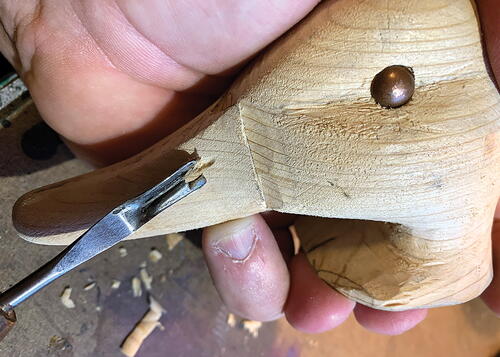
endrickson began carving around 1914 and hunted the narrow creeks in the marsh meadows, so his decoys during this period were relatively small. The rumps were tall and the heads were full with fairly fat cheeks. The bill margins, where the bill meets the head, were carved in and well defined, as were the bill and nostril carvings. As time passed, the deep-drop tail pattern became less pronounced and the overall size grew a bit as the demand for larger decoys grew. Gene also moved from hunting the small creeks to the larger bays, where a larger decoy drew more birds. One of the most notable characteristics of the Barnegat/Jersey Shore school is the carved inlet for the ballast weight. The maker would use a 3 /4" flat wood chisel to cut in a rectangular inlet about 3 inches long into the bottom of the hollowed decoy and then fill the inlet with molten lead. According to Harry V. Shourds II (the grandson), black ducks need around five ounces of lead to make them self-right and ride correctly. Jamie Hand told me the more skilled carvers would undercut the ends of the inlet much like a dovetail to prevent the lead from working loose over time. Some carvers, like Hurley Conklin, used a round wood bit to bore in the ends of the inlet and then finished out the depth and length with the chisel. To contain the lead, they would hammer in two nails set at angles and leave the heads exposed in the inlet. Once the lead was poured in, it would set with the nails inside, preventing the lead from loosening up. Hendrickson used the dovetail method on his decoys -
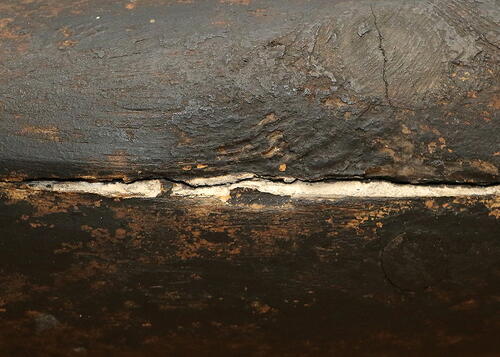
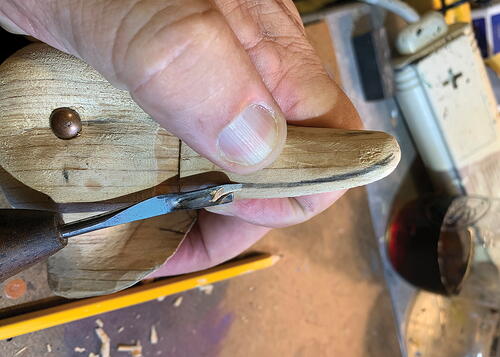
Examining the seam on the old decoy, we can see the cotton and lead white caulk that was used to seal these old blocks.
-
Most of these decoys were carved from Jersey white cedar and hollowed. Cedar was harvested in the winter while the sap was down. According to historian Jimmy Allen (Decoy Heritage), this prevented the sap from seeping out later and ruining the paint. Hendrickson, like many carvers of this period and region, was a boat builder, making sneak boxes and later PT boats during WWII. Carvers used the same caulking methods to fill the seams of their decoys as they did to fill between the planks on their boats. Once they hollowed the two halves of a decoy, they fastened them together with either wooden dowels or small nails. Then they took soft cotton cordage saturated with thick lead white paint and pressed it between the halves with a special tool. Some carvers inserted the nails only from the top half, keeping the nail holes above the waterline. Others alternated the nails on the top and bottom around the decoy and filled the holes with some of the lead white caulk. Incredibly, the old Hendrickson black duck I have still shows the cotton and lead caulk along its seam. Thankfully, the excellent waterproof glues and epoxies of today mean we no longer have to deal with the toxic lead.
-
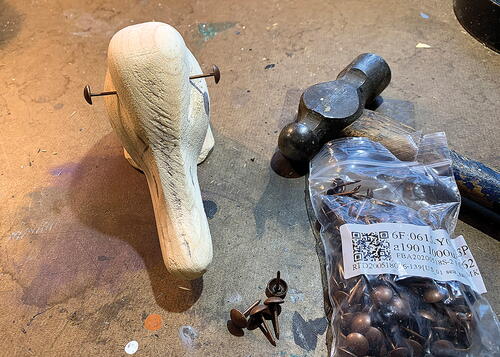
Gene Hendrickson did a good bit of carving on his heads, including nostrils and some other work on the bills. He used small metal upholstery tacks for eyes. Finish nails secured the heads and longer nails or screws ran through the head to strengthen the neck.
-
Carvers of the Jersey Shore school used several different methods to attach their decoy heads. Some ran a large nail or long screw from the top of the head and used several small finish nails around the neckline, using the lead caulk to fill the large nail hole in the top.
Other carvers ran a wooden dowel down through the top of the head or up from the base of the neck and then secured the head with several smaller nails around the neck. Some carvers frowned on this method because they believed the wooden dowel would absorb water and swell, causing the head to split later. The head was never glued on because at some point it would inevitably crack and break and need replacing. Without x-raying my decoy, I can’t tell how Gene attached the head. The best I can tell is that he used four small finish nails to attach it and possibly two long hand-cut nails running in from high on the back of the neck. He may have used a screw up through the bottom of the neck, however, as the neck is not cracked except for some small checks at the nail sites. -
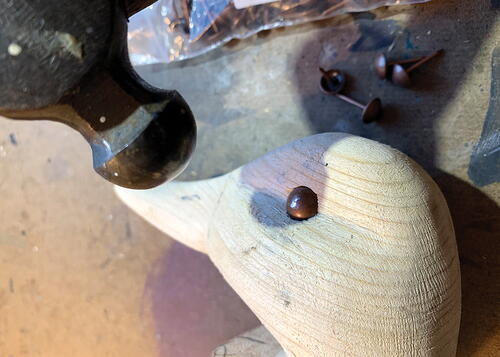
I split open one of the test pours to show how the dovetail will hold the poured lead in place.
-
I patterned the decoy for this demonstration from my Gene Hendrickson decoy. The measurements are fairly accurate, but some of my construction techniques will use modern materials like epoxy glues. I was able to find 9 mm upholstery tacks for the eyes on eBay. I did a bit of research to determine just how deeply to carve the inlet to hold five ounces of lead for the ballast weight. An inlet 3 /4" wide, 3" long, and 3 /4" deep held 11 ounces of lead. At 1 /2" deep, the weight dropped down to eight ounces. At 3 /8" thick, the weight was a little less than seven ounces. The winning thickness was 1 /4" thick, which gave me five ounces on the nose. I’m sure there is a bit of variation depending on how deep the undercut dovetails are. For this project, I started out using dry white cedar that was three feet long, two inches thick, and six inches wide. This included the head material. It’s hard to find clean cedar where I live in North Carolina, so a few knots became issues as I worked. In the demonstration I will show you how to deal with them. Two 14" long pieces of the cedar stock are needed for the body, and the remaining piece can be used to make a few heads. I usually make several heads and use the best for the decoy. Let’s get started on the head.
-
Keith Hendrickson is a freelance writer/artist/photographer who also works for the North Carolina Wildlife Resources Commission. He has been carving rough working decoys for around 30 years and won best of show at the Ward Museum’s Chesapeake Challenge.

Black Duck Carving
-
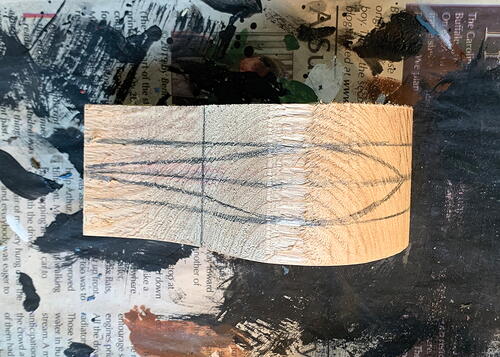
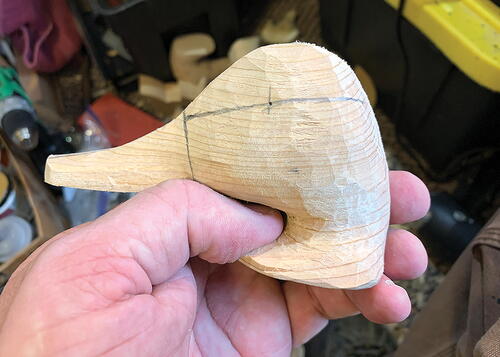
Lay out your head pattern on wood that is 2" thick. Make sure you run the grain straight down the bill.
-
I use a pencil to run a line down the middle of the head cutout (1"). Then I divide those two halves into quarters, giving me four sections of 1/2" each. You can then trace in a top pattern like this to use as carving guides. The bill will be an inch wide.
-
I pencil in the high spot for the cheek. I use the pencil as my measuring tool and my finger as a stop, and then transfer this measurement to the other side.
-
Most of the time I carve in the width of my bills because I like to use the knife. To save a bit of time, I use the band saw to cut each side of the bill up to the bill margin you can see on the head pattern.
-
Using my knife, I begin rounding up the cheek where it runs into the bill on the underside of the chin. After I get it rounded into the bill and get the rest of the bill width carved, I’ll repeat on the other side.
-
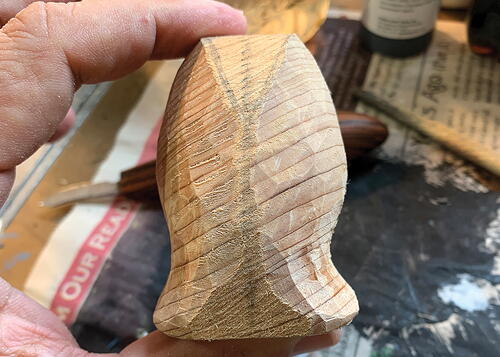
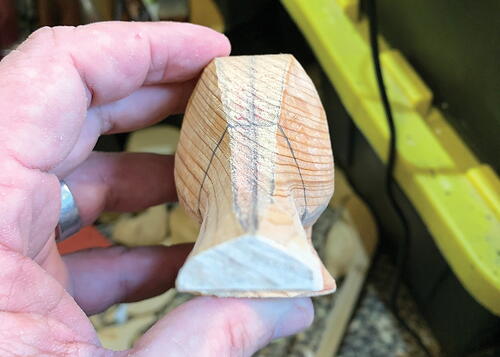
On the crown, I round and remove excess wood on both sides. I round down from the crown to the high spot on the cheek.
-
Moving from the crown toward the bill, I remove the excess, working from the high point on the cheek into the bill.
-
Work on both sides to keep things symmetrical and remove the excess straight into the bill.
-
Round out the back of the neck, working from the high point of the cheek to the center of the back of the neck and head. Work on both sides to insure symmetry. The wood here will carve easiest if you work from the midpoint toward the back.
-
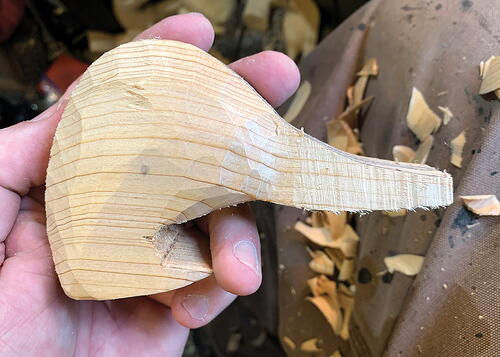
Work both sides up until the head looks close to this. Working on both sides a little at a time will help to keep the head symmetrical.
-
Begin carving out between the cheek and the base of the neck. You don’t have to go too far here as you will finish the area after you’ve glued the head to the body.
-
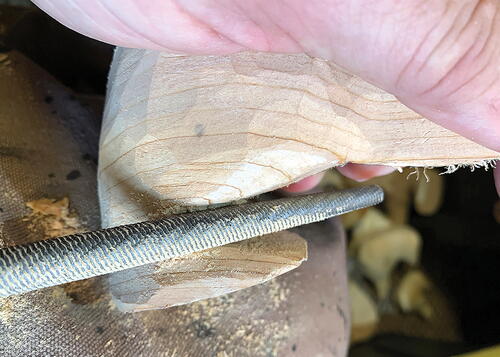
A coarse round file or rasp makes getting into tight areas much easier. Here I use one to round things up around the throat area of the head.
-
Look at the head from the front, top, and back to make it symmetrical. Here you can see the neck isn’t carved as deeply on one side, but that is okay for now since I will be carving the neck into the body a bit later.
-
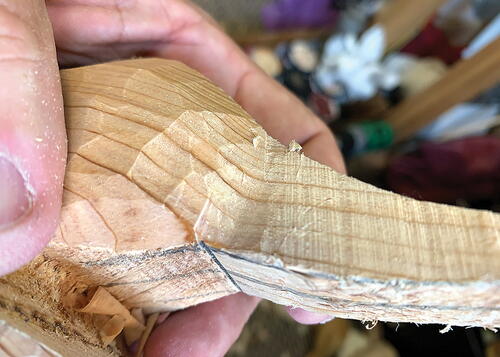
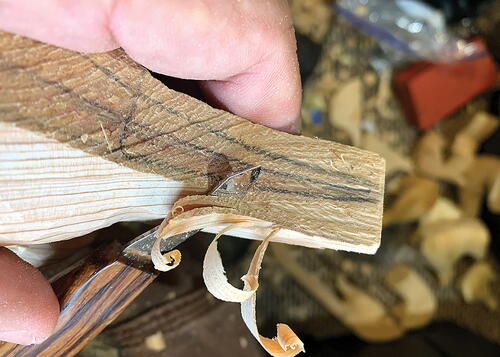
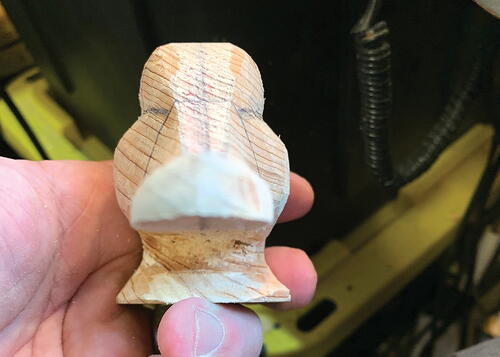
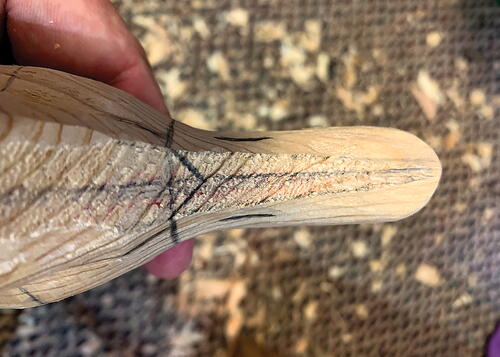
I begin removing wood from the back of the bill to the front and from the top guideline down to the lower edge. Remove wood slowly as this area likes to split.
-
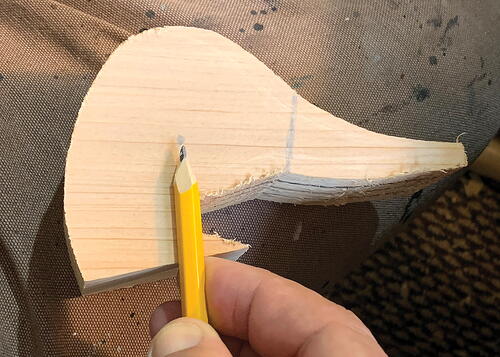
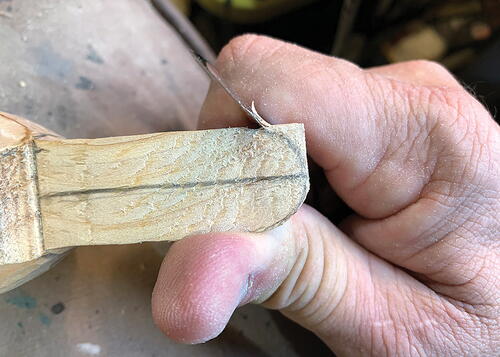
I usually leave this thickness on the end of the bill. At this point, I also draw in the bill margin where the bill meets the head. Gene Hendrickson made his margins as straight as possible. Here you can see those lines are rounded.
-
To flatten the margin line, I remove some of the fullness here. I redraw the line and look from the end of the bill, repeating the process until I like the curve.
-
This looks about right.
-
I draw in the rounded end of the bill. Carefully removing wood from both the top and bottom, I work on one side and then the other.
-
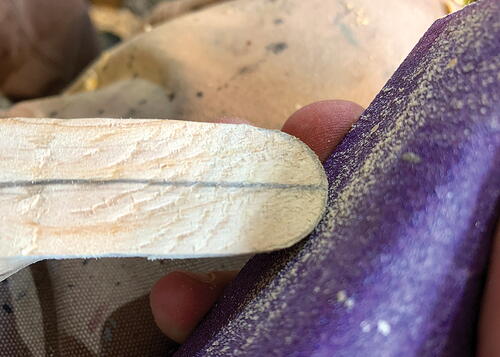
Once the curves are about the same, put the knife down and finish rounding with the sanding block. It is hard to remove too much wood accidentally with sandpaper.
-
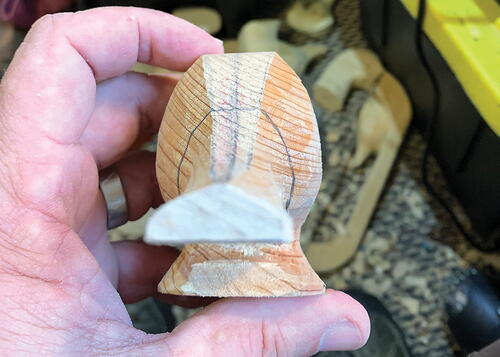
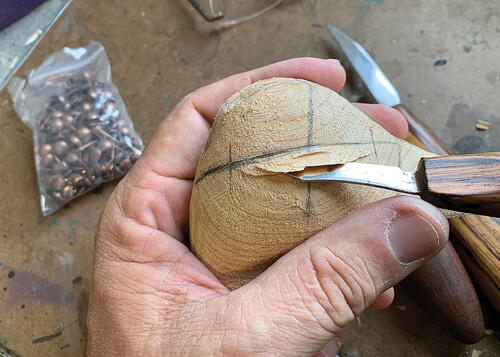
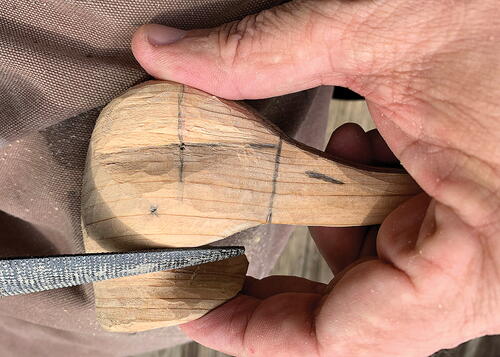
Moving to the eyes, I use the measurements on the pattern and transfer them to the carving. Some Jersey Shore carvers simply carved out a flattened eye channel but I prefer a V-shape.
-
I draw in a guideline from the top of the bill that passes through the eye point and on to the back of the head. Draw in the other side, too, and then look from the front and back to insure symmetry.
-
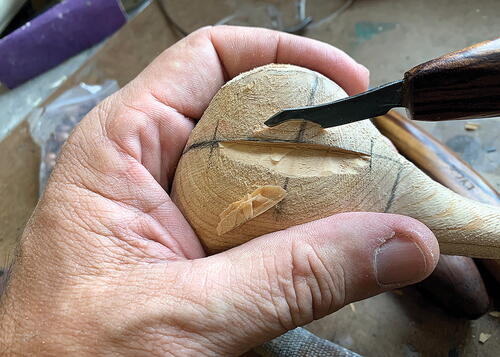
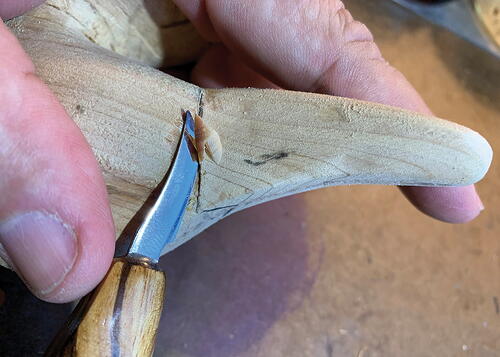
With my knife I make a stop cut straight in along the line I drew about 3/8 of an inch deep on each side. I then carve up into the stop cut to form the bottom of the eye channel.
-
I finish the eye channel by carving down from the top.
-
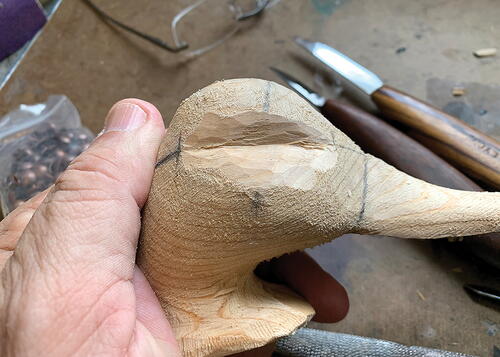
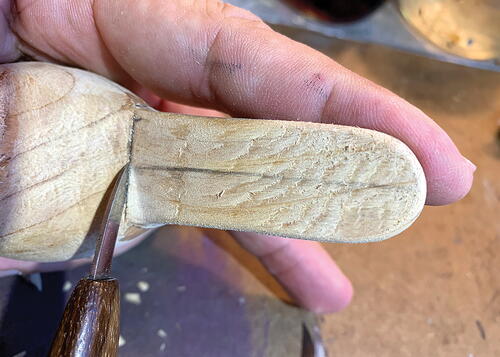
Work on both sides for symmetry. Feel into the channels with your fingers to help determine that they are carved evenly. Once you get them where they look and feel the same, sand them out to remove the knife marks. You can also rasp out the head and sand it at this point.
-
Look at the channels again from the front and back to insure they look the same. Once you tack in the eyes it is hard to make corrections.
-
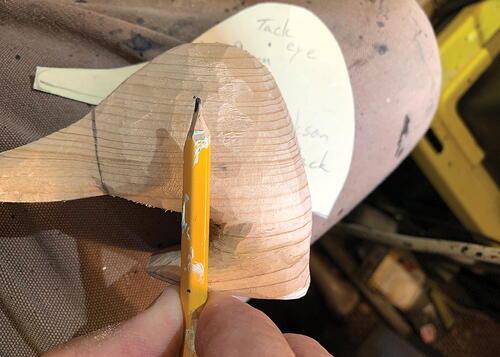
Using the pattern for measurements, locate the eye placement. I measure up from the base of the neck and end of the bill.
-
I press the tack eyes into place but don’t set them. When they stick out, I can look from the top and front to make sure they are set evenly
-
Once both eye locations are good, I drive the eyes all the way in. I set them so they rest flat at the base of the eye channel.
-
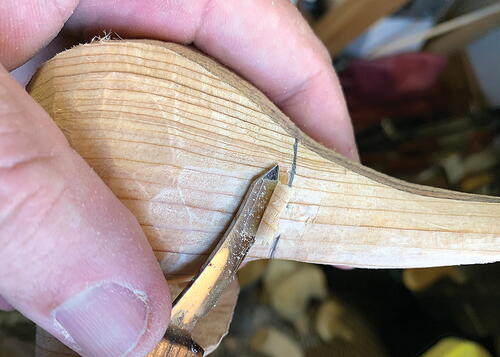
Turning now to the bill details, I draw in where the nostrils, the V-notch, and lower bill groove will be. Check from the front and top to get them symmetrical before you carve them in.
-
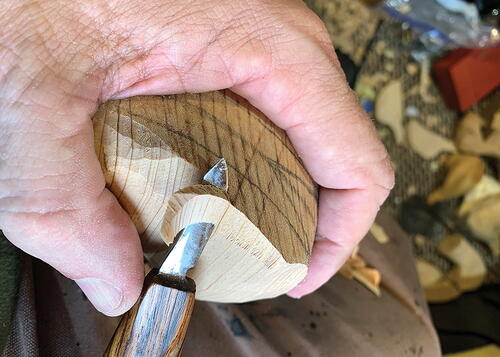
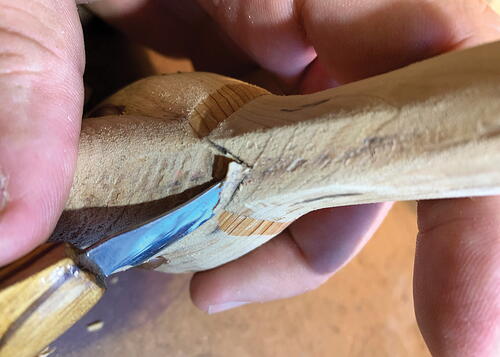
Using a small detail knife, I first cut straight down in along my lines. I then carve into those cuts from the cheek into the bill.
-
For the V-notch, I press and cut hard into the point of the V but not so deeply at the top corner of the bill. This will taper the cut toward the top of the bill. I then cut into that cut and chip out the wood.
-
On the underside of the bill, I make a stop cut straight down into the margin line. I then cut into that cut from the underside of the head toward the bill, chipping out the wood.
-
I cut out the nostril using a small V-gouge. You can also do this with a detail knife or even by stoning it with small stoning tools/Dremel/micro-motor.
-
Finish the head by cutting in the detail along the bill’s bottom edge. If you haven’t sanded the head, do it now. The neck doesn’t need to be sanded, as we still have some carving to do once it is attached to the body.
-
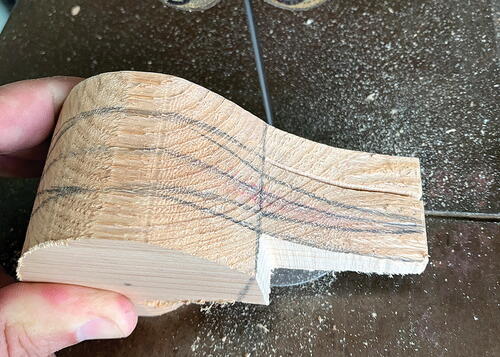
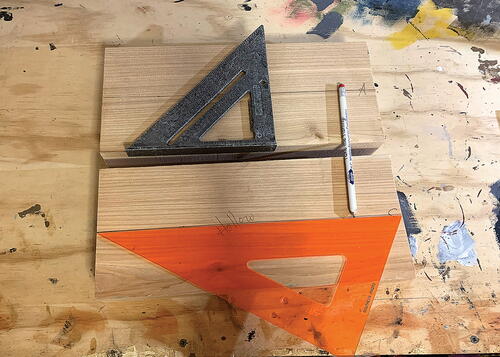
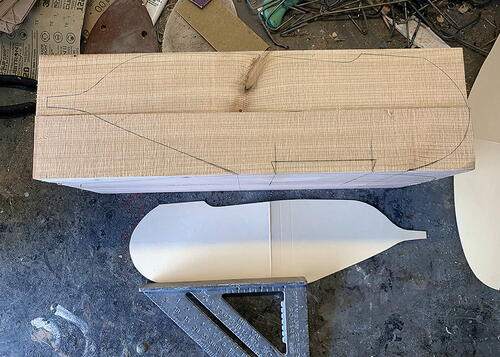
Cut two pieces of the 2" x 6" stock to a length of 14 inches. Then draw a centerline down the length of the top and bottom of each piece.
-
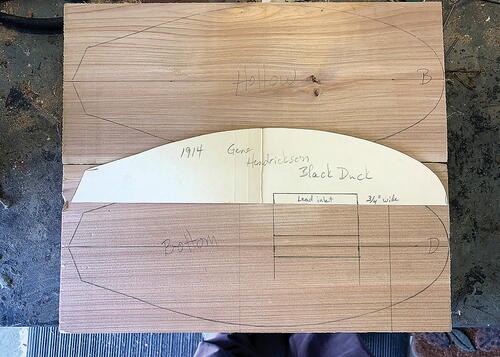
Take the top view of the pattern and trace it onto the top and bottom of each piece. I am going to use the hollowing technique I used in the article I did on Joey Eubank’s Core Sound redhead (Winter 2019) to hollow this decoy, so the pattern needs to be on the top and bottom of each piece. Mark out the inlet for the lead ballast on the side you want to be the very bottom.
-
Place the two pieces together, trace the side profile on them, and again draw in the inlet location as noted on the pattern.
-
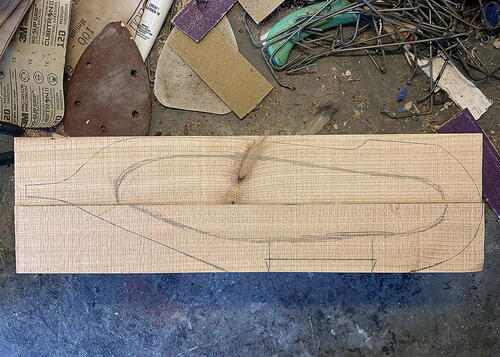
I now draw in an approximate area on the side pattern that will be a guide to how deep I can hollow out each piece of wood without making the decoy too thin in any one area.
-
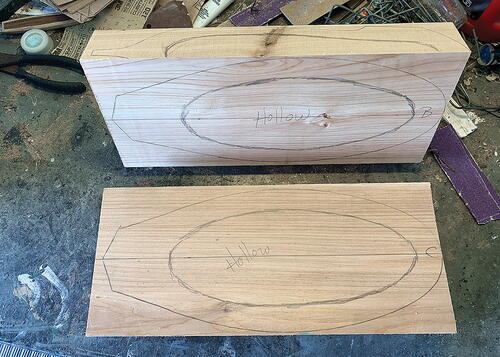
I also draw approximate hollowing guidelines on the inside of each half.
-
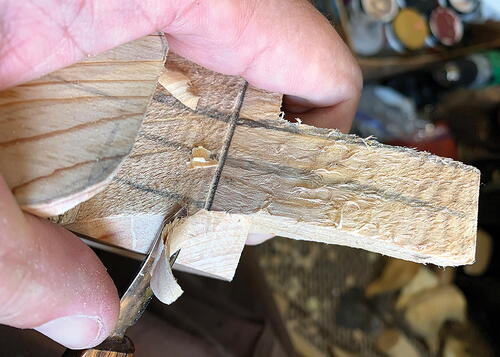
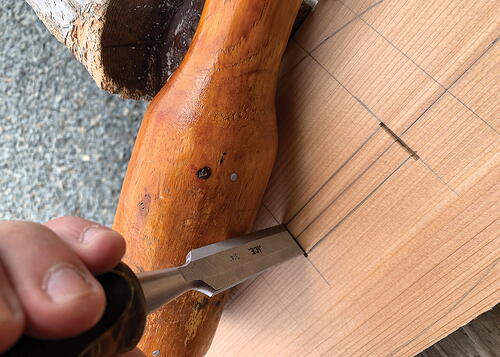
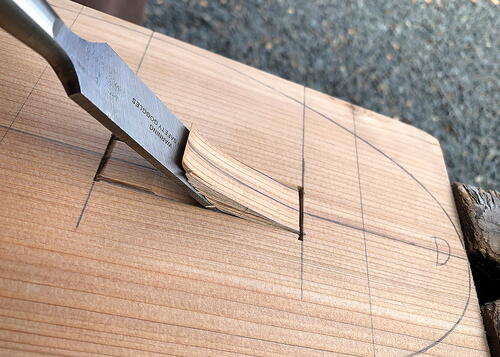
Time to cut out the inlet. Using a 3/4" flat chisel, I initiate the cuts on each end to prevent the wood from splitting down the length of the decoy. I cut in only about an eighth of an inch at a time to prevent any splitting. After the ends are cut in, I then cut in along the sides using a long thin knife or large flat chisel.
-
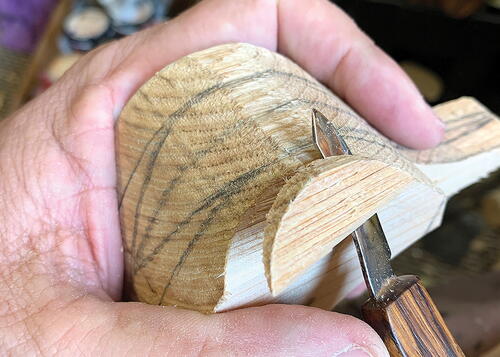
I begin to chisel out the inlet about a sixteenth to an eighth of an inch at a time. I re-cut in the ends as I work and angle those cuts to start forming the undercut dovetail on each end.
-
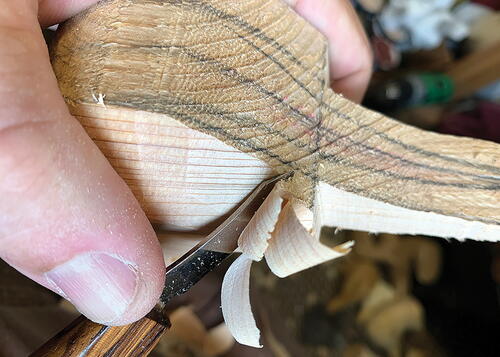
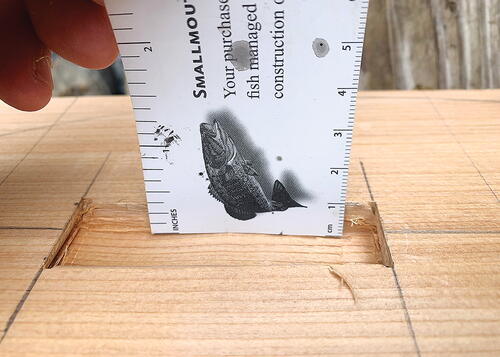
I work front to back and then flip back to front until I get the desired depth. Remember a quarter-inch thick is about five ounces of lead once poured and 3/8 of an inch is around seven ounces
-
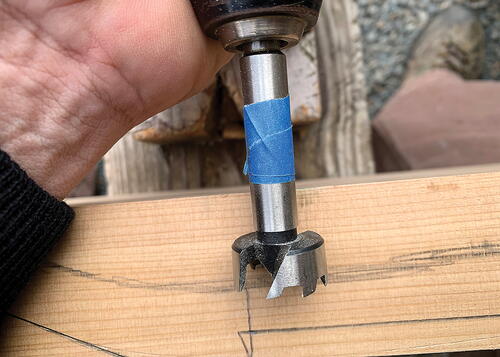
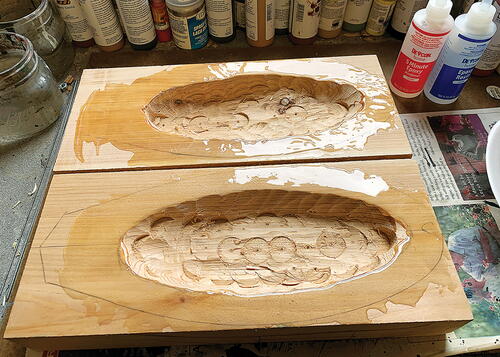
Time to hollow the inside of each half. Using a 3/4" Forstner bit, I use the guideline on the side profile I drew to determine how deep I can drill into each half. I use a piece of painter’s tape as a guide.
-
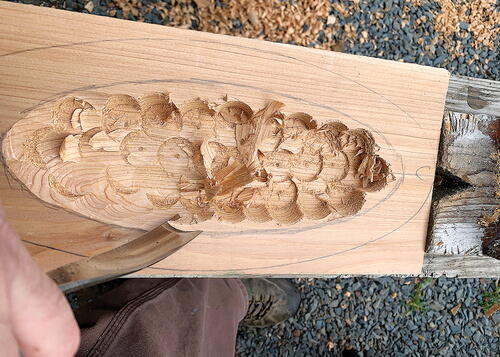
Once I get as much wood out as I dare with the drill and Forstner bit, I use a round gouge to neaten things up and get a little more weight out of the block. Repeat on the other half. If you accidentally remove too much wood anywhere and a hole appears when you carve, you can easily patch the area with multipurpose Bondo.
-
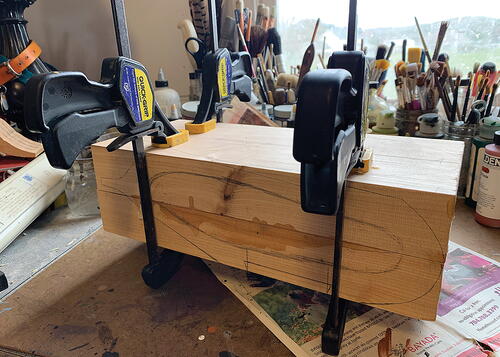
Once you have each side to your liking, use the glue of your choice to attach the two pieces. I prefer two-ton epoxy to five-minute; it dries slower and allows more adjustment as the glue sets. Titebond III is also great, but takes a day to set up.
-
A tight seam line and some clamps will ensure that you have no air gaps in your seam once the block has dried. After the glue has dried thoroughly, I can cut out the block. I will pick up things from there next issue with part two


New Jersey Black Duck
-
By Keith Hendrickson © 2021

Read NextEastern Bluebird, Part One

