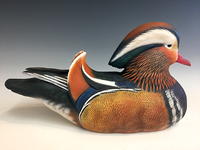
The Most Beautiful Duck in the World

Most waterfowl carvers have a favorite bird. Perhaps it’s one that evokes a cherished memory from nature, or maybe it’s a species that does particularly well in competition. There can be as many reasons as there are carvers. I do know that I could ignite an impassioned debate and get called a bunch of names if I were to say, “The most beautiful duck in the world is the mandarin drake.”
I’m sure others would extol virtues of the drake canvasback, pintail, cinnamon teal, gadwall, green-winged teal, or any number of species. As time goes on, many of us find ourselves drawn to the subtle beauty of the hens and, given the choice, many of us will carve the hen of a certain species instead of the drake. Personal experience has led me to believe that in most cases, a well-carved hen will do better in competition than a well-carved drake of the same species.
However, if we all roll back the clock to the time before we became impassioned carvers, back to the time when we were casual observers of waterfowl, most of us would admit that the bird that just blew our socks off was the drake wood duck. Well, if you want to see a wood duck on steroids, let me introduce you to the drake mandarin!
Anyone who has seen one of these magnificent creatures, either in captivity or in the wild, will surely remember it. I still recall my first sighting and thinking, “What in the world is going on with these guys?” Yes, beauty may be necessary to attract a mate, but did this bird have to go insane with it?
A testimonial to the effect this bird has on the casual observer happened recently when an errant mandarin drake showed up in New York’s Central Park. He was not only featured in the New York Times; he was also declared the city’s most eligible bachelor and received his own website and thousands of followers. That just doesn’t happen with your average bird.
Mandarins have enchanted people since the beginning of recorded history. They were originally from Eastern Asia, where they were known as the bird of “conjugal affection and fidelity” for their exceptional beauty and their enduring loyalty
to their mates. Early European visitors often returned home with a pair of caged mandarins along with silks and spices.
The bird’s scientific classification, Aix galericulata, is attributed in part to Aristotle’s description of it as an “unknown diving duck with a wig or cape.” Apparently, even Aristotle had difficulty differentiating between divers and dabblers, but he certainly observed the bird’s unusual hairdo. The
mandarin had the genus Aix all to itself for a time, until it was joined by just one other species, the American wood duck. Most would agree that it’s a pretty elite group.
The mandarin became the most popular captive waterfowl and was found in numerous aviaries and collections worldwide. As often happens, some escaped and established feral populations throughout the world. The largest population is in Great Britain. Numbering some 20,000 strong, it is considered potentially essential to the survival of the species. In their original range, only about 65,000 birds remain. That’s enough to keep them viable, at least for the time being. Feral populations have sprung up even in the United States, with the largest in California, and the occasional “wild” bird will show up in each of the North American flyways. Can you imagine one of those dropping in for a visit to your rig on a foggy October morning after you’ve had a few too many the night before?
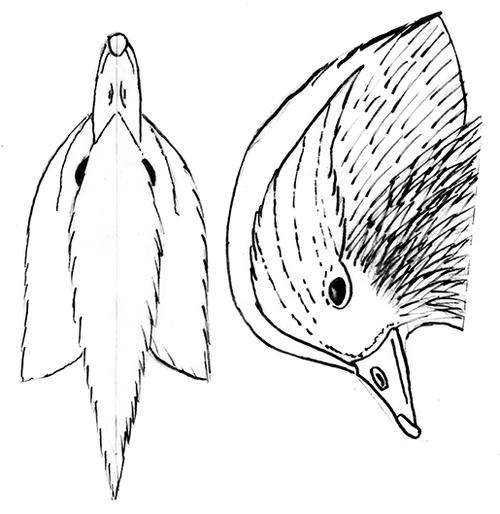
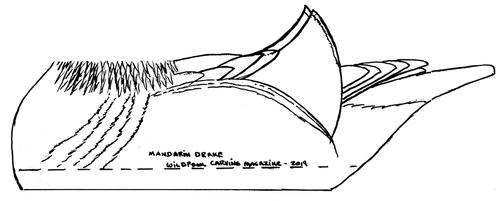
So why don’t we see this bird in more carving competitions? I don’t have the definitive answer for that, but I have my suspicions. This bird has two features that make it a little more difficult for the average carver. The first is the hood or mane that flows down the side of the head and around the back of the neck. This can be a little daunting if you are used to carving the head separately and attaching it to the body. The hood flows down onto the bird’s sides, making the transition from the head to the body an interesting challenge. The other feature is the unique “sail,” which is really an unusually configured tertial feather. To insert or not insert, that is the question.
These were elements I had to address as I embarked upon this carving. I hope my struggle for the answers will inspire some of you to attempt to find your own, and the result will be more beautiful mandarins in competition tanks across the country.
Instructions
-
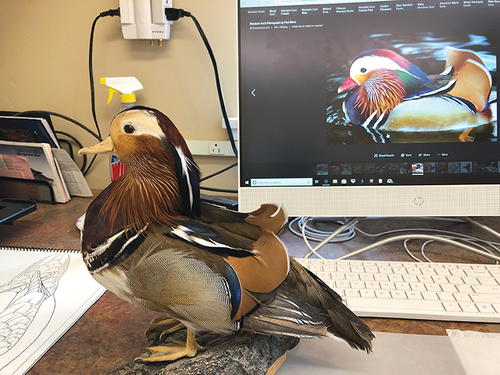
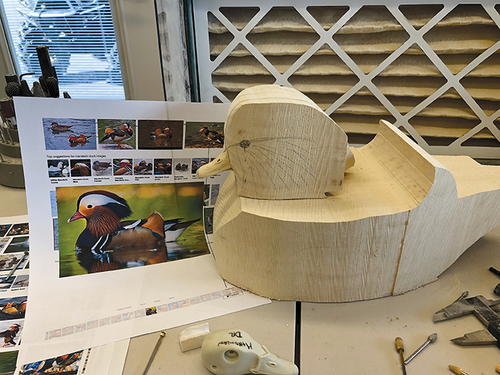
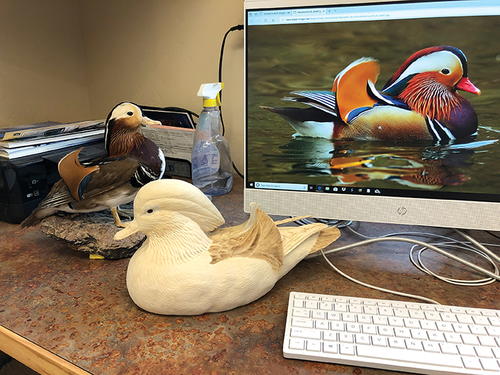
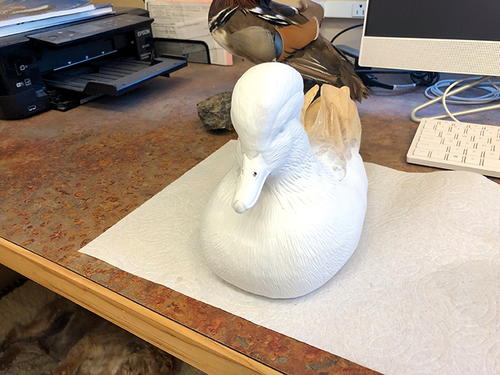
When beginning any carving project, I immerse myself in research and learn as much as I can about my subject. If I am going to spend 100 hours or more traveling a new road, I feel it is a good idea to learn where I am going. It amazes me how little some carvers know about the bird they are carving. They simply trace a pattern out of a pattern book, check a few photos, and start carving. If you do that, you miss much of the joy of the experience and you may overlook subtleties that make the bird what it is. In this case, I have what I consider the bare minimum: hundreds if not thousands of computer images, a study bill, and a mounted specimen. The specimen looks like it was mounted and then shot, but nevertheless, it provides me with what I need to know about the unique configuration of some of the feathers on this bird, such as the location of the iridescence, and just what is going on in general.
-
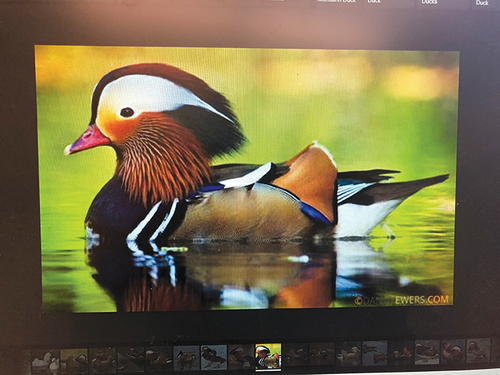
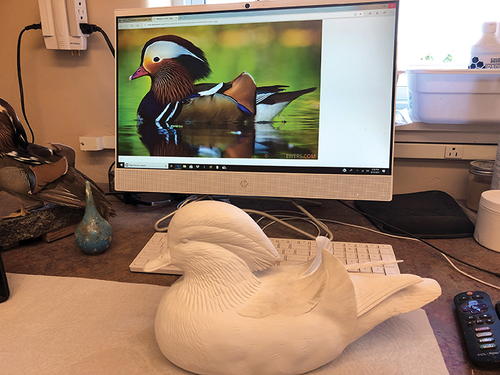
I set up a file filled with the photos that I feel best represent the species and show different elements I need to understand to create a successful carving. I set up these images as a slideshow I can project from my computer to the television in my shop so I can quickly check any reference photo I want. I will find one image that stands out and is taken straight on at the waterline. This will be the photo I will use to develop my pattern.
-
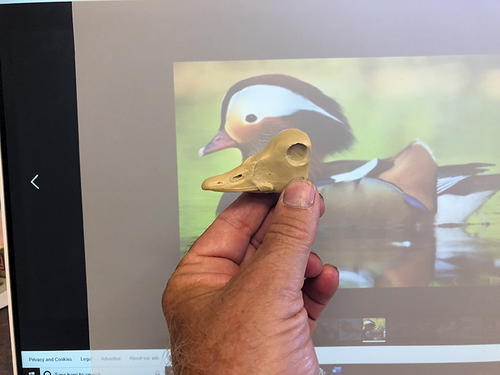
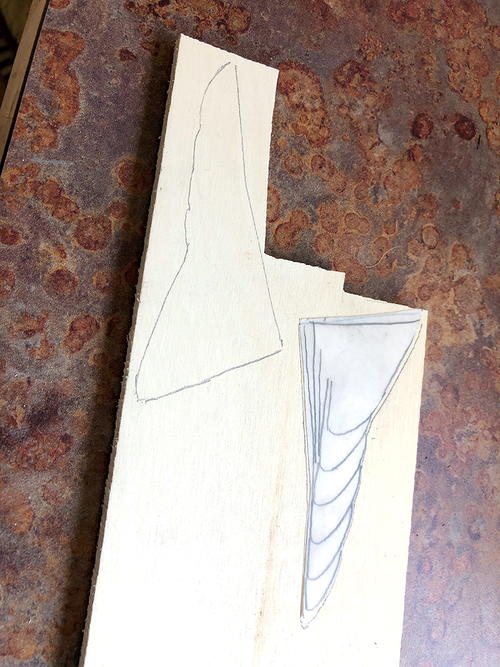
In an article about carving a ringed teal that appeared in the Fall 2017 issue of Wildfowl Carving Magazine, I described how I develop many of my patterns. Simply stated, I take my study bill and hold it up to the computer screen, blowing up the image on the computer until its size matches the bill’s. Study bills for some exotic species are difficult to find, but certain taxidermy companies will carry them. I found a mandarin study bill through a company called Lone Star Taxidermy. In addition to the study bill, I obtained average specimen sizes through my research and determined that a mandarin drake is a very close match in size to a wood duck drake. Trust but verify. Once I’ve done my pattern, I can cross-check it with reliable patterns of wood duck drakes to confirm the size. When I have the image the right size, I trace it onto the Badger No-Tack Stencil Film that I use for all my patterns. This durable product is virtually indestructible, so you can file your patterns for future use.
-
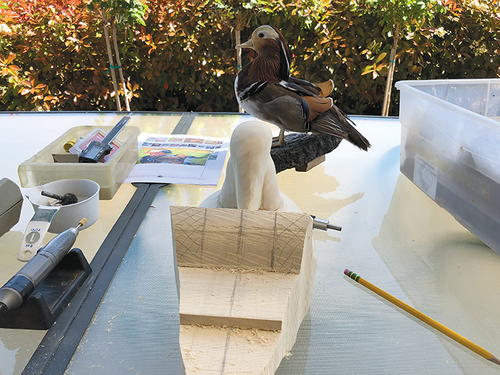
I transfer the pattern to my tupelo block so I can cut it out on the band saw. I have chosen to carve the head separately, even though the best way to carve this bird would be as a one-piece. If your skill level is high enough, I thoroughly recommend that approach, as it would be so much easier to deal with the transition of the hood from the head to the body. However, I have intended this article for the average carver. You will also note that I have decided to carve the sails out of the body block as opposed to carving them separately and inserting them. The sails curve around to the body in two different planes as they attach at the top of the wing and contour around the bird to a point on the lower half of the back of the side pockets. This would be a challenge to pull off successfully with inserts. I feel the tupelo is strong enough and I will make sure to align the grain in the sails to provide maximum strength.
-
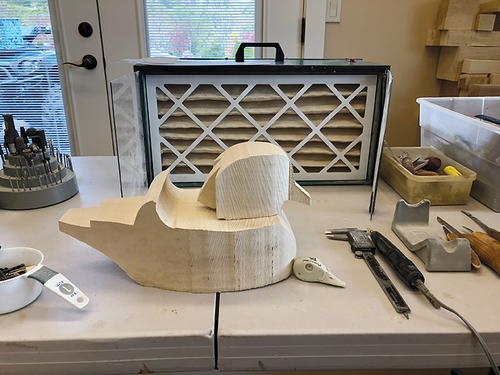
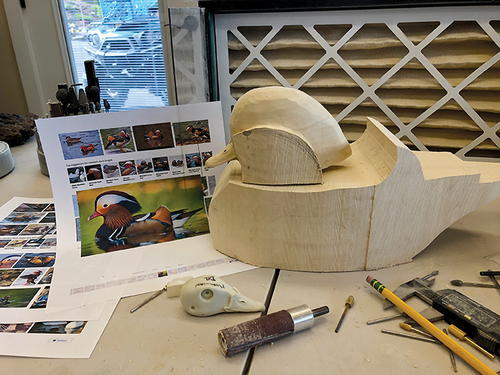
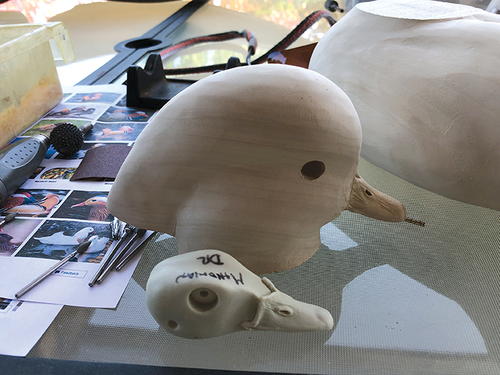
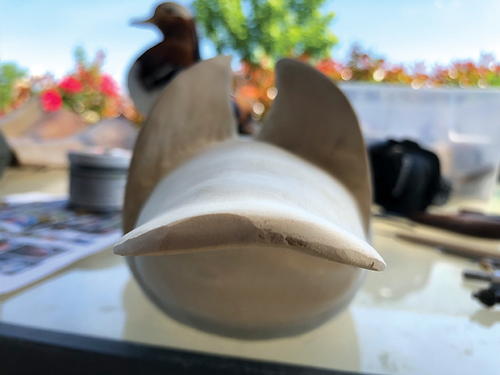
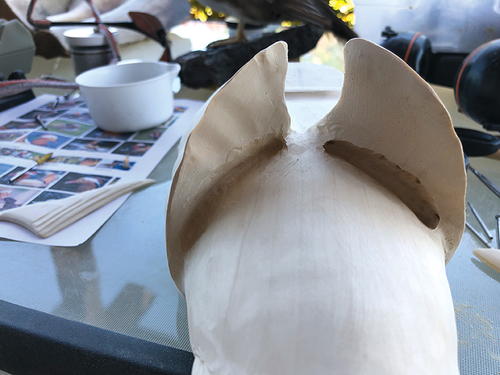
When I place the roughed-out head and the body together, you can see that it’s a pretty strange looking bird at this point!
-
Part of the reason the head looks so strange is that I’ve left enough wood in the hood area to allow the head block to transition to the body block with a minimal amount of filler down the road. You can see that the neck is buried deep within the hood. I have seen this unique feature of the mandarin referred to as a collar, sideburns, and numerous other things. “Hood” works for me. Regardless of what you call it, it is a unique feature and presents challenges for carving and painting. Remember the old adage, “If you carve it, you have to paint it.” Also be aware that if you carve this poorly, you are going to have a nightmare trying to paint it!
-
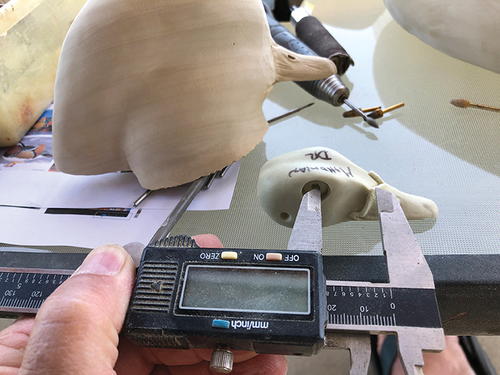
I now begin carving this bird as I would any other. I am getting accurate measurements from my study bill and bringing the bill down to size and shape.
-
When I cut out the bill on the band saw I left plenty of extra wood on the sides and the tip. Remember, the bill doesn’t start at the tip of the wood that you cut out. It belongs where it logically meets the face.
-
I’ve carved the bill close to size. It is accurate enough for me to begin carving the face to meet it.
-
With the eye roughly located, I can establish an eye channel and begin to round the head and face to it. I am not doing final placement of the eye at this point. I will do this with more accurate measurements later.
-
I’ve established the eye channel to the point where I can begin to bring the head closer to size.
-
Now I’ve rounded the hood area to meet the eye channel.
-
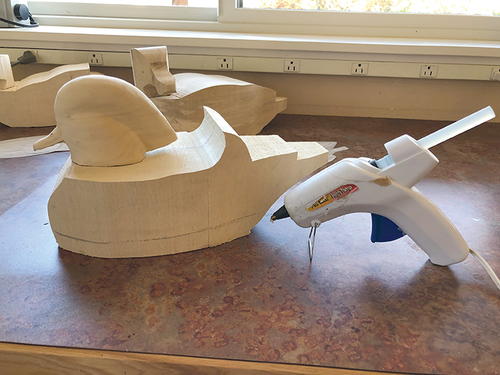
I am going to temporarily glue the head onto the body block with a dime-size spot of hot glue. I will do a lot of rounding of the breast and the shoulders of the body block as I begin to bring the head and body together. I have also sketched in the waterline, which I will round to the flat surface on the bottom of the bird.
-
I have begun rounding the breast, the shoulders, and the scapular area, simply carving to the round at this point. I have not established side pockets yet as I need to determine the flow of the outer edge of the sails before I try to define anything else on the body.
-
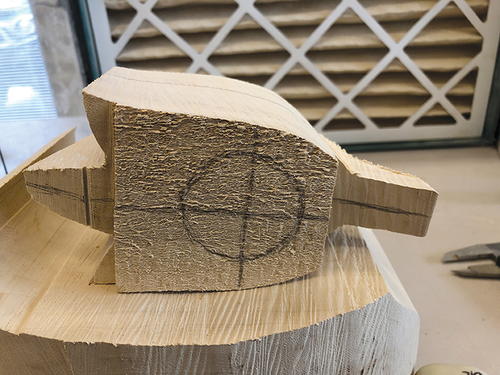
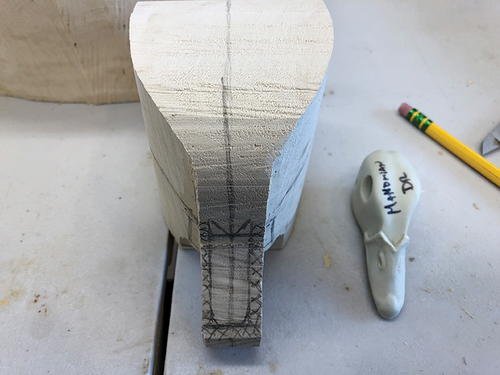
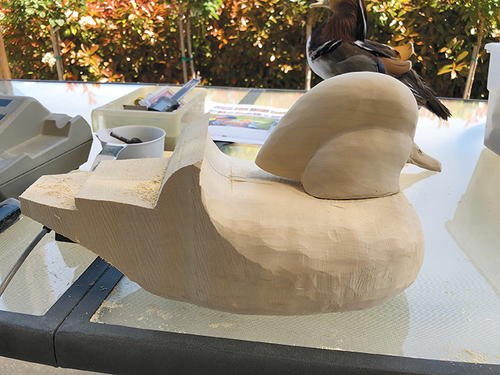
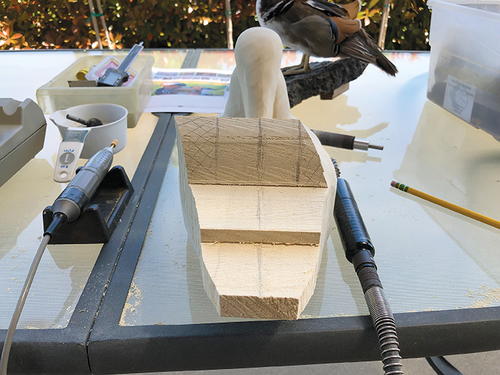
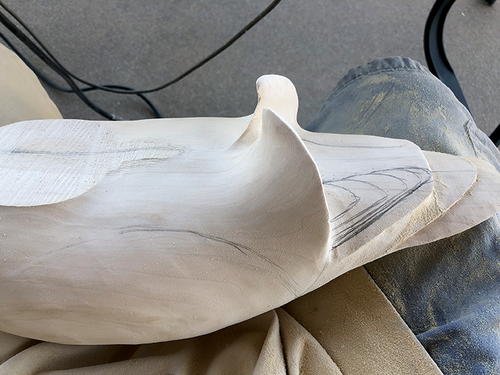
My preferred place to carve is outside, so I relocated at this stage of the carving, simply because it was a beautiful day. I turn on the fan and let the wood dust blow! I have drawn the centerline and marked where I would like the inside edge of the sails to be. This is tricky, as the sails are angled inward from the back to the front. This will become clearer in the subsequent steps.
-
I have rounded the right side of the body block to what will ultimately be the outside tip of the sail on that side.
-
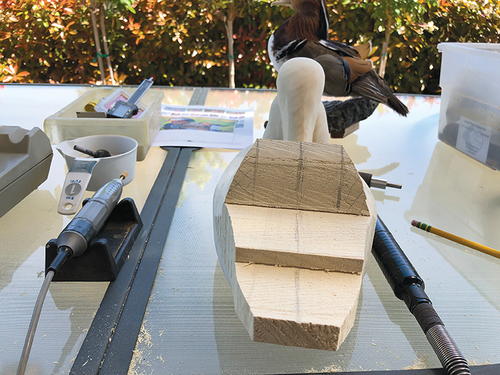
Now I have established the outside tips of the sails on both sides.
-
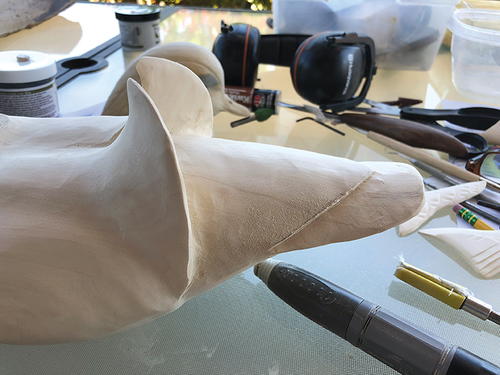
I continue the process of rounding the entire body, bringing everything closer to its final shape. Now I have established the planes of the sails where they meet the top of the wing and contour over the side of the body. I am using a gold carbide bit from Ram Products. This is a smooth-cutting but aggressive bit, and I can move a lot of wood in short order.
-
I have found the top of the body on the centerline of the bird and have begun to shape the front of the sail angling from front to back. The front of the sail will meet the inside tip and the back will remain where it is, as each sail continues to flow down over the side pocket.
-
I am continuing the process. It should become more evident where I am going at this point.
-
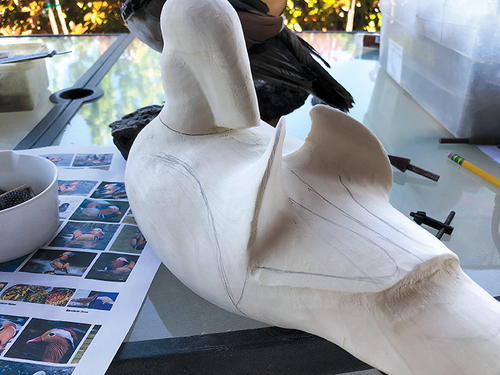
The sails are still bulky, but I have them positioned where I want them. I will thin them further as the carving continues. I have sketched in the side pockets, the centerline, and a rough sketch of where the primaries will lie. Even though this will get carved away before I insert the primaries, it is important for me to establish in my mind where they are going to attach under the sails. Note again that the trailing and lower edges of the sails are going to continue over the tops of the side pockets.
-
I have not cut in the rump and under-tail coverts until now. I am now beginning that process.
-
The primaries, upper-tail coverts, and the top of the tail have been established. The sails are getting closer to size.
-
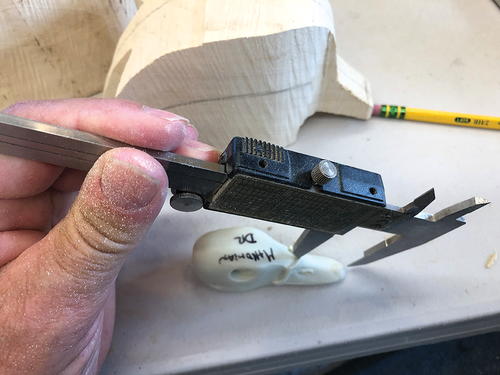
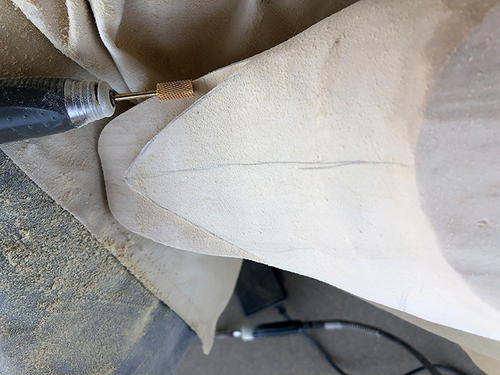
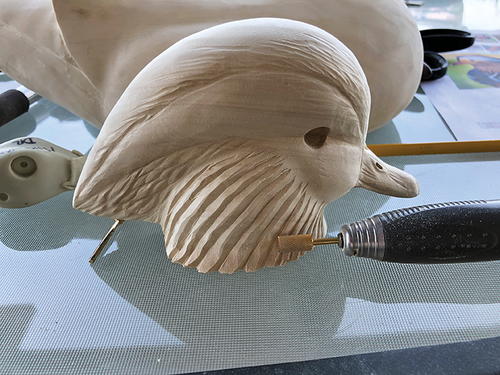
Shifting my attention back to the head, I get my measurement from the top of the culmen to the center of the eye. This is a critical measurement for accurate placement and angle of the eye. I will do the same on the other side of the head, and to assure symmetry, I will use pushpins and view the head from all angles before ultimately drilling the holes. I will drill out the eyeholes using the small tapered carbide bit shown in the background. I simply use a circular motion and drill the eyehole slightly larger than the 9 mm brown eye that I have chosen for this bird. I use the best quality eyes that money can buy. This is no place to economize.
-
The right-side eyehole has been established.
-
I am not going to place the eyes yet because I do not want to risk scratching them. I will wait until I’ve finished the carving and texturing in those areas. This carving is a commissioned piece and the client has requested a partially textured bird, in other words, a “tweener.” I enjoy doing that kind of carving, so I am happy to accommodate his request.
-
The hood is very interesting upon close examination. Most of the feathers fall in relatively parallel curving lines, starting with smaller feathers on the cheek area and getting progressively larger and longer as they progress down the side of the head and eventually onto the body block. I am simply establishing the general shape and size of these feathers at this point, using a medium-size diamond flame.
-
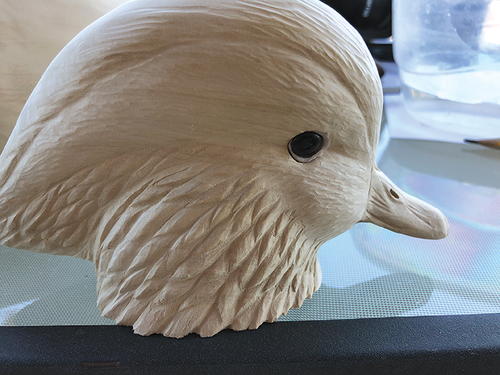
I have begun to place the eyes, angled in at the front and down at the bottom. They follow the plane of the crown as it curves into the bottom of the eye channel to their focus point across the top and slightly to the front of the bill. I am using J-B Weld KwikWood. I squeeze out the excess filler as I push in the eye and will smooth it away with dental and wax-molding tools. The bottom lid of the bird will essentially disappear, but the inside edge of the KwikWood will begin to form the teardrop shape of the eye. I can add filler here if necessary.
-
I roll a snake of KwikWood that I will place and then blend away to form the upper eyelid. I explained this process in much greater detail in the previously mentioned ringed teal article in 2017. Obviously, a great deal of sanding remains to be done on the head. I will use progressively finer grades of sandpaper folded on edge to soften the texturing. I will cover the eye with my thumb during this process.
-
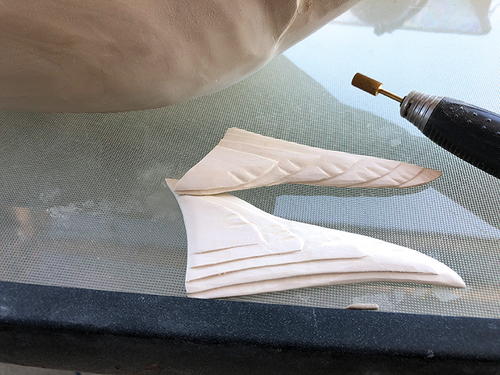
For the primary inserts, I use dimensional English holly that I purchased from Constantine’s. Holly is a wonderful wood to carve, with very little grain and incredible strength. It is a wonderful wood for lapel pins in addition to inserts.
-
Normally I would carve the primaries out of the tupelo body block as I prefer not to insert unless I absolutely must. However, I want to stress the importance of maintaining the football shape of the body, a feature that so many novice and intermediate carvers misunderstand. The plane of the top of the body begins where the top of the tail meets the upper-tail coverts. It then continues over the top of the rump to a point where it disappears under the scapulars and connects to the back of the neck. The plane of the lower rump begins where the bottom of the tail meets the lower-tail coverts. It is then rounded to where it meets the flat bottom of the body block, leaving a shape resembling a football when viewed from the end. I will thin and carve the tail to its final shape. This is one of the last things I do, as I have broken too many tails over the years when I thinned the outside edges too early.
-
I have begun the process of establishing the tail and the outside edge of the upper-tail coverts.
-
Before I insert the primaries I will fully carve them, top and bottom.
-
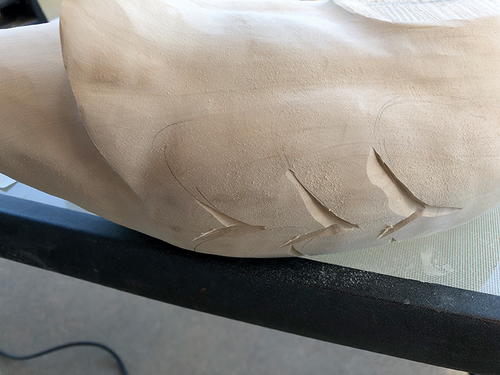
I have begun the “landscaping” process, creating depth and contour to the side pockets, which will be gently rounded. This will do a great deal to soften the bird’s overall appearance.
-
I have created channels under the sails in preparation for accepting the inserted primaries.
-
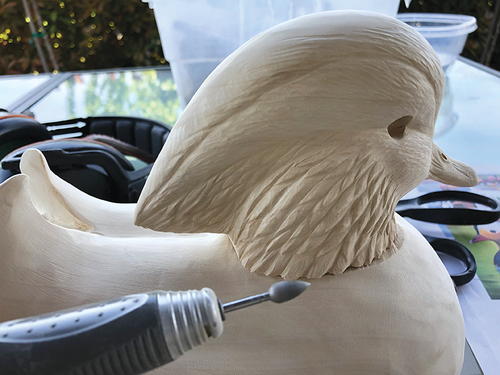
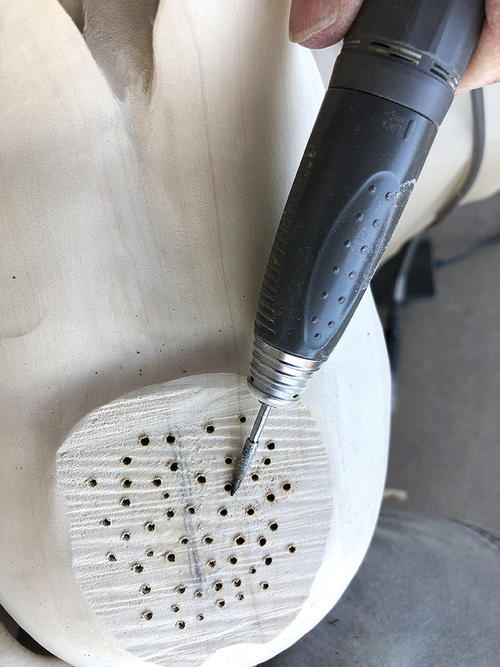
I drill small holes in the top of the body block and the bottom of the head, which will allow columns of glue to create a strong bond. I use 5-minute epoxy mixed with a little West System Colloidal Silica to form a smooth neck seam. It is not as critical on this bird as I will be using Tuf-Carve around the neck seam to facilitate the transition of the hood from the head to the body.
-
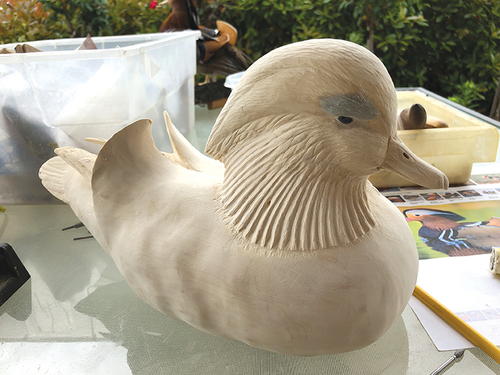
I continue carving the feathers that make up the hood as they flow from the head to the body. I will use a diamond flame to establish the feather edges in this area. I have also added a little Apoxie Sculpt to the brow over the eye, as I felt the bird needed a little more character.
-
The areas of the bird that I stoned have been sanded and cleaned up. I burned the areas that are highly visible on the top of the bird for effect. I never burn areas that will be white. White paint simply doesn’t cover burn lines well. I also find that I gain very little by burning heavily vermiculated areas, because much of the detail is lost in the vermiculation. Plus, this is consistent with the client’s wishes.
-
Areas that I stone textured can be primed with white primer, which has a smoothing and softening effect and also seals those portions of the bird in preparation for painting.
-
I’ve sealed the rest of the bird with a mix of 50/50 lacquer and lacquer thinner. Then I covered the bird with thin washes of gesso to get a consistent finish over the entire surface. I am now ready for the real fun part, the painting, which I will explain next issue.
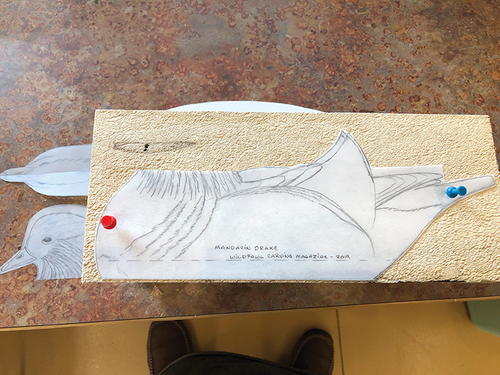


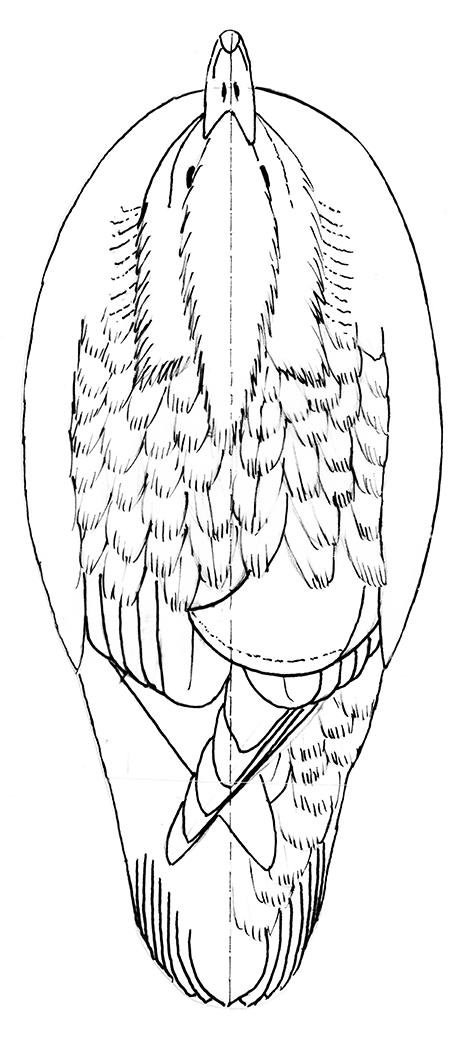
Mandarin Drake
(70% Life-size)
By Brad Snodgrass © 2019
-
Note to professional copying services: You may make up to 10 copies of this pattern, without the express written permission of Wildfowl Carving Magazine, for any purchaser who states that the copies are for personal use.