Carving the Black-billed Magpie
Even when you carve, think about paint.
Jean Minaudier began carving birds alongside his father, Raymond, and has been competing since he was still in school in the early 1990s. He also contributes the patterns and color guides for Wildfowl Carving Magazine’s reference articles. Jean and his wife, Shelley, live on an acreage in southern Manitoba, where they keep their horses and a few calves. Aside from carving and painting, Jean works full-time in agricultural manufacturing.
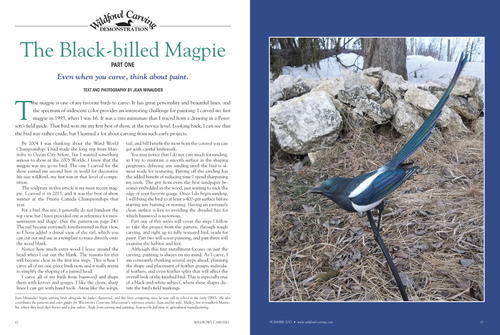
The magpie is one of my favorite birds to carve. It has great personality and beautiful lines, and the spectrum of iridescent color provides an interesting challenge for painting. I carved my first magpie in 1993, when I was 16. It was a tiny miniature that I traced from a drawing in a Petersons field guide. That bird won me my first best of show, at the novice level. Looking back, I can see that the bird was rather crude, but I learned a lot about carving from such early projects.
By 2004 I was thinking about the Ward World Championship. I had made the long trip from Manitoba to Ocean City before, but I wanted something serious to show at the 2005 Worlds. I knew that the magpie was my go-to bird. The one I carved for the show earned me second best in world for decorative life-size wildfowl, my first win at that level of competition. The sculpture in this article is my most recent magpie. I carved it in 2015, and it was the best of show winner at the Prairie Canada Championships that year.
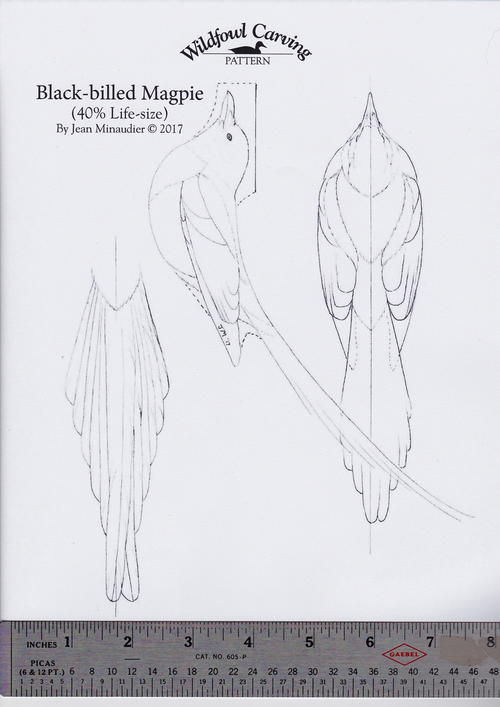
For a bird this size, I generally do not bandsaw the top view, but I have provided one as reference for measurements and shape. (See the pattern below.) The tail became extremely foreshortened in that view, so I have added a dorsal view of the tail, which you can cut out and use as a template to trace directly onto the wood blank.
Notice how much extra wood I leave around the head when I cut out the blank. The reasons for this will become clear in the first few steps. This is how I carve all of my one-piece birds now, and it really seems to simplify the shaping of a turned head. I carve all of my birds from basswood and shape them with knives and gouges. I like the clean, sharp lines I can get with hand tools. Areas like the wings, tail, and bill benefit the most from the control you can get with careful knifework.
You may notice that I do not care much for sanding, so I try to maintain a smooth surface as the shaping progresses, delaying any sanding until the bird is almost ready for texturing. Putting off the sanding has the added benefit of reducing time I spend sharpening my tools. The grit from even the best sandpaper becomes embedded in the wood, just waiting to nick the edge of your favorite gouge. Once I do begin sanding, I will bring the bird to at least a 400-grit surface before starting any burning or stoning. Having an extremely clean surface is key to avoiding the dreaded fuzz for which basswood is notorious. Part one of this series will cover the steps I follow to take the project from the pattern, through rough carving, and right up to fully textured bird, ready for paint. Part two will cover painting, and part three will examine the habitat and feet.
Although this first installment focuses on just the carving, painting is always on my mind. As I carve, I am constantly thinking several steps ahead, planning the shape and placement of feather groups, individual feathers, and even feather splits that will affect the overall look of the finished bird. This is especially true of a black-and-white subject, where these shapes dictate the bird's field markings.
Black-billed Magpie Carving Demonstration
For a closer look at each step, please click on the image to enlarge.
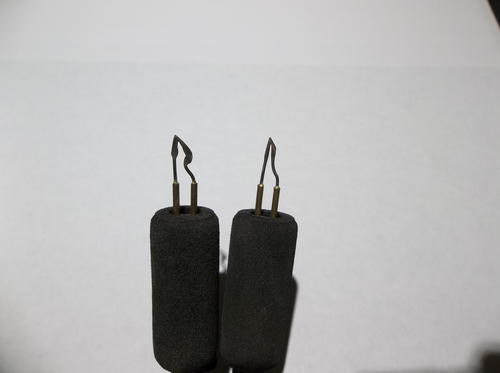
Tools
-
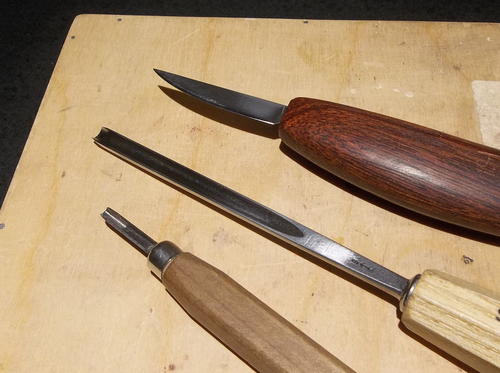
My 2" knife has a curved edge with a good point. I prefer the curved edge for shaping, as it allows me to reach corners and hollow out areas that are just not accessible with a straight-blade knife. The sharp point is great for detail work. I like using the 6 mm-wide gouge for relieving feather groups and contouring. The 3 mm-wide gouge is great for refining feather groups on the head.
-
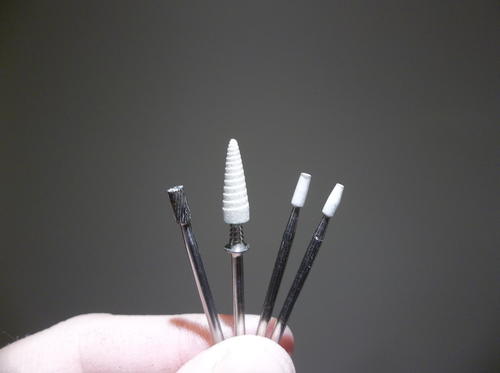
I use the small carbide burr for drilling out the eyeholes. The sanding roll has a small size for fine grit. These work really well for sanding in tight spots and adding small contours and ripples in feathers. The fine white stones are for fine texture. I reshaped the one on the far right with a slight taper so it can reach into tighter corners.
-
The medium skew burning tip is for general burning and quills, and it’s also great for cleaning up undercut feathers. The small skew is well suited to small feathers with shorter burn lines, and corners that the larger tip cannot reach.
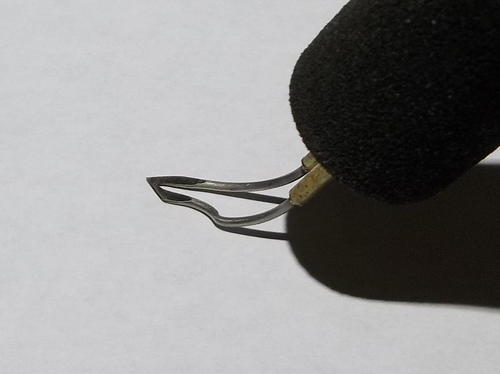
-
This bent skew tip is generally known as a Guge-style tip or a quill maker. I seldom use it for relieving quills, but it works great for relieving the wing and tail feathers.
Step-by-step carving
-
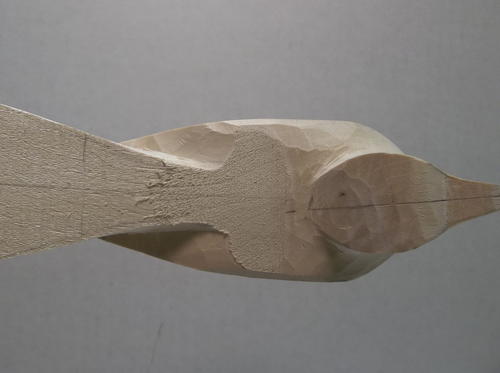
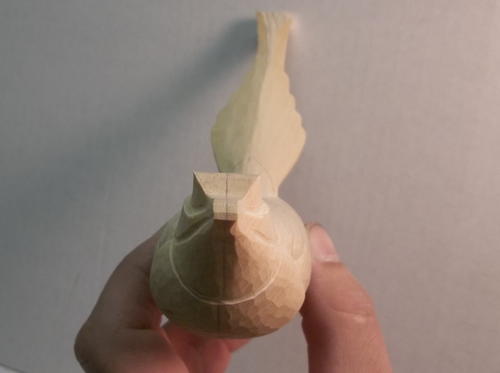
Here you can see all of the extra wood I left around the head profile. I leave extra above the head, as well as plenty on the front and back, to allow for the turned head. The top edge is a horizontal line, based on the pose and attitude of the profile sketch. By keeping this horizontal, you can turn the head in either direction, without inadvertently having it tilted to one side when you mount the bird on its perch.
-
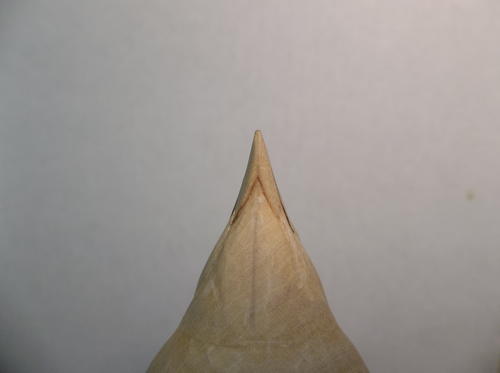
Draw in the centerlines for both the head and body and stay true to these lines all through the shaping process. I then shape the head into a rectangular block.
-
I use a paper template to trace the head profile onto the block, being careful to properly align it on each side. Then I shape the wood to match. This step is just like cutting the shape out on a bandsaw.
-
The top view is roughed in, leaving plenty of extra material at this point. The chest is slightly rounded to the shape of the top-view pattern.
-
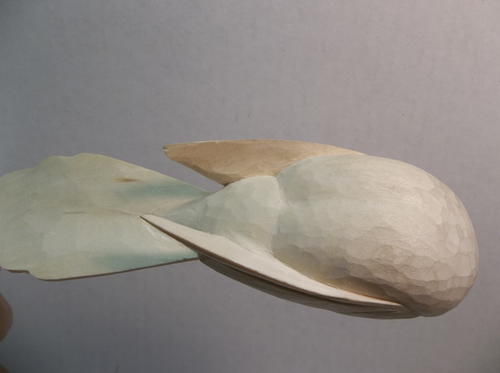
This shows the top view of the wing/ tail area as I shape it. This bird has dropped wings, so I rough out that shape now.
-
Relieve the lower edge of the wing and rough shape the under-tail.
-
Now relieve the cape and scapulars and the chest feathers overlapping the wing.
-
Round the bird’s underside, making sure that the magpie is symmetrical on both sides.
-
I have defined the cape and scapulars and done some shaping on the wings as well.
-
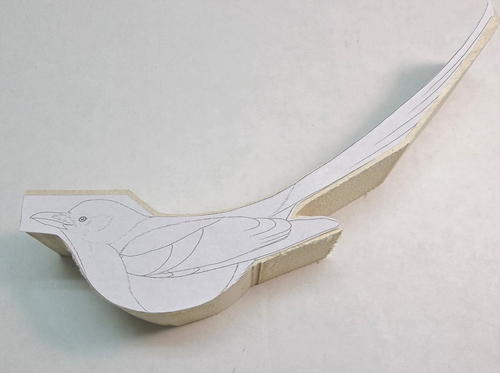
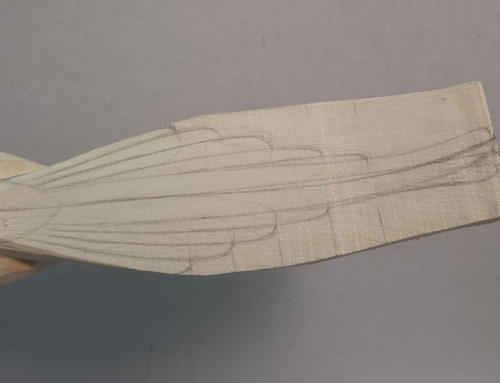
On to the tail. Sketch in the tail feathers. Cut out the tail, using the template provided with the pattern to simplify this step.
-
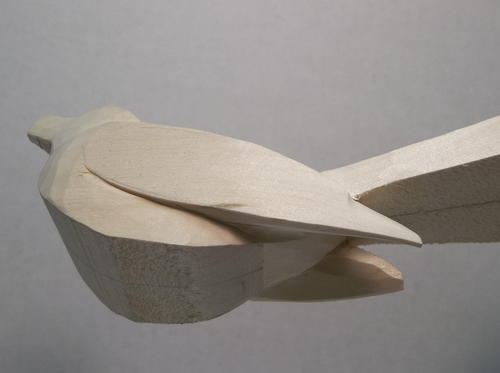
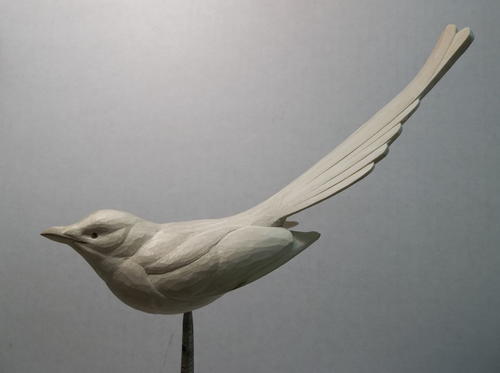
Now the tail is taking shape. Notice the smooth transition from the back, to the rump, right through the length of the tail’s top edge. That shape is critical to the pose, so I want to keep it true to the original drawing.
-
Begin refining the head shape.
-
Relieve the throat from the chest.
-
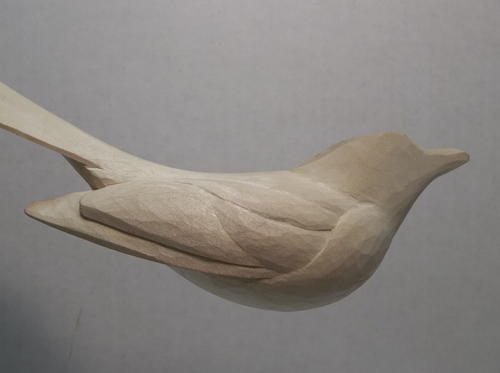
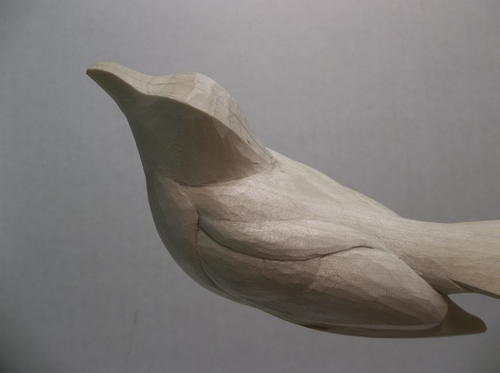
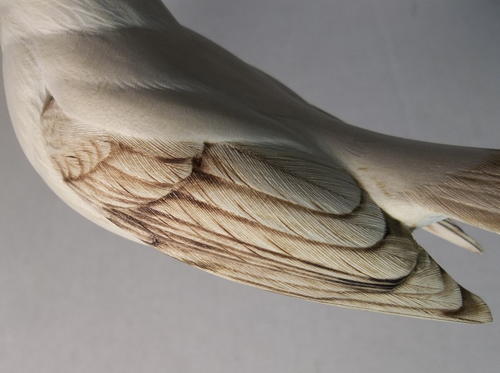
I further define the area where the wrist tucks beneath the side feathers. The wings are now very close to their final shape. The secondaries and secondary coverts have been relieved and shaped. I will not be deeply undercutting any of the wing feathers, but this contouring accounts for the volume of several feathers stacked on the wing. Study real bird wings any chance you get. Look at them, move them, fold and unfold them. The sizes and proportions will vary, but the general shapes, structures, and relationships will remain consistent from warblers to eagle. They all have to fly.
-
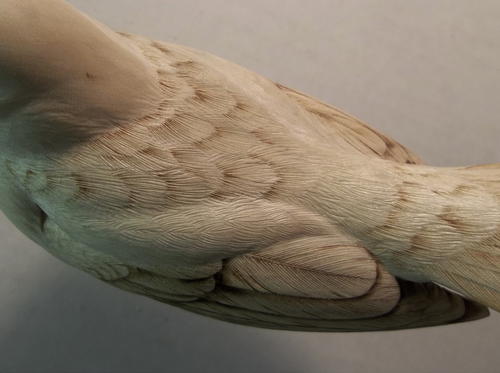
The head/neck transition is nearly complete. The cape, scapular, and chest feather groups are near their final shapes.
-
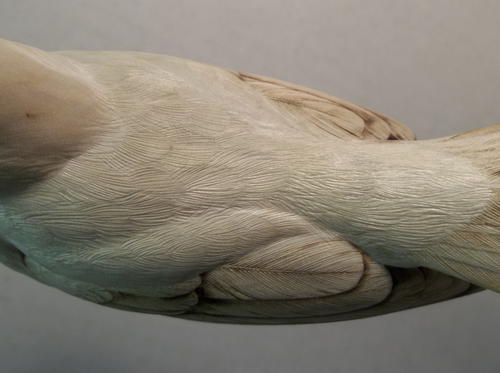
Now I’ve shaped the lower-tail coverts and the underside of the tail. Again, notice the wing shape in the next couple of photos.
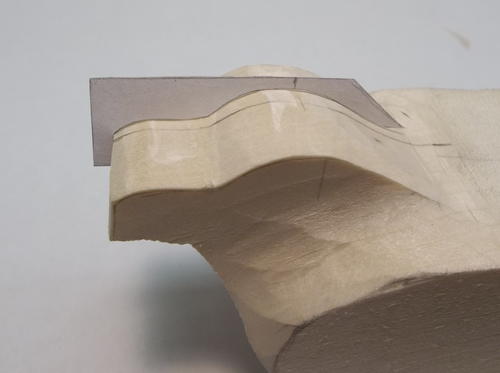
-
I decided to create a subtle step between the black chest bib and the white breast, and also between the white flanks and the black plumage of the vent area. Thinking ahead to the painting here, it is important to get these transitions in the right place, as once you carve them in, it will be impossible to change with paint.
-
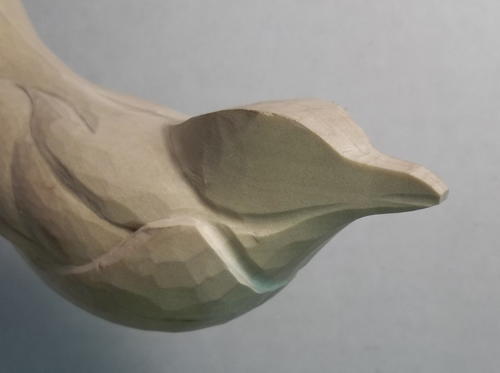
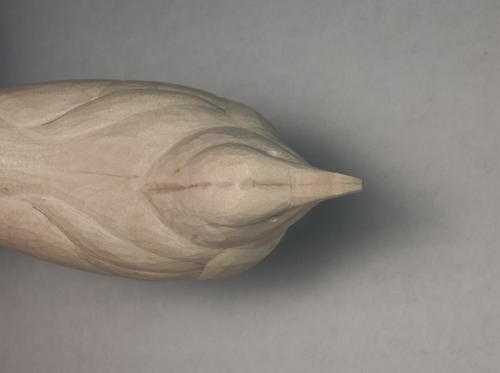
I’m shaping the head. In this front view, notice the rounded shape of the body at this point.
-
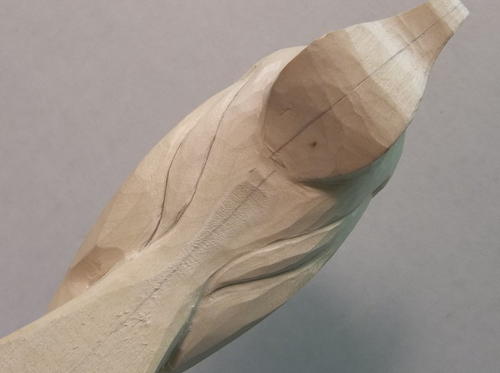
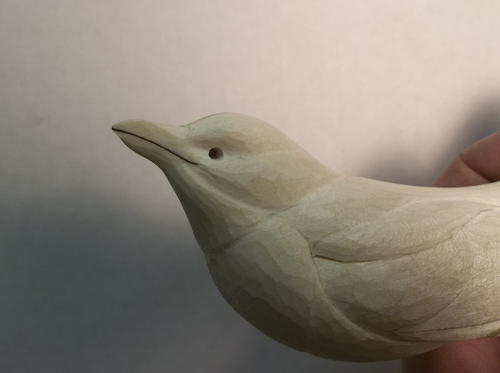
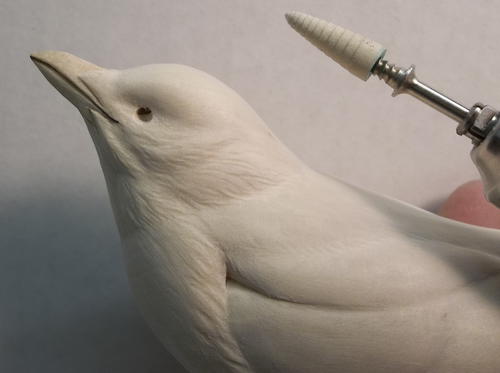
Now I’m shaping the feather groups on the head. I’ve located the eye and roug shaped the bill. Note how the centerline of the head is still independent of the centerline of the body.
-
To establish the mandible separation, I first sketch it on in pencil, check for symmetry, and then trace it with a fairly deep burn line. This way I can gradually shave wood away without completely losing the line. As it fades, I will just burn it in again. This reference line helps me keep the head symmetrical as I carve.
-
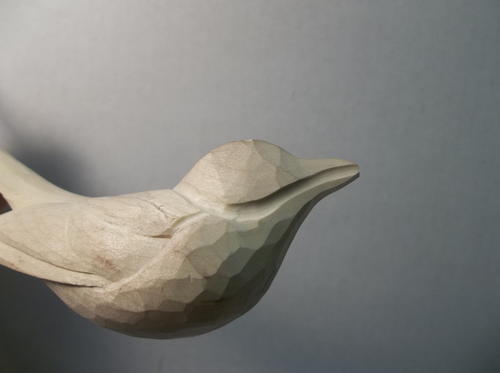
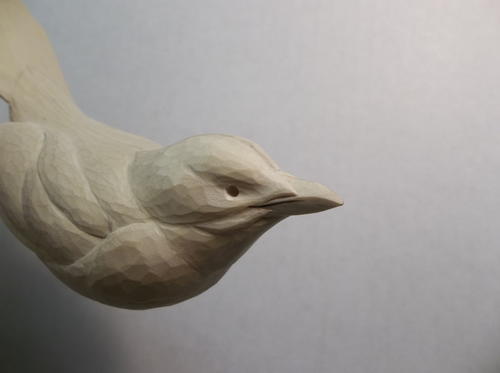
I’ve refined the bill shape. For the feather groups near the bill I use the knife point.
-
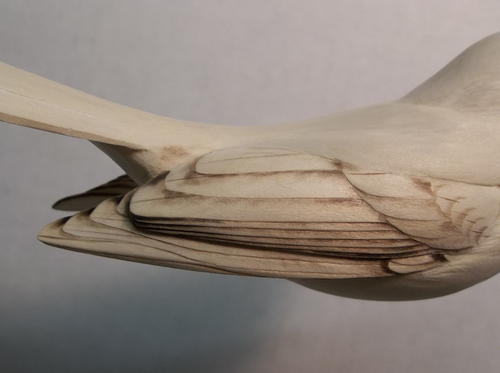
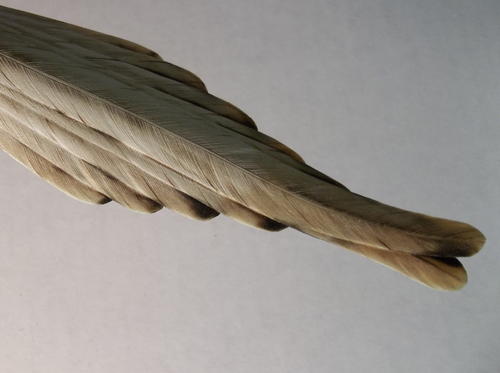
Here I’m relieving the tail feathers. Because of the tail’s slightly fanned shape, I want to create some undercuts and separation. Near the base, though, the feathers are still tightly stacked, so there is no need to “step” them out there. I will return to them later.
-
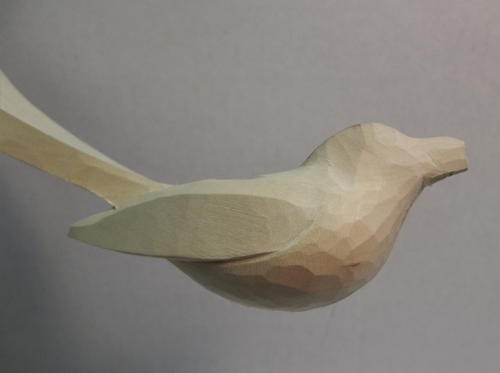
The top side of the tail is complete. I made sure to leave the tail thick enough to avoid breakage as I continue. I’ve shaped the ear coverts and redefined the bill separation. This is one of my favorite points in the entire process. I am satisfied with how the bird looks and it feels nice in my hands. I can now imagine what it will be like when completed. The attitude and shapes that have emerged will not change, regardless of how I detail the bird from here.
-
At this point, I have completely sanded the bird with 320- and then 400-grit. I use the small fine-grit sanding cone to add some surface contours. The cones create a nice soft look, and I find that I do not have to be as careful of grain direction as I would with a ball-shaped stone.
-
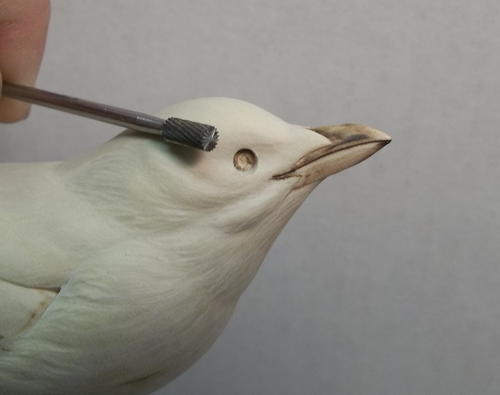
I open up the eyehole. This bit cuts on the sides and end, so I will just move it around in a circular motion until I achieve the desired size and depth for the 4-mm eye. The bill has been sanded and then burnished to a smooth finish.
-
Time to sketch on the wing feathers. Take your time with this and think ahead to what you will need to paint later. It isn’t necessary to show every single feather of each group. With a closed wing, they are seldom all visible on the live bird, and if you try to reveal them all you will end up with a very cluttered look. Besides, detailing and painting a feather edge that is about 1 mm wide offers its own challenges.
-
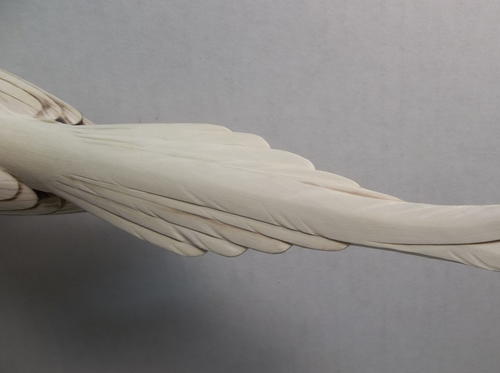
Relieve the wing feathers with the burner. The edges of the secondaries are subtle, becoming deeper near the tips. To create a slight undercut, I use the medium skew tip to “cut” between the feathers.
-
Using the cone sander, I create a few ripples on the tertials. Don’t overdo this or it will look ragged. It’s a good idea to map the ripples out in pencil before grinding them in.
-
I use the same technique to add ripples to the tail feathers.
-
I turn to the underside of the tail by carving individual feathers and cleaning the undercuts with the burner. I’ve also added ripples, quills, and a few splits. I will give this area a final sanding with 600-grit paper. I seldom burn individual barb lines on the undersides of the wings and tail. Most people will never look at these areas, so they are a good place to practice some creative, smoothie-style painting.
-
I try to get tail feather edges fairly thin, about to the point where you can start to see light shining through, but there is no need to overdo it. If they get too thin they become extremely fragile and the burning can cut nearly through the feather.
-
Before burning, I lightly sand the wings and tail with 600-grit. This final sanding may seem like overkill, but it really does result in a smoother final painted finish. I try to keep the lines shallow with a smooth arc shape. I create a few splits by burning a bit deeper and slightly twisting the tip as I burn the line. Toward the edges of the feathers, I lift the burner tip slightly to avoid cutting through the edge. This leaves a smoother feather edge to paint, and looks much less jagged, especially on a miniature carving. After completing all burning in the area, soak the tips of the tail feathers with cyanoacrylate (super glue). Never burn super glue. I seal each area with lacquer as I complete it. This prevents any sweat or oils from my hand from penetrating the wood and damaging the fine burning or stoning details.
-
I use a small white stone for the fine details after first penciling in the feather layout. I start at the tail coverts and work my way forward so that feather detail will have a natural overlap. I add a few strategic splits, overlaps, and crosshatched effects, again planning ahead for painting.
-
Because the deeper, sharp lines created by the burner reflect less light than the wide, shallow stoning, I will finish any black areas with fine burning. I will avoid using burning texture on any area that will be painted white.
-
I do some stoning on the breast area.
-
On the throat and head, I use the same stone, but texture in short random strokes, following a preplanned flow direction that I sketched on.
-
I use the burner to tighten up the detail and deepen the texture. The head of a magpie is almost velvety in appearance, so I will burn fairly deeply, but use very short strokes here to mimic the effect.
-
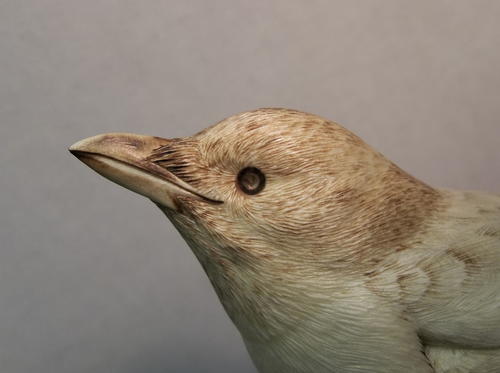
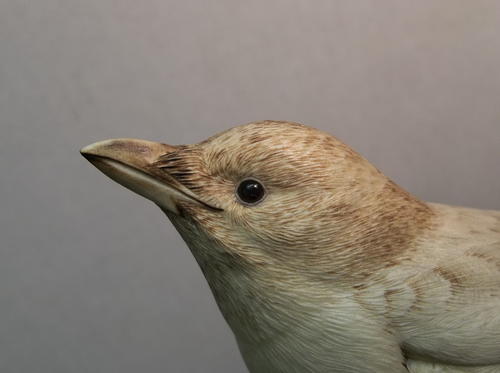
After sealing all the texturing, I set the eyes and build the eyelids. This bird gets a 4-mm, dark-brown eye, angled slightly down and forward. I like Apoxie Sculpt for the eyelids as it has a smooth consistency, does not crumble when formed, and has a decent working time. I roll a very thin “rope” of the Apoxie and wrap that around the eye, pressing it in with a knife point or dental tool. I remove excess material and shape with a knife. I can then smooth the eyelid with a damp paintbrush to remove any tool marks.
-
I like to give the entire bird one more light coat of sealer to ensure that all areas are covered before applying gesso. Avoid getting the sealer (or gesso) on the eyes, as it can be very difficult to clean out from the inside edge of the eyelid. In the next issue, I will add some color to this black-and- white bird.


Magpie pattern
The rule will give you the proper scale for a 40% life-size pattern. To get your pattern to the right size for a 100% carving, make sure you have the ruler scale correct (1 inch equals 1 inch), and then blow it up by 250%.
Read NextEastern Bluebird, Part One