
Alexander and Maria
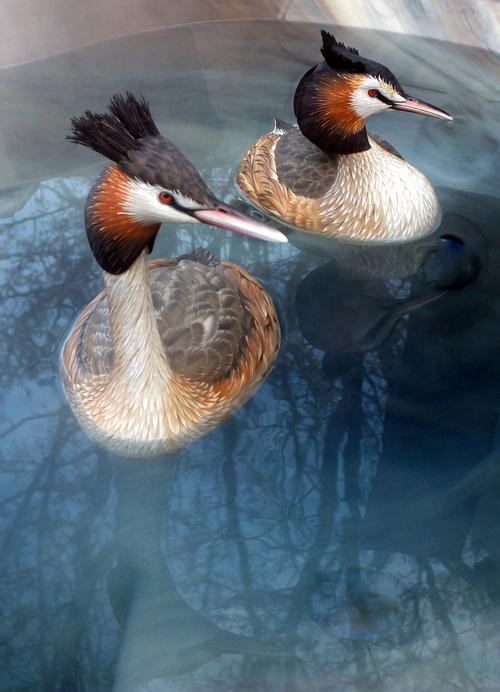
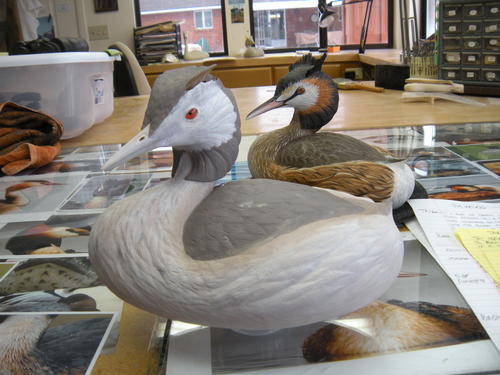
This pair of great crested grebes has a touch of royalty.
Early in 2012, I learned that the pair competition at the 2014 Ward World Championship would be grebes. I have had some success with my grebe carvings in the past and knew this was something I had to do. At first, I wanted to do a pair of pied-billed grebes, an adult female, and a juvenile male. I got busy and carved three juvenile birds, critiquing each before moving on to the next. I planned to enter my fourth effort. Then the photographer who had been supplying me with reference photos sent me a picture he had received from Europe. It was of an adult great crested grebe. That was all it took for me to change course. The bird was beautiful! I had to do a pair.
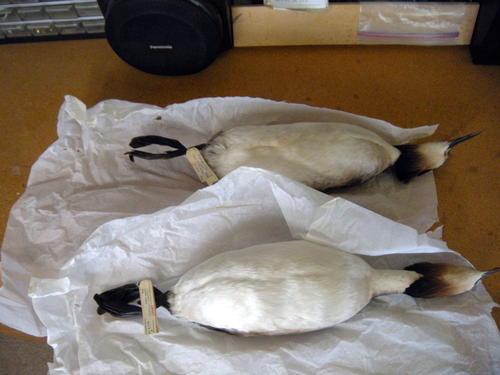
Although I had once seen a great crested grebe while in England in 1978, I knew nothing about the species. I needed more information. I went to the Internet for photographs and videos, but still needed measurements and feather shapes. I contacted the Carnegie Museum of Natural History in Pittsburgh, Pennsylvania, which had 21 study skins on hand and loaned me a couple. One of them came from Montenegro in 1930. At that time, the ruler of that region was Alexander I. So I decided to name these birds after him and his wife, Maria.
Three major areas in particular, provided me with challenges—the head crests, the wet side pocket feathers, and the paint job that would make them stand out.
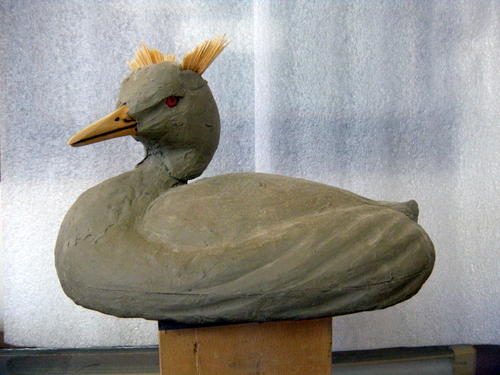
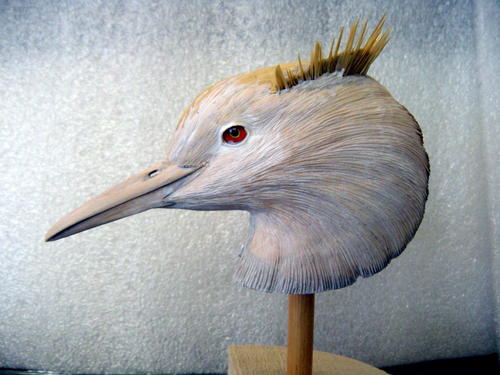
I am always in a hurry to get into the wood and get some carving done, and this has always been a problem for me. This time, I took the time to make a clay model of the bird. I also did a life-size carving of the head, showing the crest, and attempting a paint job that would draw attention. I did not like this first crest, which I made from crushed bamboo hardened with superglue. It was too brittle. For my second effort, I tried the reeds used for basket making. They were flexible and had the look I wanted.
For the side pockets, I studied all the photos that I could gather to make sure the feathers looked like they were wet. On all the grebe carvings I have seen, except one, these feathers had been treated to look like duck feathers. That is not what my references show.
I completed my first pair of great crested grebes, knowing that if I critiqued them honestly, I could do a better job on my second pair. The photos in the article are of my second pair of birds.
This article is from the Fall 2014 issue. For more information on our issues, check out our issues page.
Alexander and Maria
For a closer look at each step, click on the image to enlarge.
Wildfowl Carving Demonstration
Follow along step-by-step with Ted Smith.
-
These are the two great crested grebe study skins on loan from the Carnegie Museum of Natural History. When using study skins for measurements, I always adjust for shrinkage. Try to determine the age of the skin, as this will affect the color and shape of the feathers. When making patterns, I use the measurement of the culmen—the upper ridge of the beak—to get the size right.
-
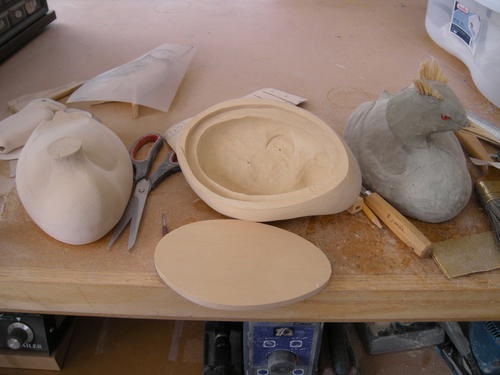
When I do a clay model, I rough carve a bill and use glass eyes to help me to see the details that would normally take hours to create. I quickly carve a very small body, neck, and head to act as an armature for the clay. This model is sitting on a turn table so that I can look at her from all angles.
-
This is the head study that I completed; it gave me a chance to work on the carving details. My carving friends claim that 80% of the interest in the carving is in the head, and 80% of the interest in the head is the eyes. So obviously the eyes are very important. At this point, I have sealed the head with two coats of Deft sealer and have applied a watered down coat of gesso.
-
I hollow all of my life-size bird carvings. This guarantees that the body will not crack due to stress or moisture. At this time, I can
also add lead ballast to adjust how the carving will float in the water. I use a Forstner bit and a carbide Kutzall to clean out the cavity. -
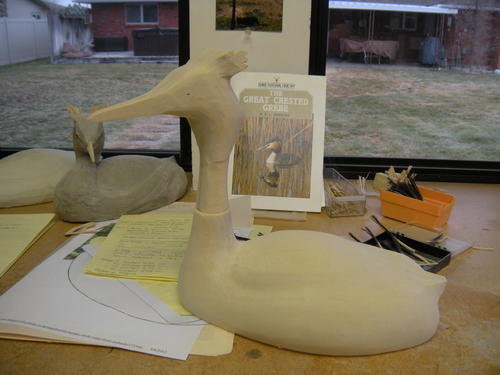
For the head and body, I used two pieces of jelutong. I’ve hollowed the neck area on the head to receive the neck from the body. In the background, you can see my first effort in carving the female great crested grebe. The plastic tub on the work bench holds the two study skins. I also have a glass top on my mobile work bench, where I store the reference photos of the bird on which I am working.
-
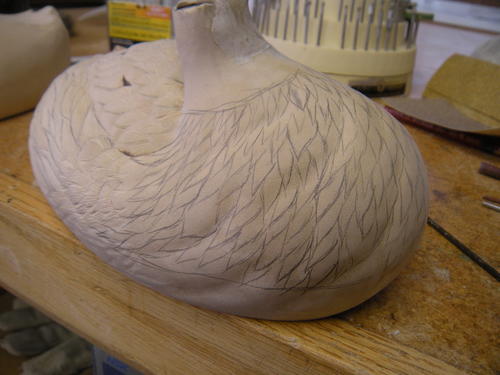
The head is textured and wood removed to receive the crest inserts. The bill’s dark color comes from a coating of super glue. I am also trying to come up with a side pocket feather pattern; I often draw them in four or five times. It is so much easier to change the pencil drawings than it is to re-carve the feathers.
-
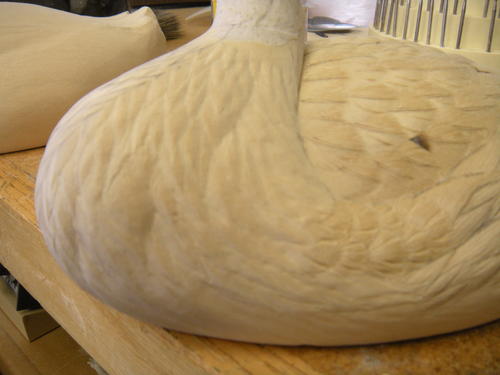
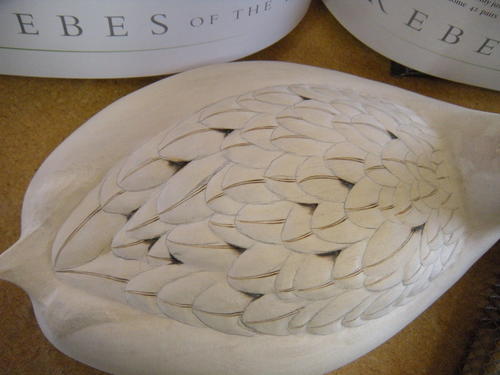
I have carved the side pocket feathers on the 8 right side. I keep going back to my reference photos to try to make this area realistic and interesting. I have drawn in the feathers on the breast. Notice that three of them are double the size of the others; again, I am trying to add more interest.
-
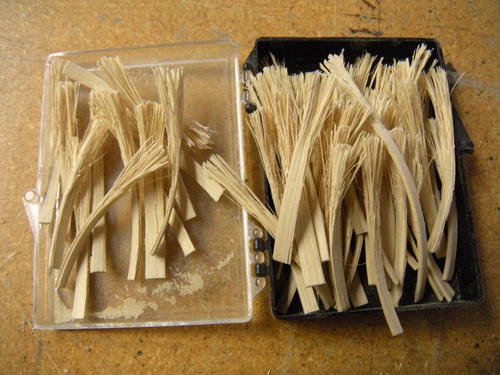
This is my box of magic! I went through three different types of wood and treated them in four different ways to come up with a natural shape, flexibility, and strength that could duplicate the crest on this bird. I tried to paint them, but this only made them brittle. I ended up staining them with leather dye to give them the look and flexibility I wanted.
-
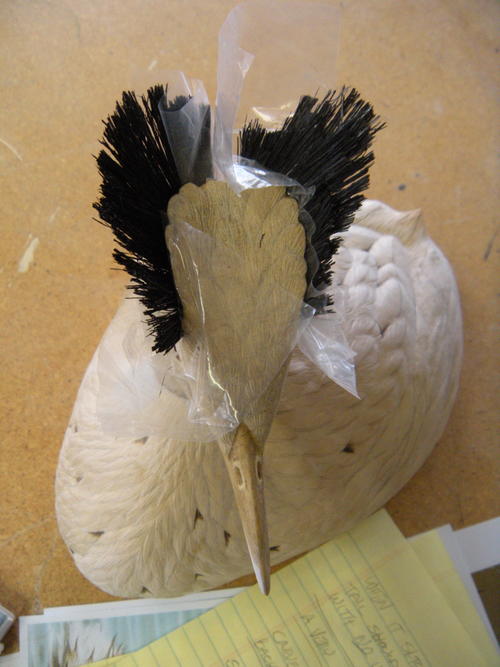
Here, I am inserting the reeds into the head without making them permanent; I still have to trim them back to duplicate the natural look of the crest. The paper under the carving is my critique of the first female great crested grebe that I carved, showing all the changes I needed to make on the second bird.
-
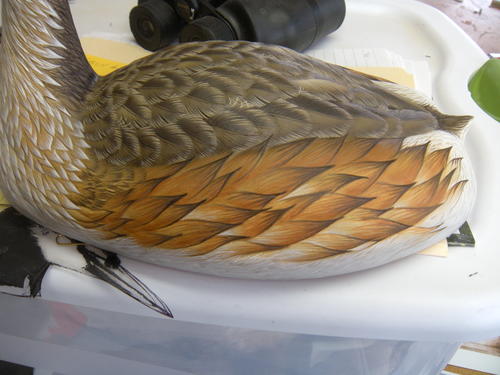
When carving the breast feathers, I not only change the size of the feathers, but I also vary the depth of the feather groups. Notice how the wet feathers change shapes where the breast meets the side pockets, going from a dry looking feather to a wet feather.
-
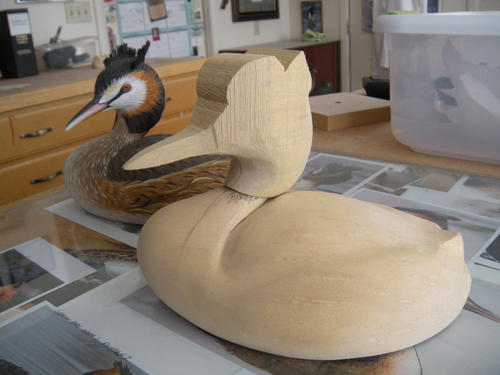
I have started to carve the male. Once again, I use two pieces of jelutong. By using two pieces I can take advantage of the strength of the wood grain. On the far left of this photo, you can see the rear portion of male’s clay model. Behind the drake are three batches of the feather material I made up for the crest.
-
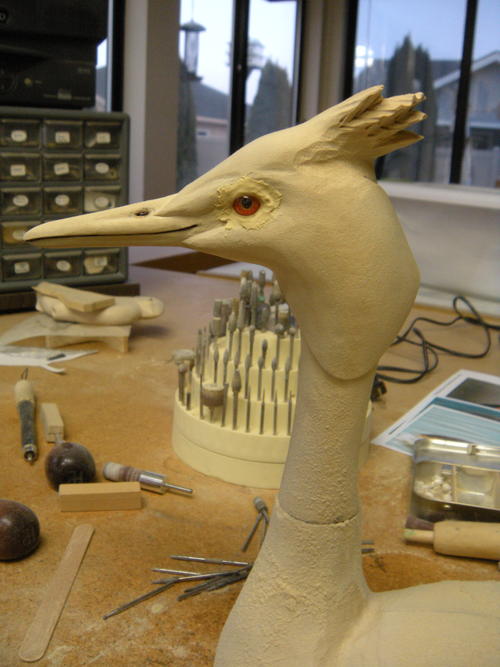
Here is a close up of the head carving. I use a clear lead crystal eye and paint the back side of it to match what I feel this bird’s eye really looks like, not what someone recommends that I use. In the background, you can see the cord to my “Hot Tool.” I designed a tip that I use to burn in the nostrils on the bill, and the burning also hardens the wood around the holes.
-
This was the layout of my back feathers. People have questioned me about this arrangement, but I have two photos showing how the wet feathers lay on the grebe’s back. The dark areas on the back come from using a wood burner to give the illusion that the feathers are lifted and that there is air under them. Behind the carving is the book Grebes of the World, one of the references I used to carve this pair.
-
Three coats of watered-down gesso have been applied as an undercoat on the female. The carving behind her is my first female. Notice how the side pocket feathers have changed. I complete all the carving on both birds before I clean up the studio and start the painting process.
-
This is the male with the gesso undercoat applied. I have added some color to the dark areas. I used an airbrush to soften the transition between the two colors. This also helps me blend the colors together when doing the final painting. The black circle behind the bird is one of the turntables that I use when carving and painting a bird.
-
The painting on the body has been completed. After I have painted a carving, I set it aside for at least a week and then I do an honest critique and really look it over closely to see if I missed anything, either an anatomical detail or something that would make the piece really stand out. Then, I return to the studio and make the necessary changes. Some carvings require up to four
additional hours before I am satisfied. -
I’m finishing the head and bill. The neck feathers look to be very wet, and I have more work to do in the cheek area. The hen in the background is my finished second effort. The white webbed ball in the upper left corner is the white cotton glove I wore on my left hand while painting.
-
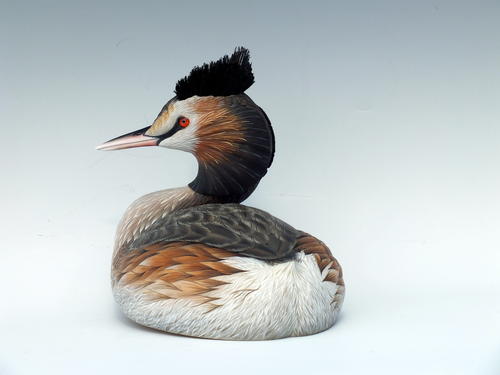
Alexander and Maria are now finished.


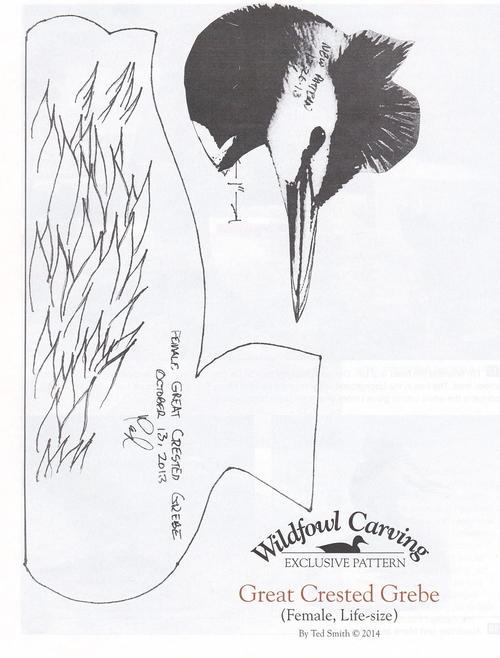
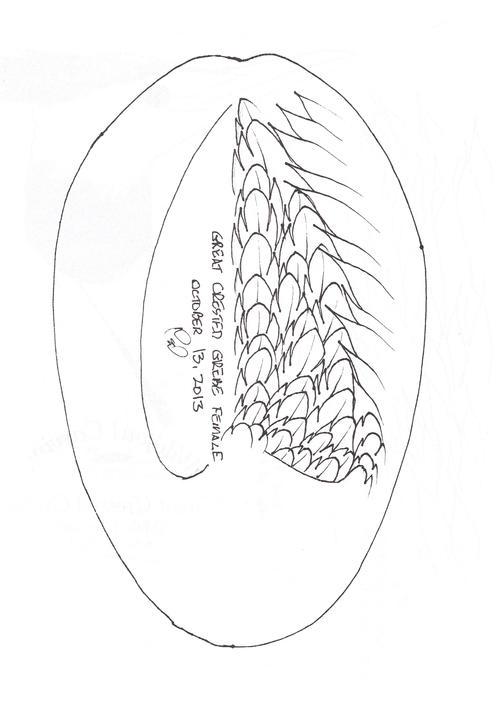
Wildfowl Carving Exclusive Pattern
Life-size female great crested grebe
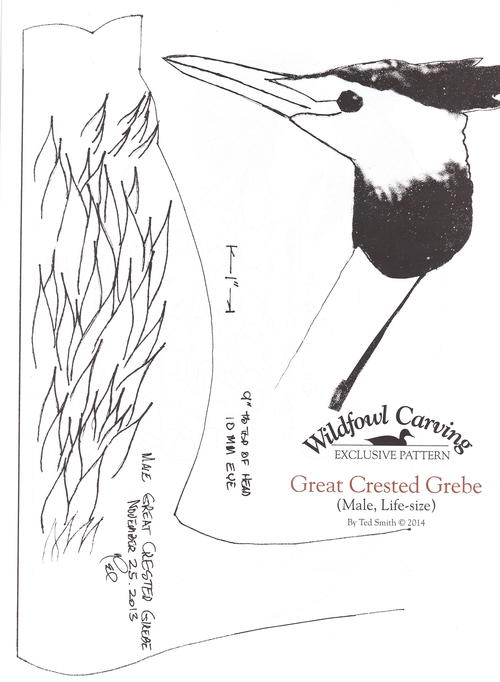
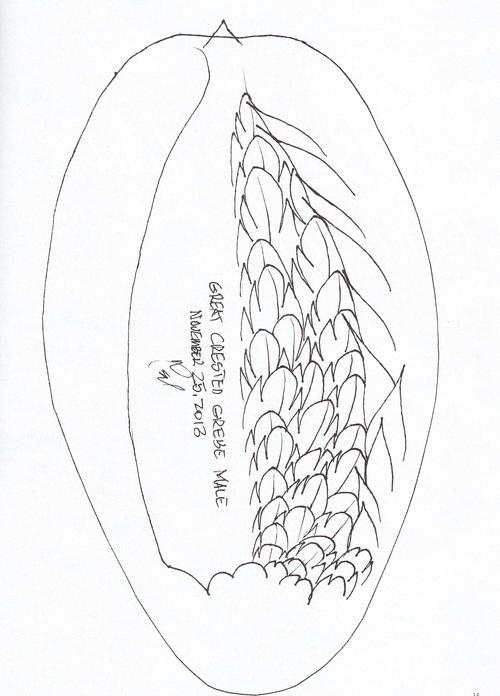
Wildfowl Carving Exclusive Pattern
Life-size male great crested grebe
About the author
With the help of his wife and a great number of friends, Ted Smith has been a full-time bird carver since 1979. The carving shows that he enjoys most are the Columbia Flyway Wildlife in Vancouver, Washington, and the Ward World Championship in Ocean City, Maryland. Ted lives in Nampa, Idaho. Email him at tjsmithbirdcarver@cableone.net or visit his website at http://deerflatwildfowlartstudio.weebly.com.
Read NextCarving the Black-billed Magpie

