The Indelible Snowbird
It may be dark-eyed or it may be slate-colored, but it's still a junco
I first heard of the junco when I was a young boy coloring eggs for Easter. Deciding to do things my way, I found a second bowl and began to mix a little of each colored dye to make my own special color. I ended up with a dark, bluish-purple and my mother laughed and said the egg I dyed looked like a junco. That was the first time I had heard the word, but I liked the sound of it. Later my mother told me what a junco was. Even when I was very young, she knew I had an intense interest in birds. I had to wait until the next winter before I could get a good look at a junco.
Here in northeast Ohio, this slate-colored member of the sparrow family is commonly identified as the “snowbird.” In Ohio, we use the same name for seniors who head to Florida and points south for the winter. However, when the feathered snowbirds reach Ohio for their winter sojourns, they have already made their trips south, migrating from the more severe weather to our north. Seeing the juncos arrive in Ohio is a clear indicator that winter is upon us. Although this bird has several subspecies, this article will focus on the dark-eyed junco (Junco hyemalis), more commonly known as the slate-colored junco. I will carve the bird from tupelo, using power tools.
Tom Baldwin is an internationally award-winning wildfowl carving artist. He was awarded second best in world interpretive at the 2017 Ward World Championship. Tom teaches a beginners’ bird carving class at the Cuyahoga Valley Art Center in Cuyahoga Falls, Ohio. He also wrote a workbench book for Wildfowl Carving Magazine titled Three Bird Carving Projects: Power Carving Instruction for the Beginner. Tom lives in Akron with his wife, Barbara, and their two dogs. You can see more of Tom’s work on his website, songofwood.com.
-
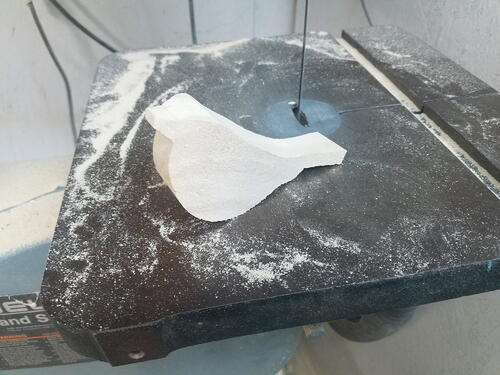
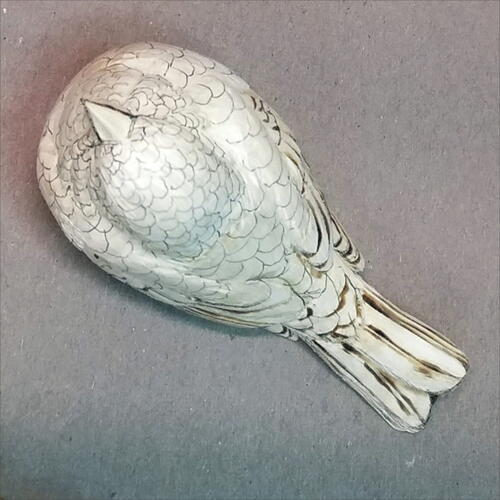
After cutting the side and top profiles of your block from the pattern, your starting blank for the junco should look like this.
-
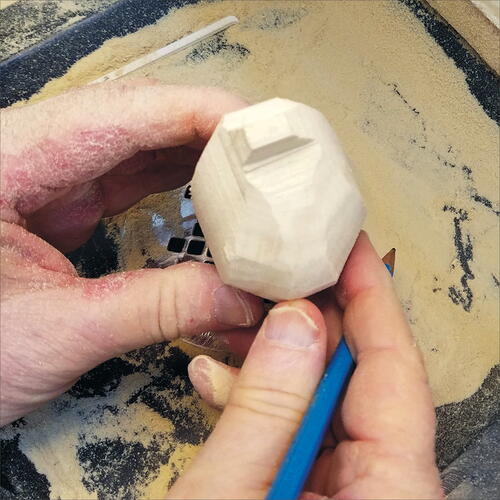
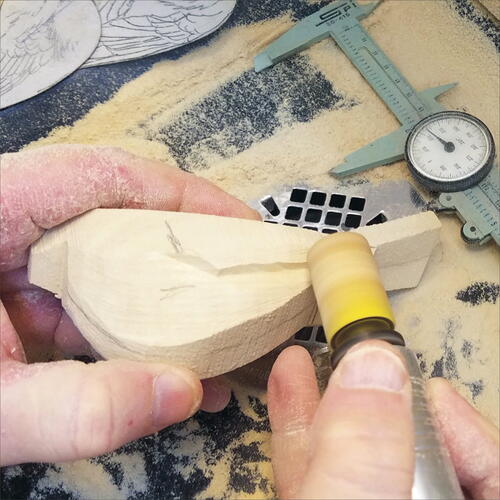
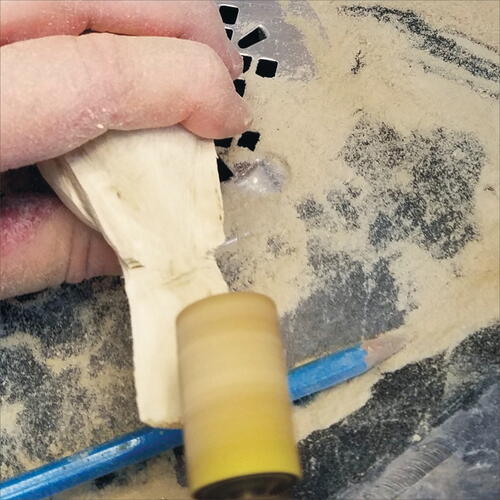
Use your Foredom or micro-motor and a fine Saburrtooth burr to carefully take the four corners off the blank from the back of the head/throat to the beginning of the rump. You should end up with a shape like a stop sign when looking at the blank head on.
-
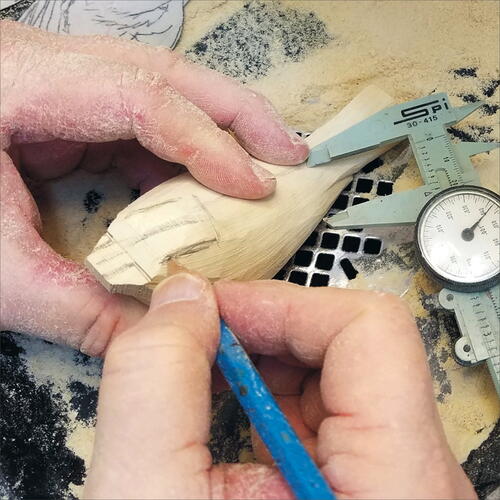
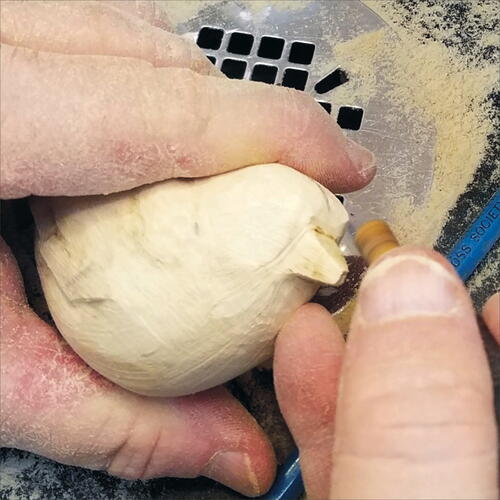
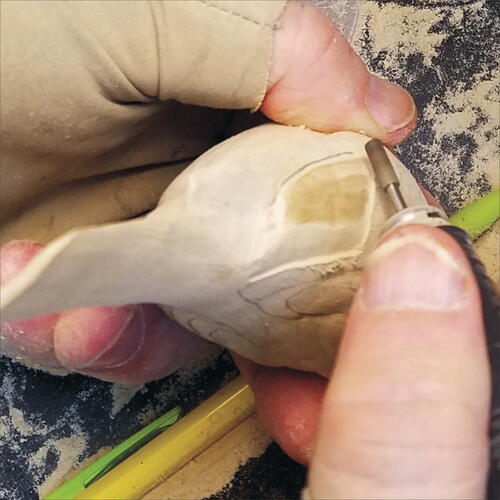
With a pencil, draw out the edges of the wings on both sides, and then take your micro-motor device and carve down on the flank side of the bird to expose the wing area. Do this on both sides.
-
On the pattern, measure the location of the lower rump and draw its location on the blank. Using a fine, flat-top Saburrtooth burr, carve out this area. Keep in mind that you are also carving out the underside of the wings at the same time. Be careful to not over carve your wing area.
-
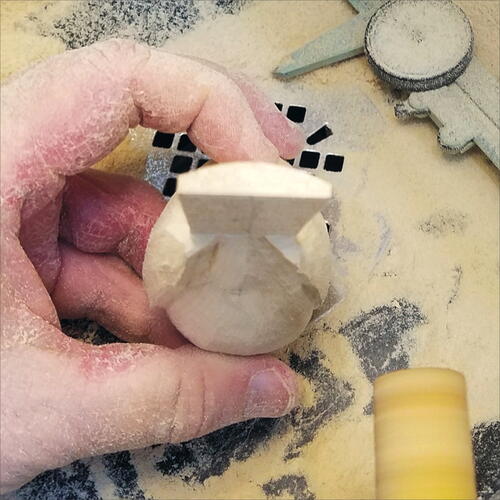
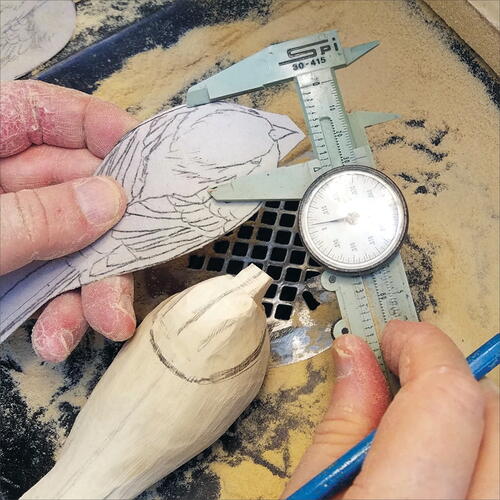
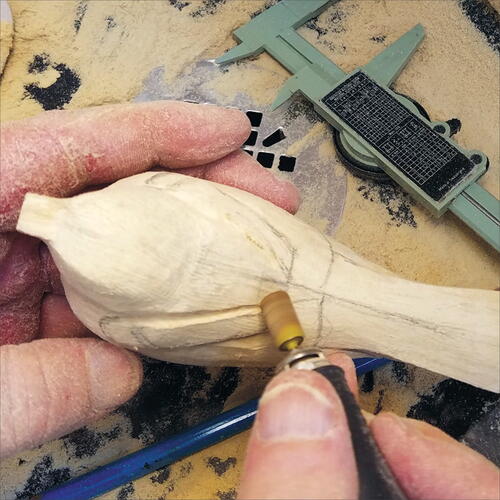
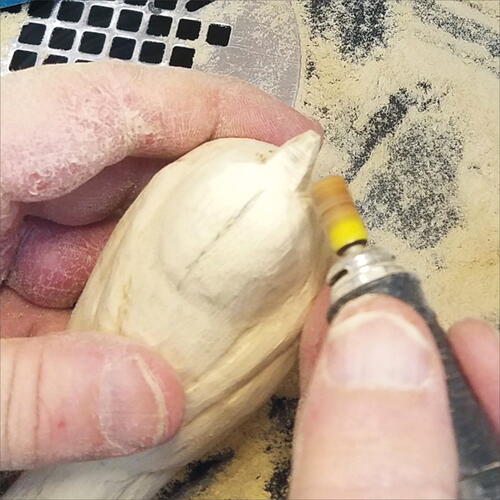
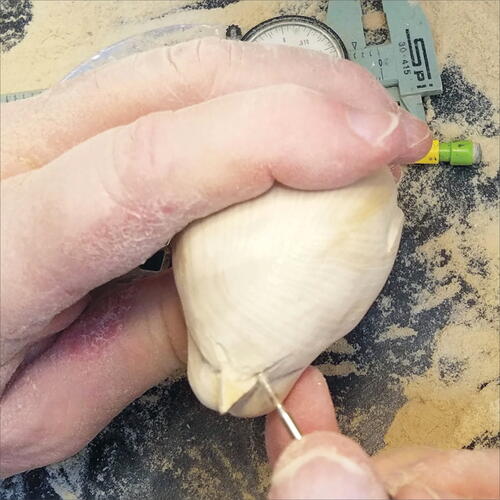
Draw a centerline down the head. Measure the width of the head from your pattern and draw that on either side of the centerline. Draw the beak area in as well, adding 2 millimeters to the width from the pattern.
-
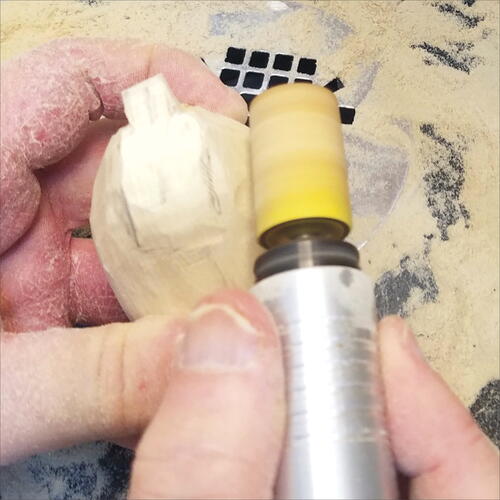
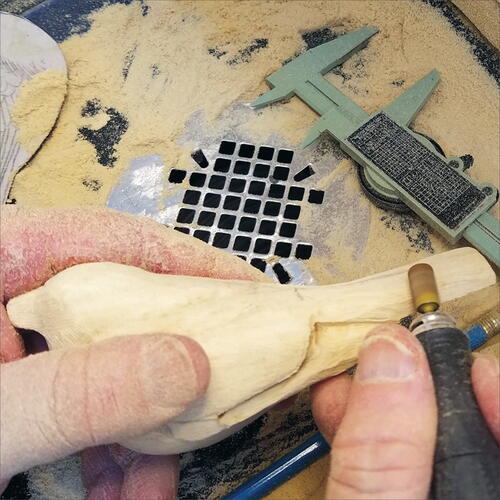
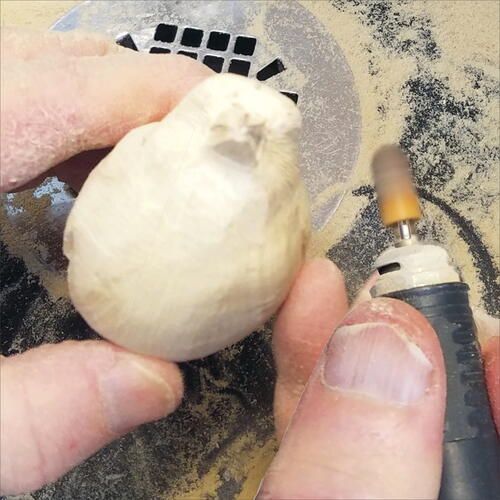
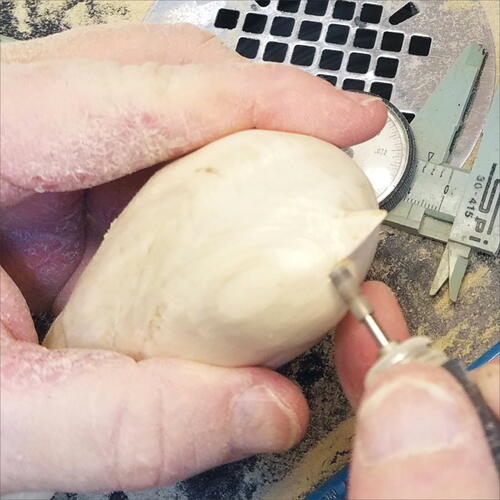
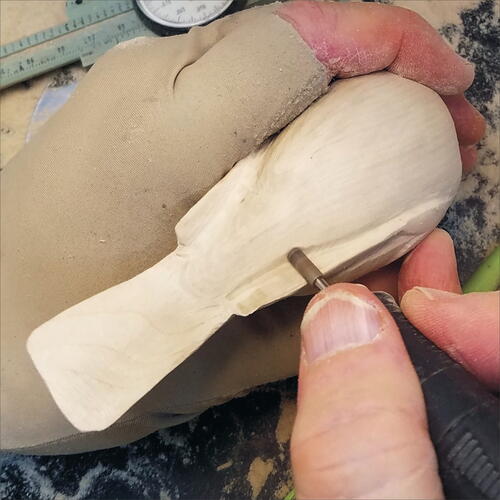
Round out the head with your micro-motor device and a flat-top, fine Saburrtooth burr. From the leading edge of the wing, round out both the back of the bird and the belly.
-
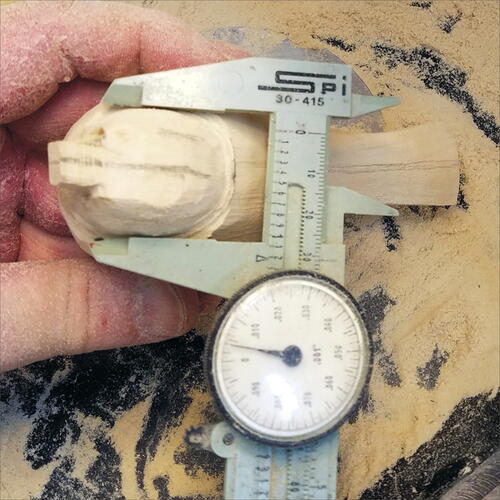
Measure the width of the neck from the pattern and lay out that area on your carving.
-
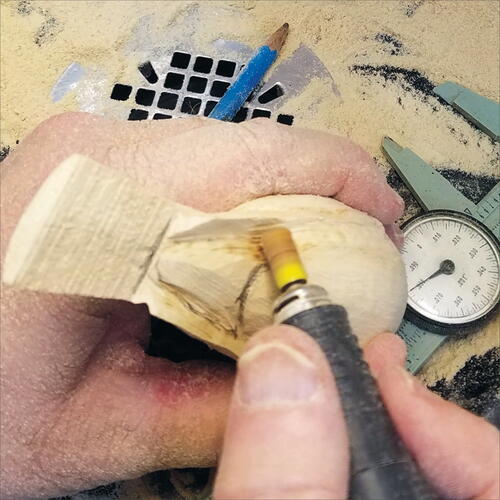
Use a round-top, fine Saburrtooth burr to begin carving out the neck from the head side of the neckline. Also carve out the basic shape of the beak area.
-
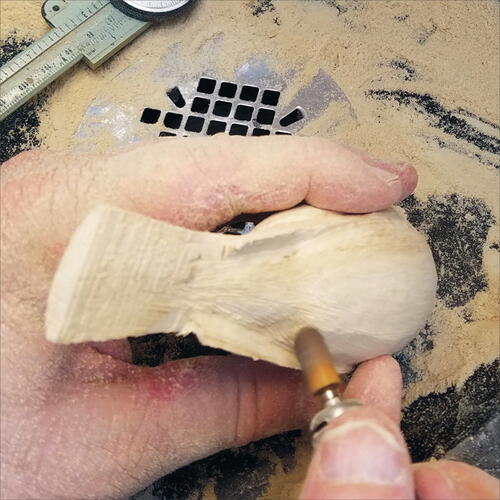
You will find that you will carve more off the sides than on the back of the head or throat. Check your measurement with your micrometer.
-
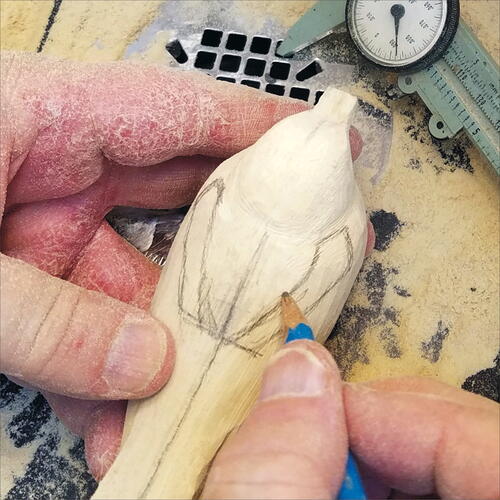
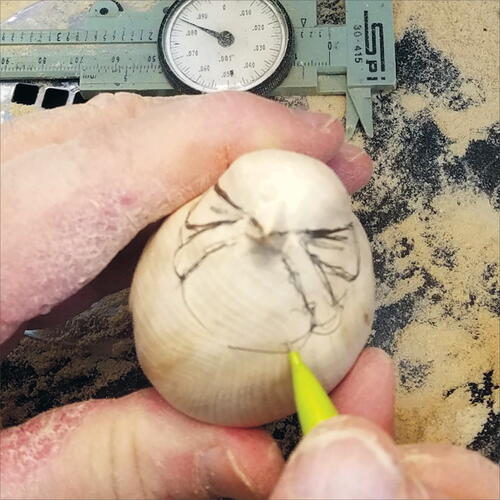
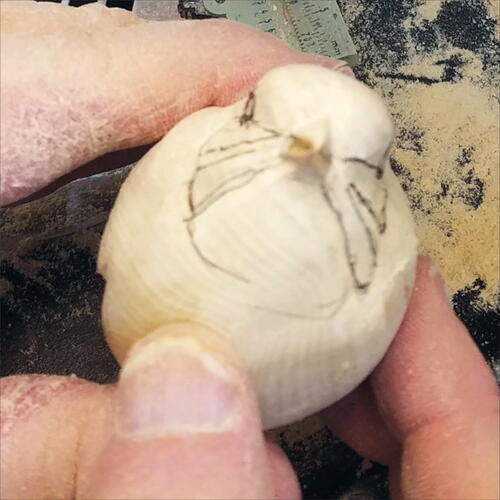
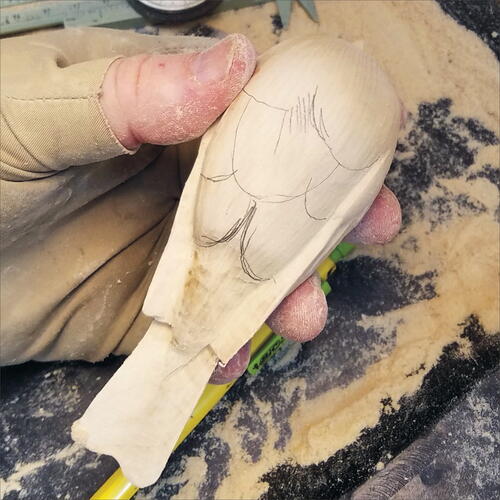
Reference your pattern and draw in the mantle (back) and the scapulars.
-
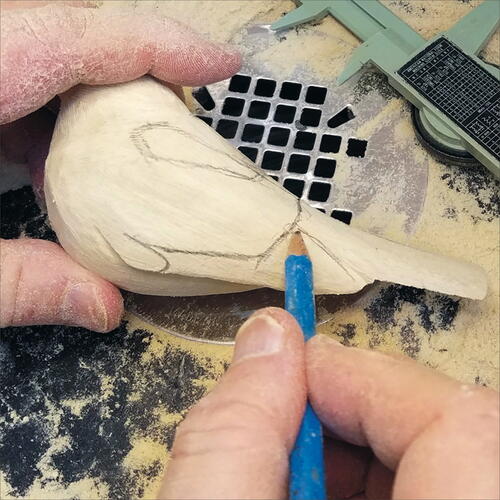
Again, using your pattern, draw in the area of the wing that holds the tertials, secondaries, and primary coverts.
-
With the flat-top, fine Saburrtooth burr, begin carving out the scapulars and the back. Be mindful that the top is a cutting tool as well and that you are carving both the mantle and the scapulars at the same time.
-
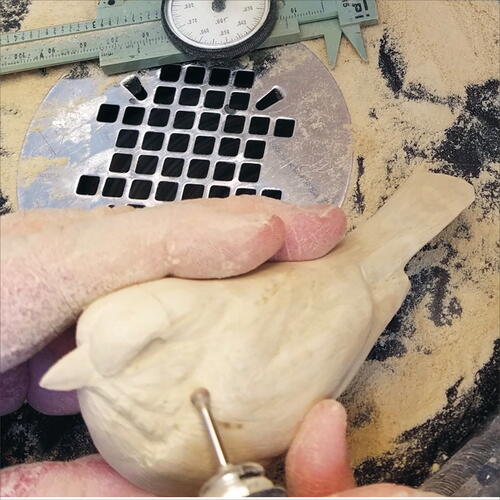
Carve out the area of the primaries and begin rounding off the edges of the top side of the tail.
-
Now that your primaries are taking shape on the top, turn the carving over and begin to round out the rump and define the underside of the primaries.
-
Using a round-top, fine Saburrtooth burr, begin shaping the rump as it relates to the side flanks. Be careful not to nick your primaries.
-
Now that the lower rump area is shaped, you can begin to thin out the tail’s underside. Take it down to a thickness of about an eighth of an inch. I usually give the underside a small arch.
-
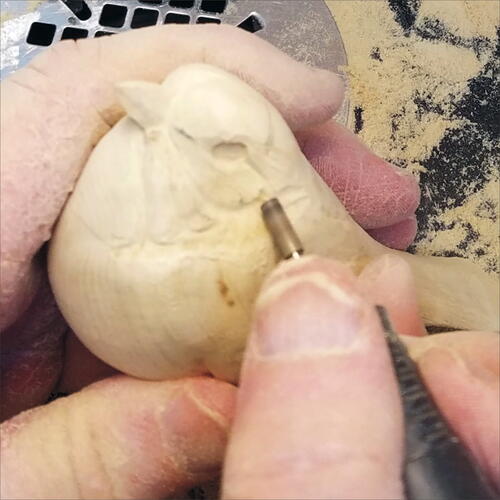
Switch to the flat-top Saburrtooth burr and carve out the brow. Also carve the side shape of the beak, keeping it slightly larger than the final size.
-
Now shape out the beak’s top profile, keeping it slightly larger than the pattern indicates.
-
Going back to the round-top Saburrtooth burr, start carving out the eye channel, making it almost flush with the beak and tapering out toward the back of the head.
-
Switch to a small flat-top diamond and carve in the small area on the underside of the beak.
-
Draw the line that separates the upper and lower mandibles. Draw another line down the center of the top of the beak. Carve from the gape on an angle to the top line on the upper mandible and shape it on both sides. You should have something of a truss shape when viewed from the front.
-
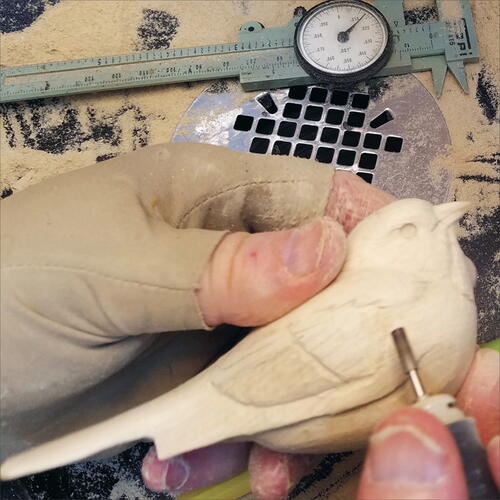
Your beak should now be the size shown on the pattern. Draw in your throat, malar region, and ear coverts.
-
The lines you just drew will help you get the location for your eyes. I usually measure from the front of the face or gape to the back of the eye, which is indicated on the pattern. Draw your eye placement as circles but do not fill them in. You need a vertical area for your eye to set properly and filling in the eye circle will not give you a clear view of your eye placement.
-
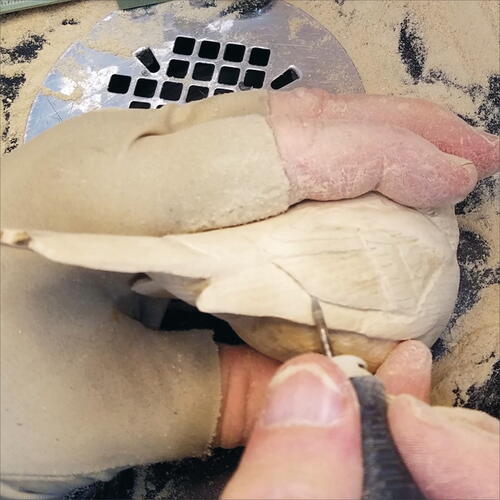
Using a larger flat-top diamond, lightly carve out the eye sockets and begin carving the lines drawn for the throat, malar region, and ear coverts.
-
Switching to a 1/8" diamond ball, lightly go over the valley-like cuts that the flat-top diamond created. Use the ball to taper and soften the harsh carved edges.
-
With the large flat-top diamond, carve out the tertials slightly and round the secondaries toward the primaries.
-
Continue to use this larger diamond to detail or clean up the underside of the primaries and rump area.
-
Create a slight definition from the secondary stack and the greater coverts. This is also a good time to add minor details to the scapulars and primary coverts.
-
Draw in the area of the “shoot” and other tufted areas on the breast.
-
Carve and taper on both sides of the tufts with the large flat-top diamond. You may want to use the diamond ball to again soften the harsh lines of the flat-top diamond.
-
Take a diamond flame (missile-shaped), and use it to define any undercuts, feather splits, or other details.
-
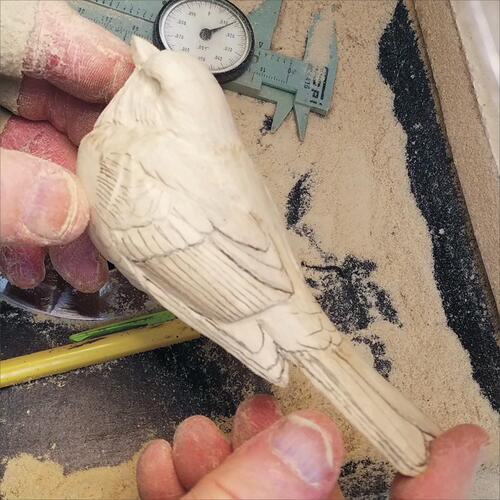
Referencing your pattern, draw in all the feather groups on the wings and tail.
-
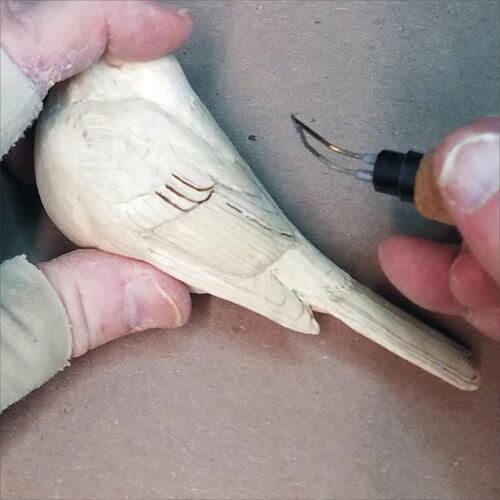
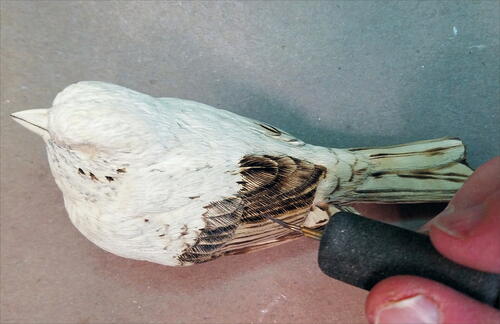
Take your Guge burning pen and set it to a temperature that will barely brown the wood. Starting with the greater coverts, use the flat part of the pen to iron down each feather edge from the top feather to the bottom one.
-
The picture shows all the places where I use the Guge burning pen. This includes the tail feather shafts. Remember to use the flat part of the tip and not the sharp detail edge.
-
Now use the straight detail burning tip. You can set it on its side and use the tip to create feather splits where needed. Remember, less is more.
-
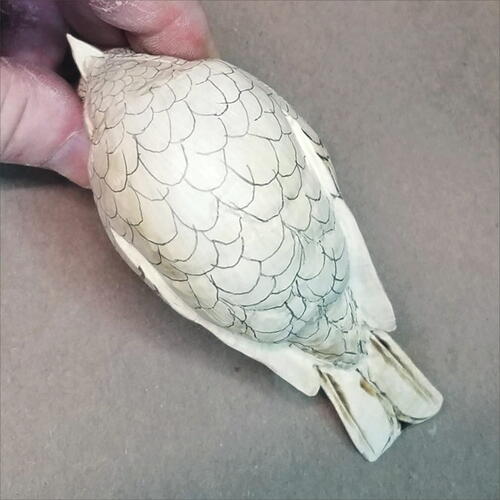
Before you start stoning the carving, you will need to draw the feather placement. Be careful to vary the pattern to avoid a lizard-like or fish-scale look.
-
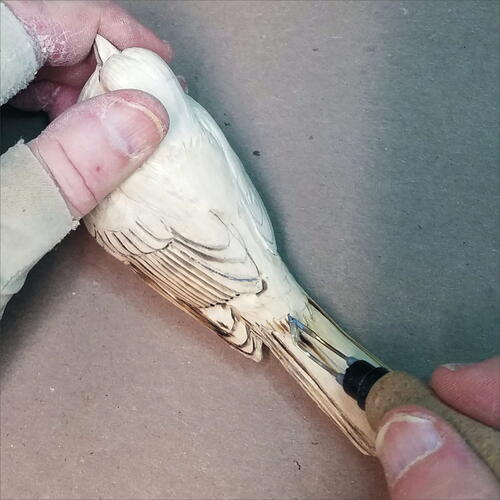
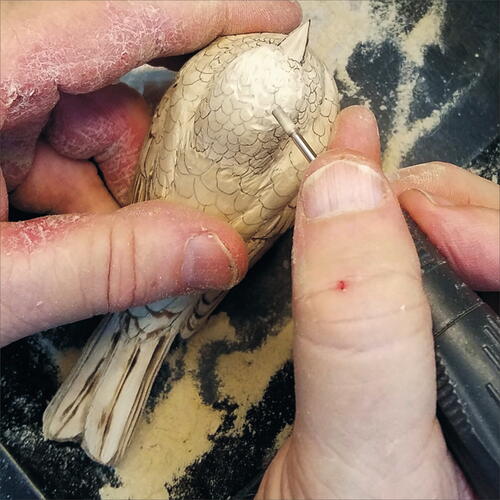
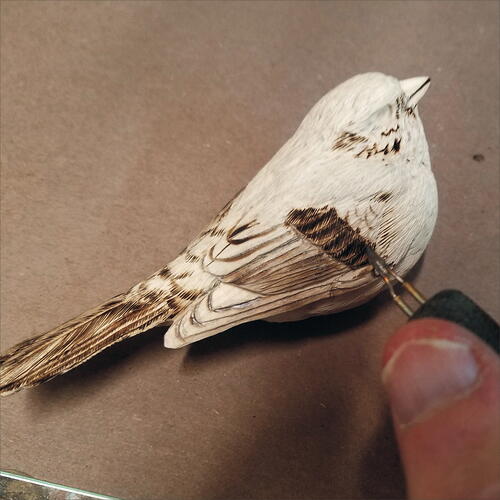
Working with a white stone about 1/8" thick, begin texturing the carving feather by feather. Working against rotation helps the tip dig into the wood, while working with rotation allows a quick, cleanly etched line.
-
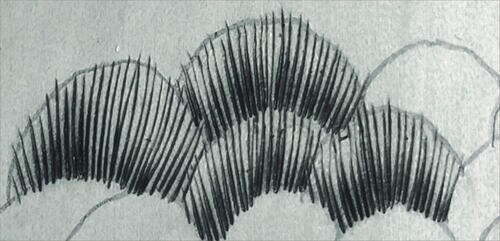
This closeup photo shows the pattern to use while stoning your carving, even if the feathers are much smaller or larger.
-
Sometimes while I am stoning a carving, I find a spot or two where I think a little depth carving may be needed. I will use a flat-top diamond for this purpose for easier digging. Keep the touch light.
-
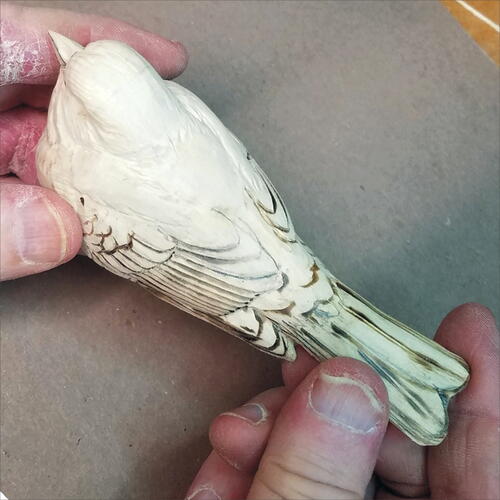
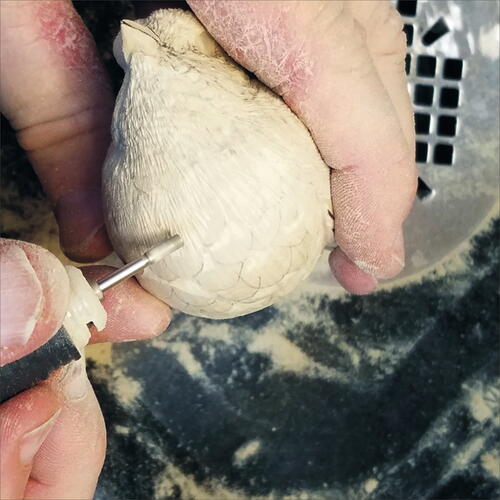
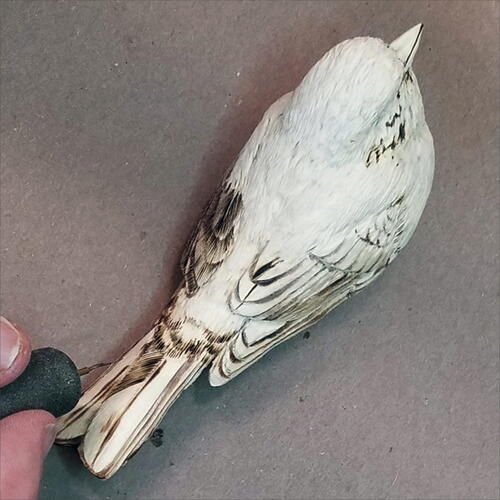
Use a small-skew burning tip to begin burning in the barbs of the firmer feathers that are in the wings and tail. The angle of the barbs is always toward the back of the bird.
-
Continue the barb burning in the tail and the other side of the bird.
-
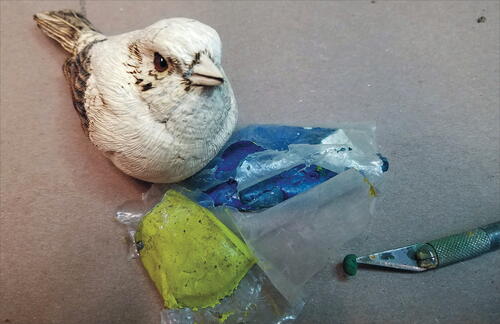
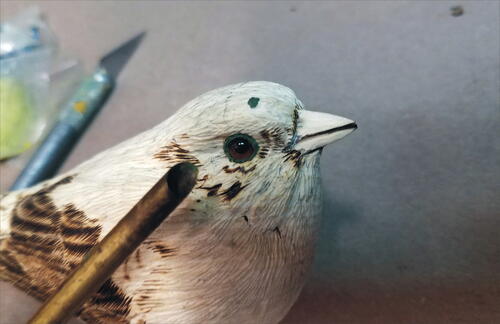
Use CA glue to glue in each of the 4 mm eyes.
-
Cut off equal parts of yellow and blue putty, then mix them together until you get a green color.
-
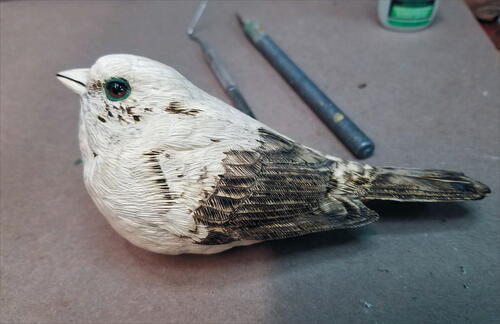
Apply a 1/2 mm ribbon around the eye to form the eye membrane. A 110 X-Acto knife and a ¼ brass tube about 4 inches long cut to a 45-degree angle are my go-to favorites to trim and shape the eye membrane.
-
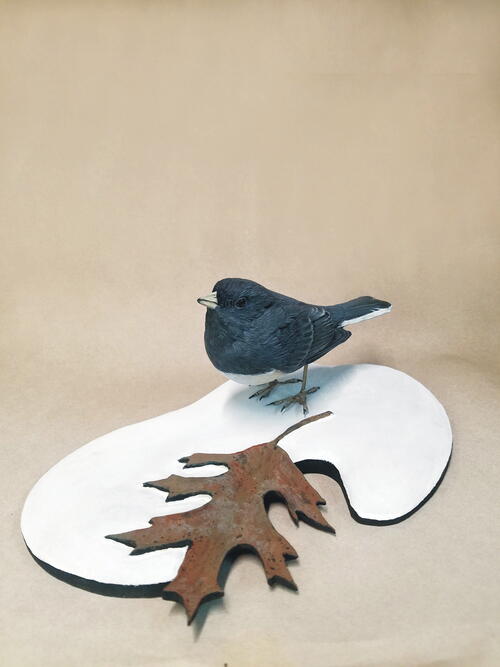
With the eye membrane shaped and the burning and the stoning completed, I set the carving aside for at least eight hours before applying any sealing or paint. In part 2, I will discuss the base or habitat, feet, and painting.


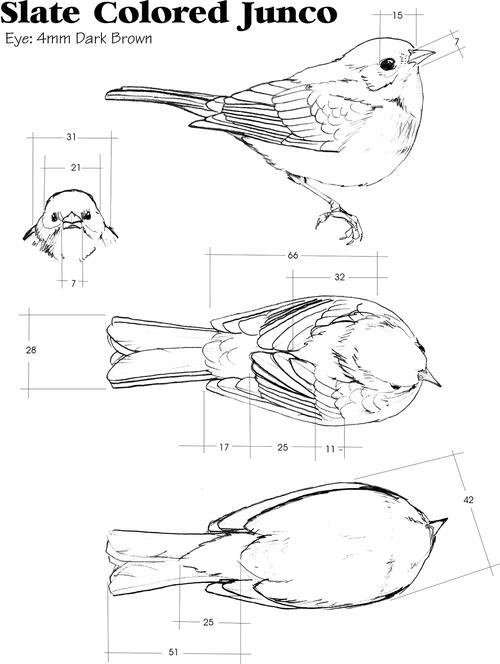
Slate-colored Junco (Life-size) By Tom Baldwin © 2021
All measurements in mm