The Dancing Sandhill Crane, Part One
Part One: Carving and Texturing
Sandhill cranes are some of the most graceful birds I have had the pleasure of watching. Flying, dancing, or bowing to feed—they make it all look so easy. Living in Saskatchewan, I have had many opportunities to observe these birds as they migrate through the province by the thousands in the spring and fall. Their mating dances and color variations have a wide range of presentations to inspire a carving.
It is best to make yourself familiar with some online reference photos of the dancing sandhill crane before attempting this carving. Although this carving will offer a fairly simple pose, I will open the wings slightly and vary the feet. The head will be turned to the left side and the beak will be closed.
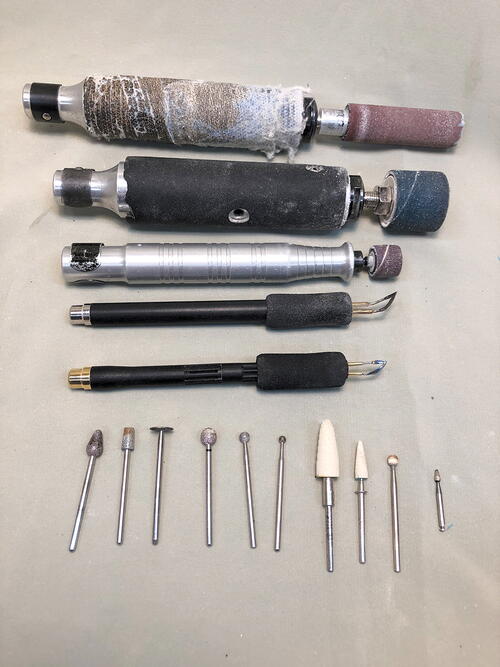
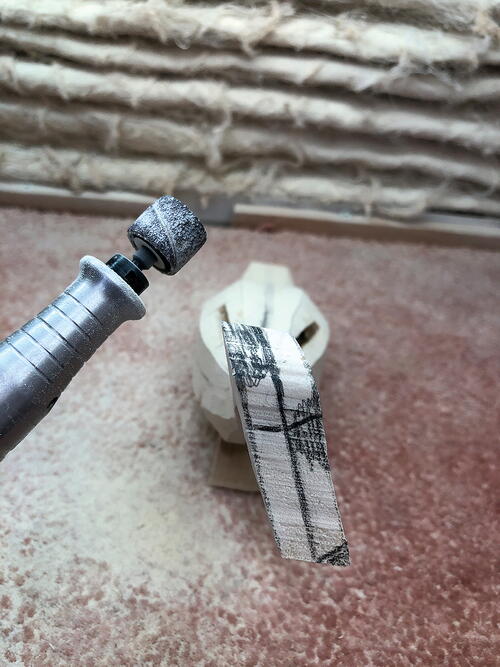
My tools for this project are a cushion sander, 1" sanding sleeve, 1/2" sanding sleeve, Guge feather pen, skew burning pen, ruby pear, diamond cylinder, round diamonds, cone sanders, and white texturing stones.
-
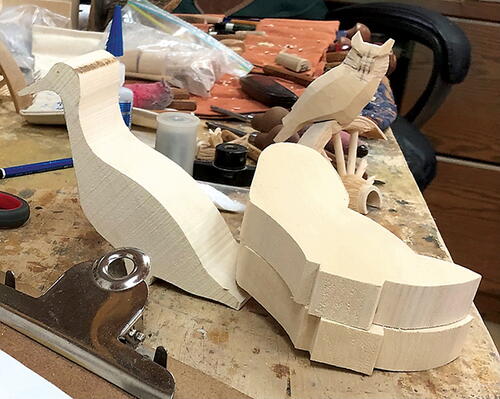
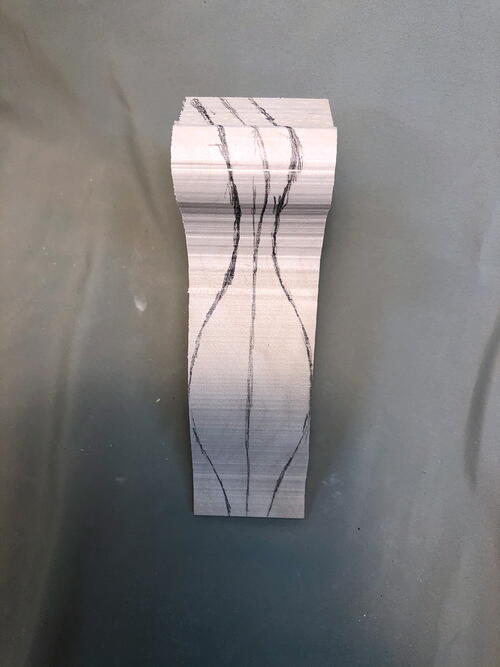
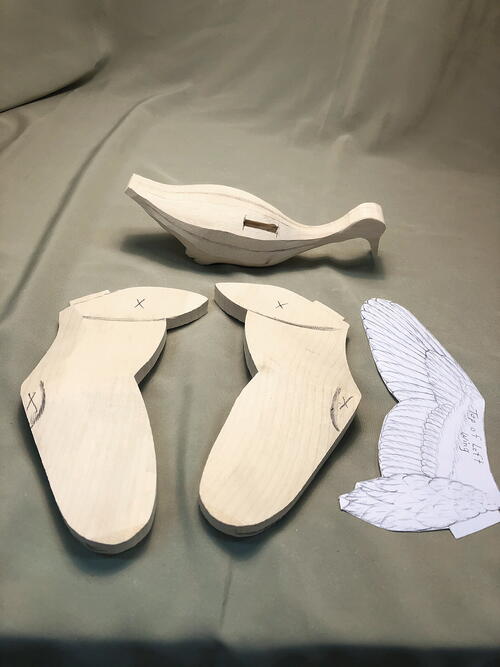
I am using tupelo for this project. A piece 1 inch thick for the wings allows for more movement in the presentation. My tools and bits are at right.
-
I begin by drawing the top profile on the body blank and removing the unwanted wood, leaving a little extra in the head and neck area. I carve with angles as much as possible, removing the same amount of wood on each corner. This gives me a well-balanced carving and a nice, round body.
-
Divide all four sides of the body into equal parts and then remove the corners (the darkened areas).
-
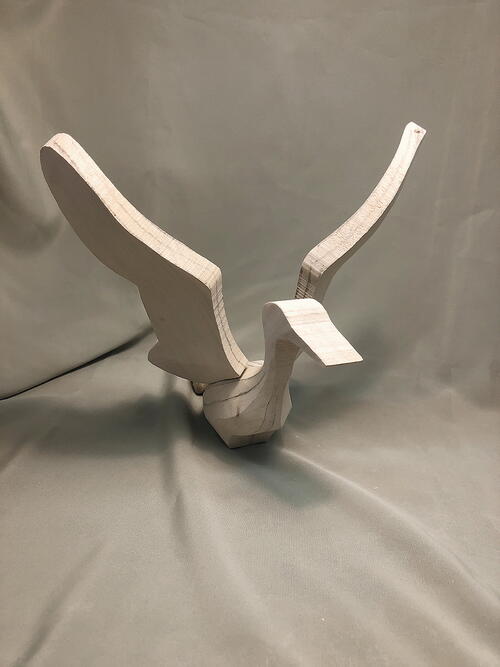
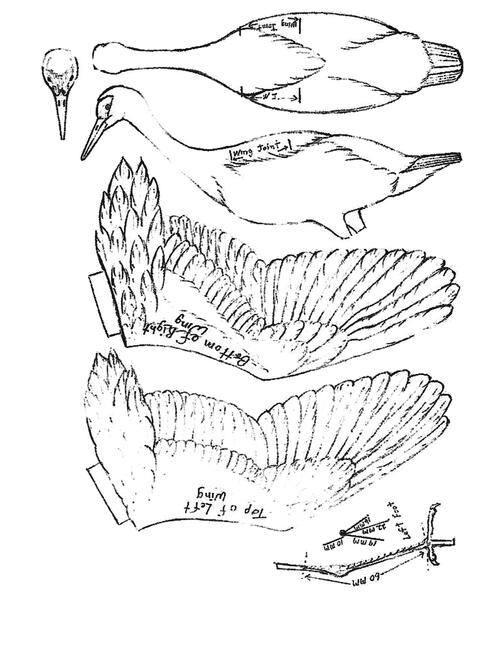
I have marked the wing to show the movement I want before carving each wing to a 24 mm thickness. This thickness will let me carve a concave bottom and a convex top for each wing.
-
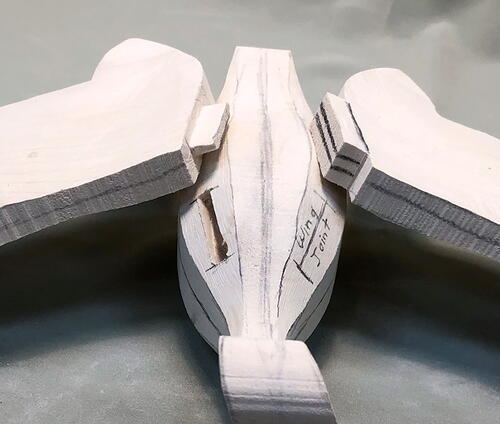
Remove wood from the top and bottom of the wings. I then mark the wing joint on the body and the insertion area on the wing. The insert of the wing is 25 mm x 5 mm. Making the angles of the wing joints in the body slightly different on each side will give the bird more “movement.” This is a mortice-and-tenon joint.
-
Use a 4 mm stump cutter to make the tenon joint. This is 1 mm smaller than the mortice and should create a more-snug fit. I want the wings to stay in place when I carve the wings and body as one piece.
-
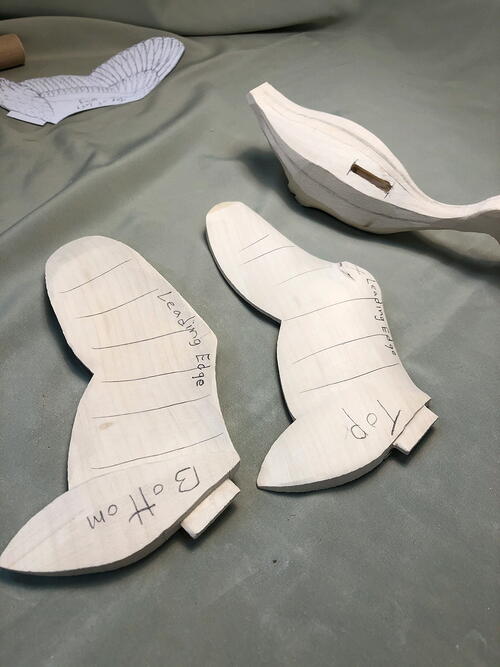
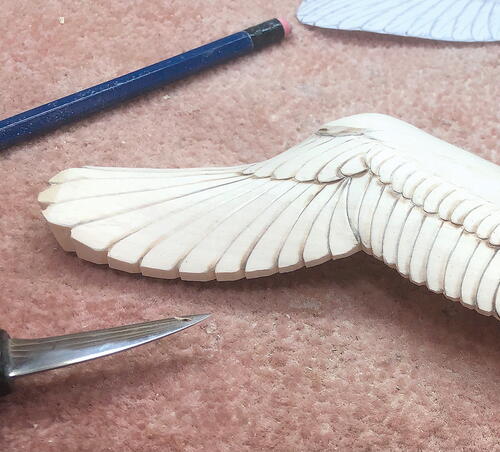
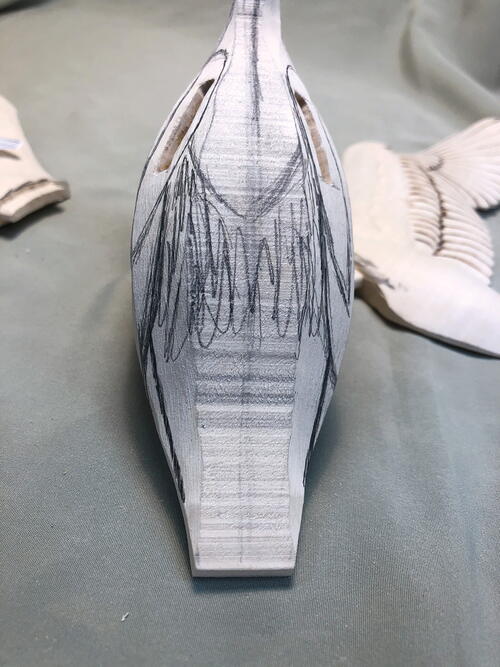
Shape the wings beginning with the top. Round the top, leading edge to trailing edge. Mark in the alula and scapular (marked here with Xs) and leave extra thickness there.
-
The wings are starting to take shape. Notice that I have left the tip of the primaries quite thick to allow for separation between the first four primaries during final carving. I next concave the bottom of the wings.
-
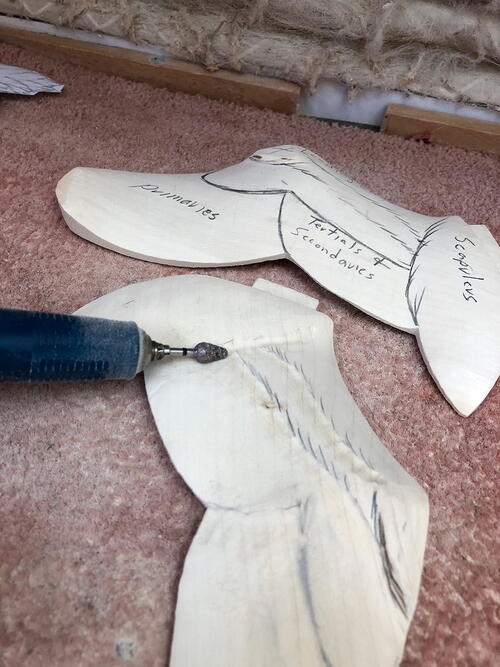
Use a ruby pear-shaped cutter to relieve each feather group and sand out the rough edges with a 220-grit cushion sanding drum. The feather groups on the wings are carved next beginning on the wing top.
-
Draw in the feather groups and relieve each group. You will use a mirror image of the first wing when drawing in the feather groups on the opposite wing, for both the top and the bottom.
-
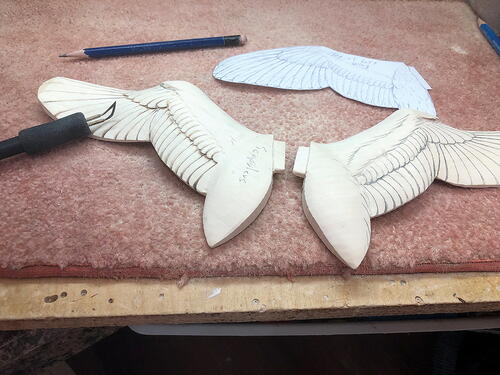
Once I have sanded the feather groups, I draw on the individual feathers and define them with a Guge burning pen, leaving the scapular area until I make the final connection between the wings and the body
-
Use a sharp knife to cut the trailing edge of the tips of the wing feathers. This starts to give the wing some feather definition and will also help to make doing the bottom of the wing easier. Lay out the feather groups on the bottom of the wings according to the pattern, using the same method as above.
-
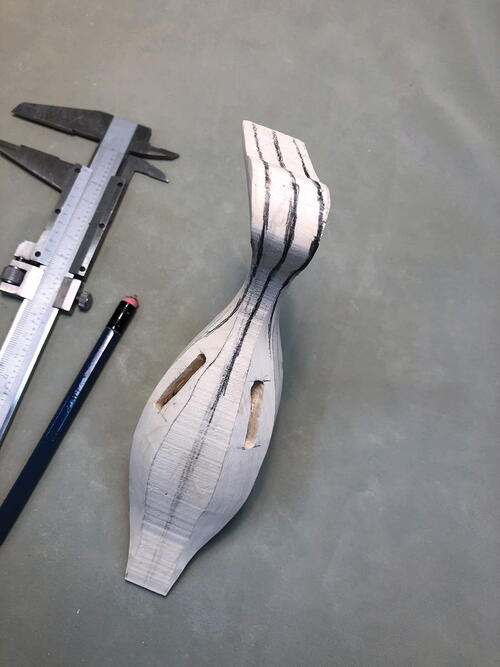
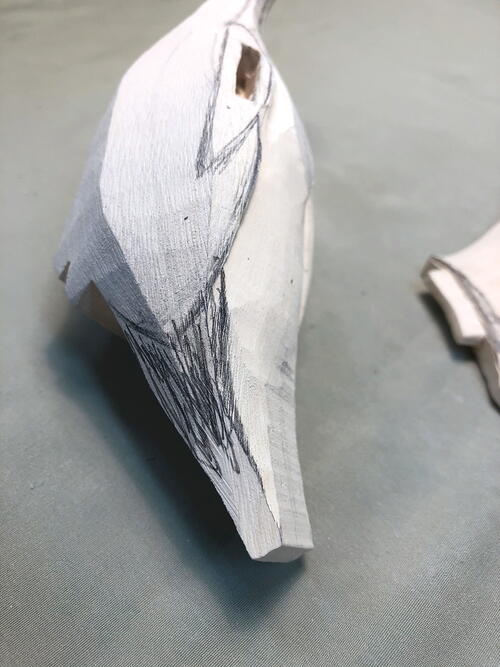
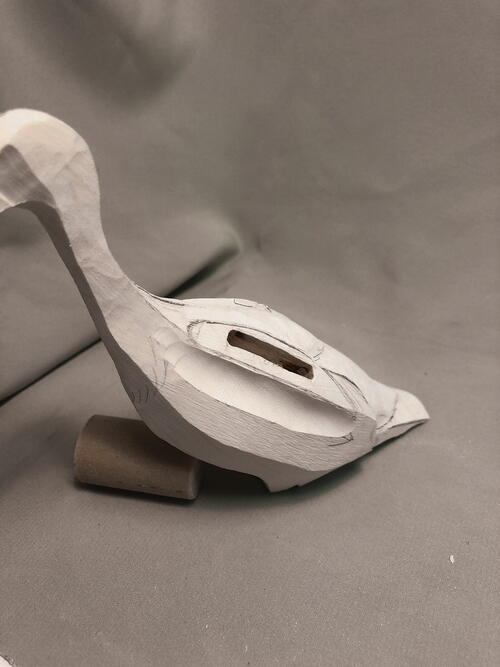
Move to the body and start removing extra wood, beginning at the head and moving through the length of the body. Leave 1 mm of extra wood on the carving for the final stages of sanding. Leave the beak alone for now. It will be the last thing carved, but you can remove the extra wood from the head and neck at this stage.
-
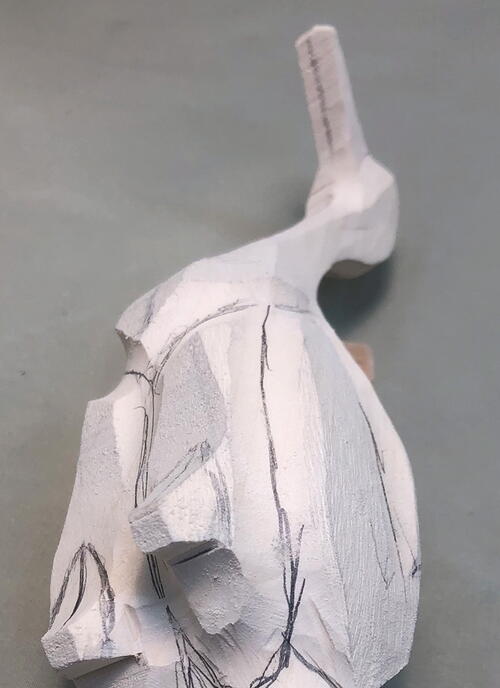
Continue to balance the head by removing the extra angles of wood from the head and neck. I have marked the high areas on the head in black. I do most of my basic shaping at this point with sanding drums ranging from 1/2" to 1 1/2", 200-grit.
-
It is said that a picture is worth a thousand words. As the head takes shape, you should be able to see that using this method makes it easier to balance the bird and have a nice round carving.
-
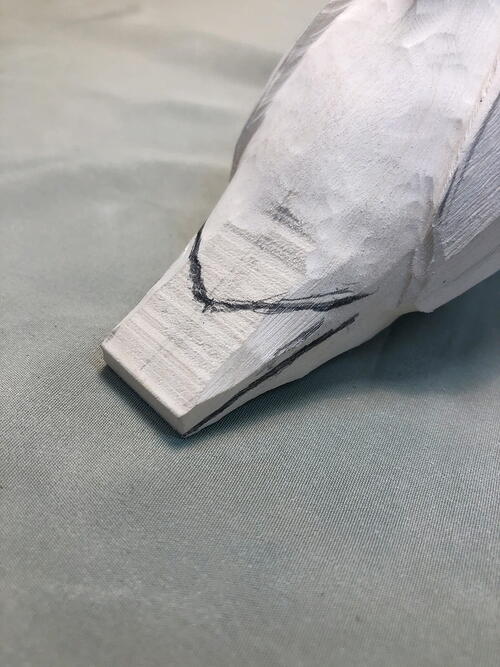
I now remove extra wood from the beak.
-
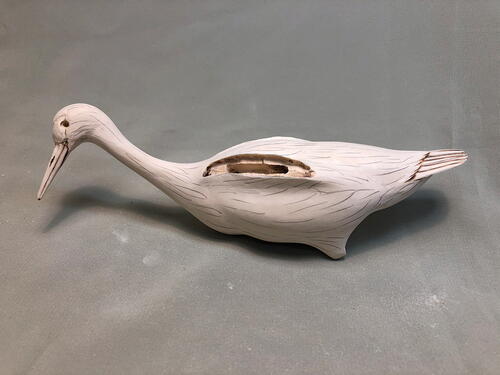
Insert the wings and mark out the line where the wings join the body, leaving an extra millimeter all around the wing joint. I don’t touch this area while shaping the body.
-
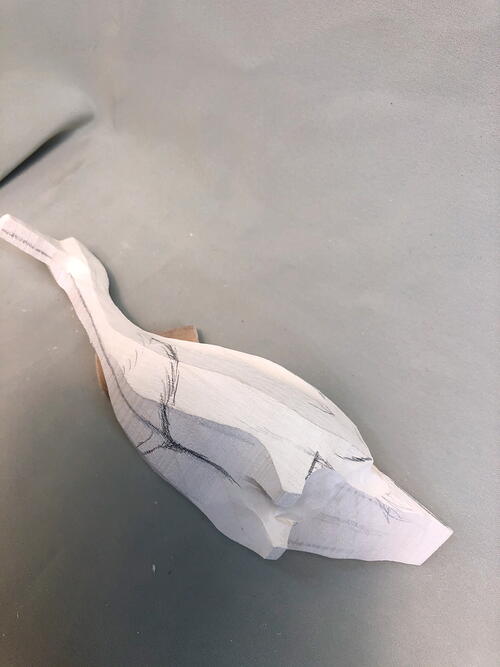
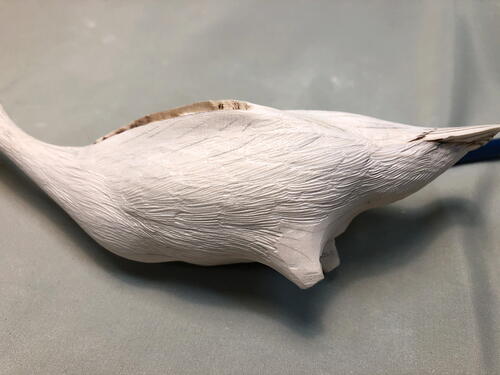
First, shape the cape area by removing wood from the back (the area marked in black about 5 mm deep). If you only round the body at this stage, you will end up with a nice bird but creating these feather groups is better.
-
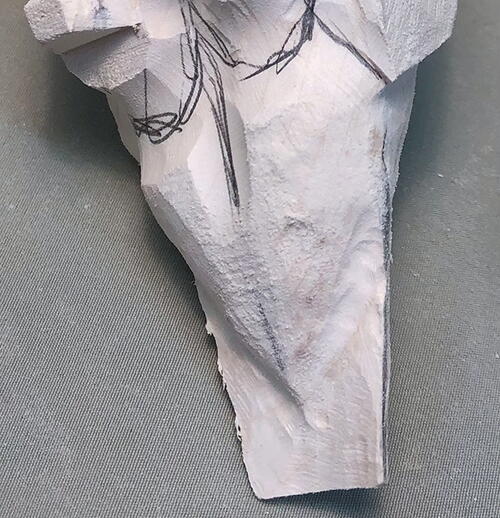
Create the side pocket by removing the side of the tail covert area, about 4 mm deep.
-
Now create the upper-tail covert area and tail feathers using a ruby cutter.
-
Make a groove on the marked line with a 1/2" sanding sleeve. This will start to round the body under the wing.
-
Mark where the legs will go and remove the marked wood using a 1/2" sanding sleeve.
-
Mark the neck and chest area and make a groove on those lines. This creates the body feather groups, giving the body some softness. Some carvers refer to this as landscaping.
-
Mark in the bottom of the tail and the edge of the tail. Use a ruby cutter to carve this in. Also mark in the bottom of the side pockets and lower tail coverts and define them with the sanding sleeve.
-
The body is starting to take shape. This is where reference material is very important, so that you can see details that a pattern cannot show well.
-
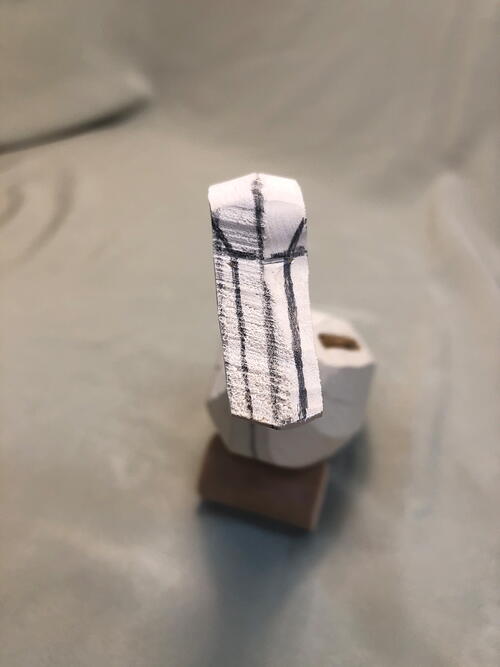
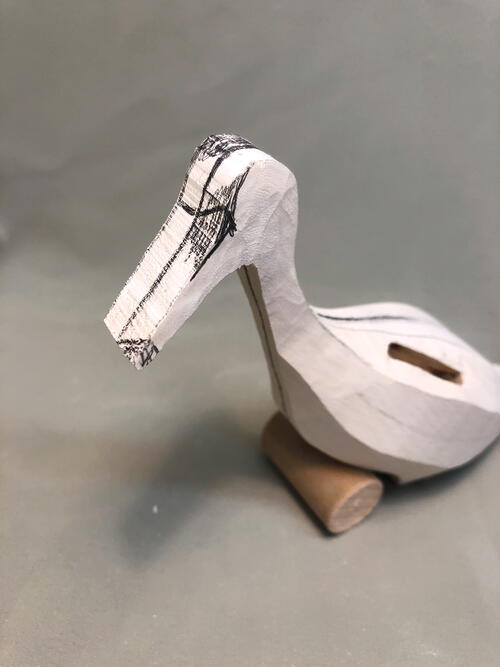
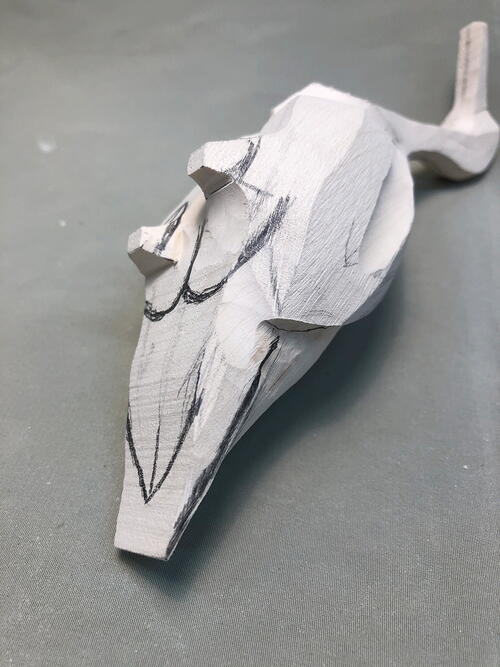
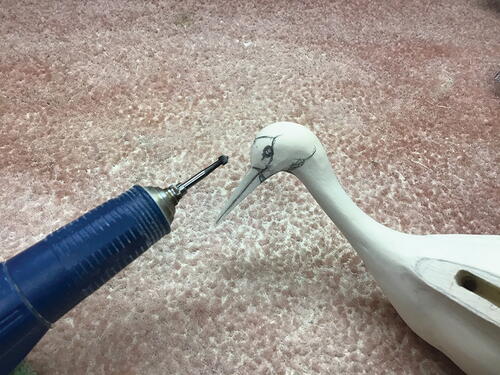
Sand the body with 220-grit paper and then shape the head and beak.
-
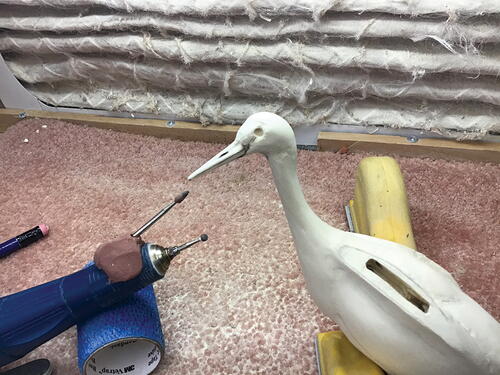
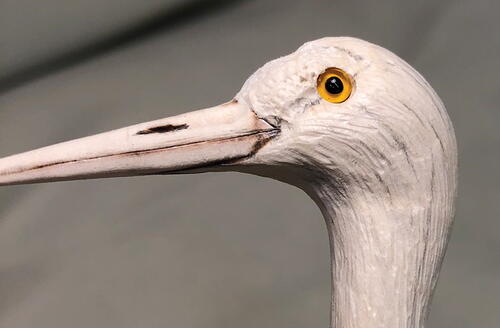
Mark in the beak and eye channel, then drill the eye hole with a 3 mm eye bit. Shape the head and eye channel as well as the red patch on the forehead. The head and neck are now ready for texturing.
-
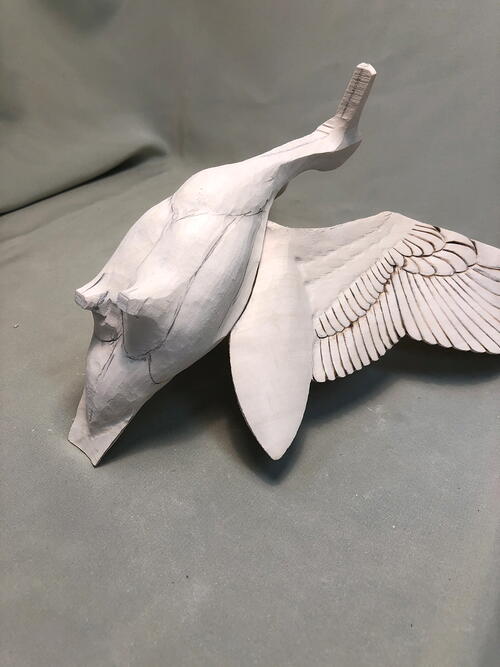
Shape the wing joint for final fitting to the body. Mark the body where the wings are to go and remove wood 2–3 mm deep into the body so that the wing will fit snugly into place. Insert the wings. They are ready for texturing.
-
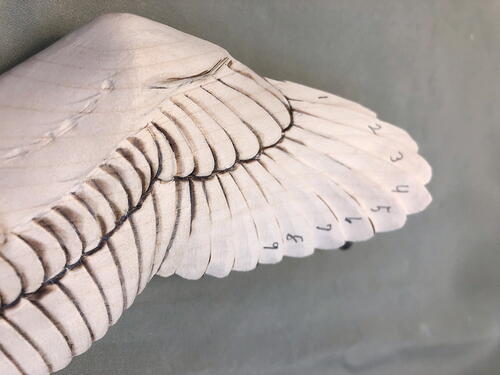
Shape the alula and primary feathers. Step down the primary feathers first, using a 1/2" sanding sleeve. Start at the top of the wing with the first feather (marked “1” in the photo) and continue down the wing. Do the underside of the wing as per the pattern, starting with the #8 feather stepping down to #1. Use the 1/2" sanding sleeve to do the initial step down and clean up the feathers with the ruby stump cutter. Use the ruby disc to create a separation at the end of the feathers. I use a Guge burning pen for the final cleanup and to do the feather quills. Raise the alulae by undercutting them with a disc diamond cutter. Burn the feathers on with a Guge burning pen.
-
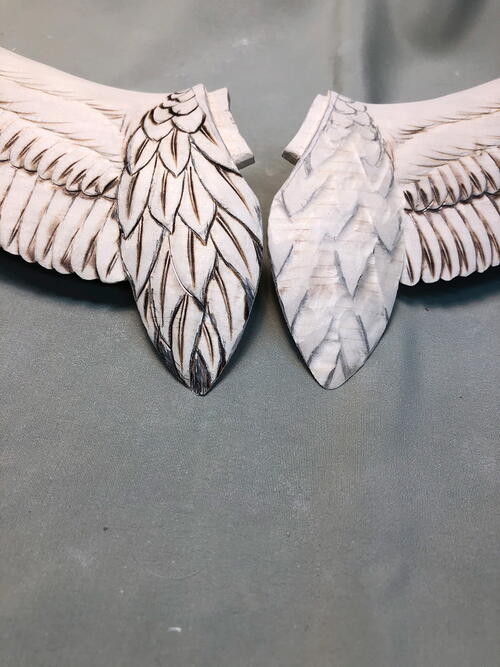
On the scapular feathers, start with round ends and progress to longer, pointed feathers. This group of feathers will hang over the bird’s rump and the tail when the wings are closed against the body. Relieve the individual feathers in this group with the ruby pear shape, then sand them and outline them with the Guge burning pen.
-
Under the wing, the scapulars are concave and shaped to match the top of the wing. Draw on the tail feathers and burn them in.
-
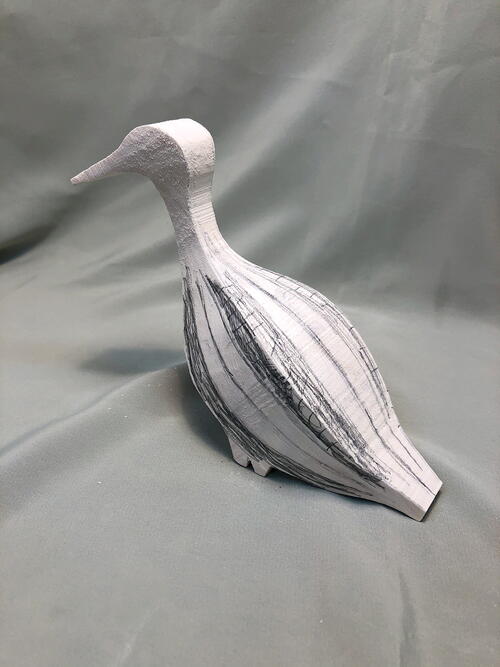
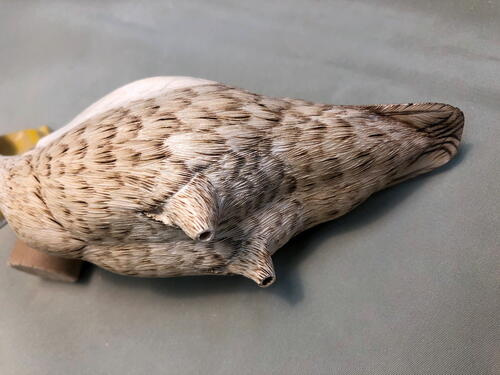
The carving is now ready for texturing using a small white stone. Draw flow lines on the body to follow when texturing. Leave 4 mm around the wing joint and the legs for final carving later. Once you’ve textured the body feathers, burn them with low heat. Then turn the heat up slightly to create splits in the individual feathers. Don’t forget to texture and burn the feather portions on the legs.
-
Texture the covert feathers on the top and underside of the wings with a small white stone, then burn the feathers.
-
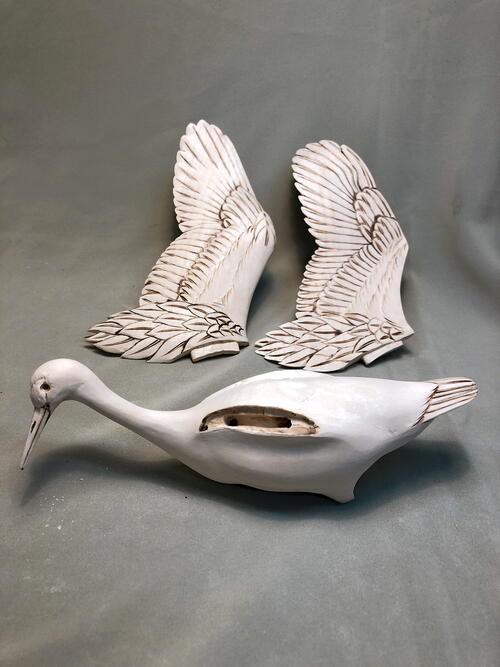
Now glue in the wings with five-minute epoxy. Fill the space in the wing joint with Apoxie Clay and let harden for 24 hours, then sand and texture the joint. With the feathers all burned, seal the carving with a mixture of two parts lacquer and one part lacquer thinner. This should be done with three successive coats until the carving is slightly shiny. The carving is ready for paint.


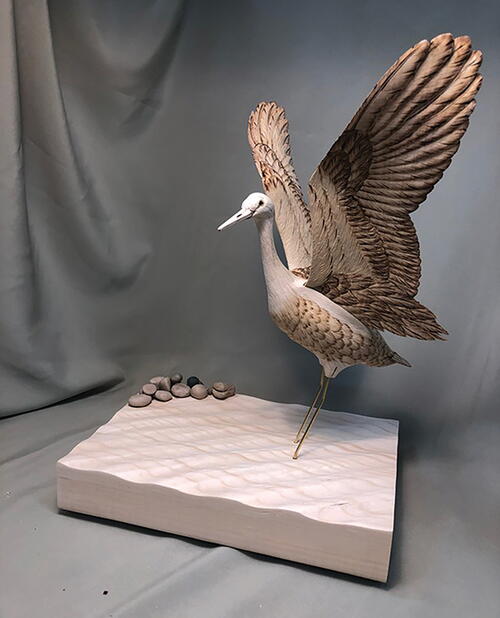

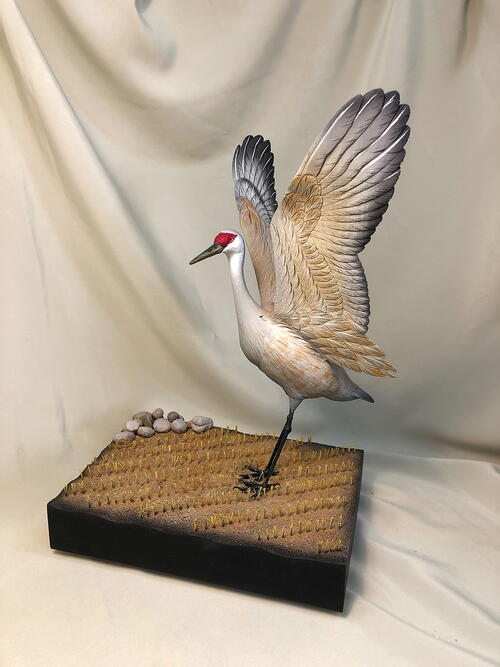
Sandhill Crane
-
(Miniature, Sized at 85%) By Robert Lavender © 2021
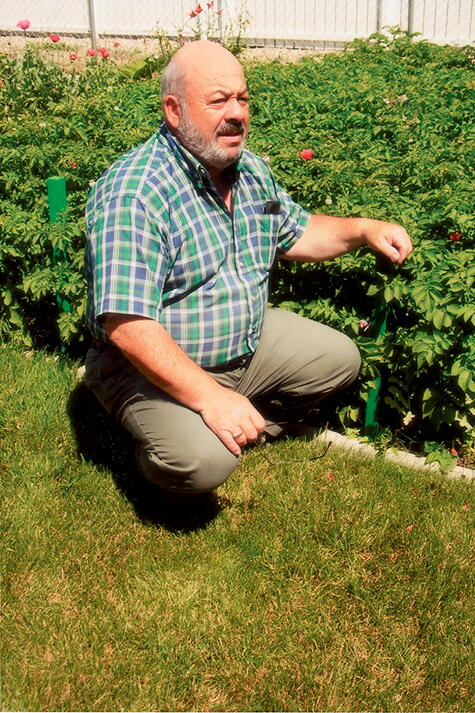
Bob Lavender
-
Bob Lavender is a retired Canadian Forces military cook residing in Saskatoon, Saskatchewan. He has been carving competitively since 1987 and has been a consistent blue-ribbon winner across North America.