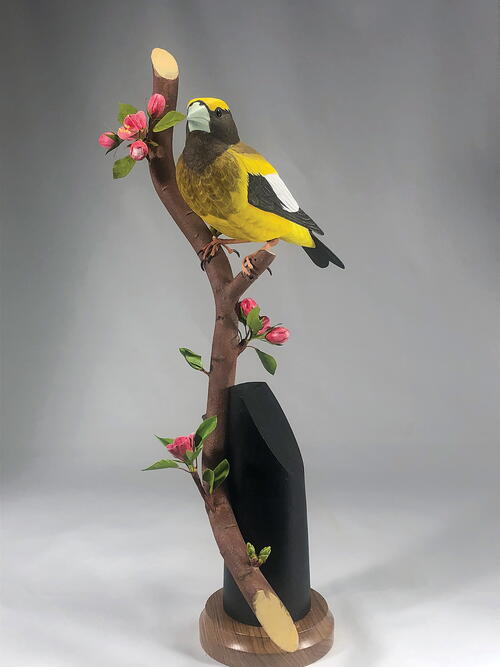
Evening Entertainment, Part Two
Part Two: Painting and Habitat

The flashy colors of the male evening grosbeak should not intimidate even a novice carver. Not a lot of color mixing is required to get a realistic result. The separation between the colors on most of the grosbeak is fairly distinct, with only a few areas requiring blending where two colors meet. Two of these areas are the back/upper-tail coverts, where the colors blend from yellow to black, and on the cape/scapulars and breast, where the greenish brown fades to yellow. Otherwise, the colors mostly follow entire feather groups. One exception is the white wing patches, where some feathers of the secondaries and greater coverts are both white and black.
If you are not confident blocking out the colors without lines to guide you, I recommend using a watercolor pencil—yellow for the eye stripe and brown for the wing patches. The water in your paint will blend the pencil lines and they will disappear. You should keep the lines light to avoid scratching your gesso coat and to ensure that the lines will dissolve with the paint.
It is important to spend a lot of time studying reference photos to ensure accuracy. I notice that the yellow eye stripe can vary quite a bit among individual birds, but there is almost always a thin band of black at the forehead separating it from the bill. After studying doz-ens of close-up photos, I noted that the white wing patch includes the three tertial feathers and at least the next two secondary feath-ers. The third secondary usually has some white but often is patchy and not solid white. The white also extends to the top four greater secondary coverts. The fifth covert usually is both white and black with the white portion to the rear of the feather and a sharp delinea-tion between the two colors. The second photo in step 1 illustrates these color divisions.
Read NextRose-breasted Grosbeak Part One


