A Cork Red-Breasted Merganser, Part Two: Painting
The carving was reasonably simple, but we'll paint this decoy with a little more detail.

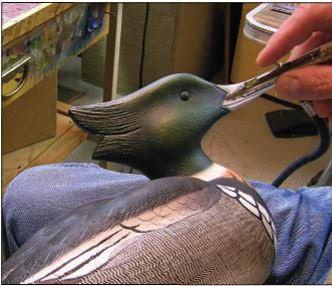
I make a mid-tone green for the Head Airbrush Color and use it to apply some highlights over the crest, cheeks, crown, and neck.
As a beginner, you will most likely find it much easier to carve a decoy than to paint it. That's just the way it usually goes. Painting will come naturally to you if you're lucky. If not, then practice, practice, practice.
When using acrylics, like I will be in this demonstration, you'll need just a couple of containers of water for cleaning your brushes, thinning your paint, and keeping your brushes damp as you work your paint. You can use paint right from the tube and mix the colors on a Styrofoam plate. Mix your colors with a palette knife, then dampen your brush with water and wipe off the excess on a paper towel. You are now ready to work the paint into the brush and onto the decoy.
If you prefer to use oil paint, your thinning agent would be mineral spirits or turpentine instead of water. I personally like using acrylics because of their fast drying time, but I think oils can give a more natural-looking decoy and allow you a lot more time for blending. The choice is yours.
Carving this decoy couldn't be simpler, but I will paint this red-breasted merganser with a little more finesse than what you would normally find in a hunting decoy. My colors will not be any different, but I want to demonstrate some hand blending and a little airbrushing and a little toothbrush spritzing.
This article is from the Summer 2011 issue. For more information on our issues, check out our issues page.
Read NextBeginner's Notebook: My Crow Rig


