A Flock of Labradors
Making an extinct species come alive, in an old-fashioned way.

Bill Kennedy grew up hunting and making decoys on the Chesapeake Bay. He worked as a youngster with carvers from yesteryear in Havre de Grace and Charlestown, Maryland. He is a full-time carver and works in the traditional style of Maryland’s Eastern Shore and Upper Bay using the same hatchet, hand tools, and shaving horse techniques he learned as a boy. He now lives in Southlake, Texas, with his wife and two young children. You can find Bill’s work in several sporting art galleries in Texas and the East Coast.
Tucked away in a home in beautiful Bel Air Maryland is one of the most unique decoy collections in the country. The home belongs to Frank Jonczak, a well-known personality in the national decoy carving community.
Frank grew up in Maryland and was interested in decoys, so it is natural he would collect birds hewn by the Maryland carvers of old. In the last decade, however, he has divested himself of some of his Upper Bay birds to make room for a new his passion: Labrador ducks and Labrador duck decoys.
Labrador ducks went the way of the passenger pigeon sometime around 1875, when records say the last known specimen was taken and preserved. Only a handful of taxidermy birds now exist in museums around the country, but Labradors remain alive and well in Frank’s home. Numbering in the hundreds, Frank’s collection includes Labrador decoys by virtually every prominent carver in the country. A listing of the people who have carved Labradors for Frank would read like a virtual who’s who of the nation’s carving community.
A few years ago Frank and I talked at the Easton Waterfowl Festival in Maryland. He asked me to make him a pair of “dead hang” Labradors. Some months later, Frank asked me to add some passenger pigeons to the piece. When I delivered the finished work at the festival the next year, Frank asked me to make a pair of contemporary antique gunning Labradors. I worked up a pair of birds but felt unhappy with them. I told Frank I was cutting out a second pair. He asked me to finish the first pair as well. I wasn’t happy with the second pair either. I really wanted to make something different for such a diverse and large collection. I decided to put the original four gunning decoys on hold and began to design what I considered to be an “Audubonesque” piece. I have long loved the way John James Audubon positioned the waterfowl in his paintings. They look as if they are in impossible, awkward poses or are flying too sharply downward. His birds crowd each other in mid-flight, and sometimes look like they are about to collide.
A few years ago I made a swan in one of these Audubon flying positions and was pleased with the result. So the die was cast. I decided to make Frank a completely unexpected piece, one I hoped would be unlike anything in his massive collection. This was a bit risky, but I knew the design and preparation for such a piece would be energizing and exciting. I told my wife, also known as “higher headquarters,” what I had in mind. She was a bit worried about my working on a large, time-consuming piece that was completely unlike what Frank had requested. She asked, “What if he doesn’t like it?”
“Well, they could always be repainted as mallards,” I answered. Onward with the project.
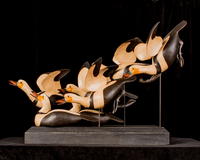
I decided to put two birds on the water and four more flying in—or crashing in, per Audubon. The designs were quite simple, with stylized outstretched wings and—as Audubon might have painted it—the birds on the water looking upward. In the end I added a fifth flying bird to get the look I wanted, so the bird bringing up the rear joined the group when the project was nearly complete. The piece now had seven life size Labradors.
This article is found in Wildfowl Carving Magazine’s Summer 2015 issue!
And, in a web-only exclusive, see a gallery of more Labradors from Frank Jonczak's collection right here.
Labradors
Click on each photo to enlarge it.
-
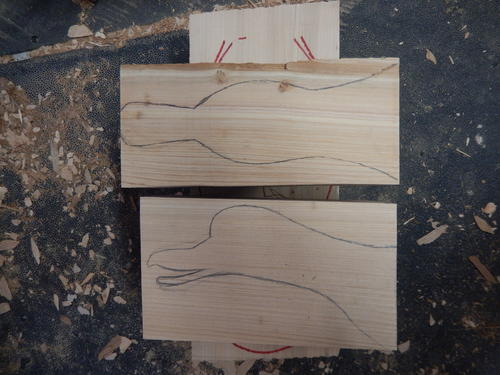
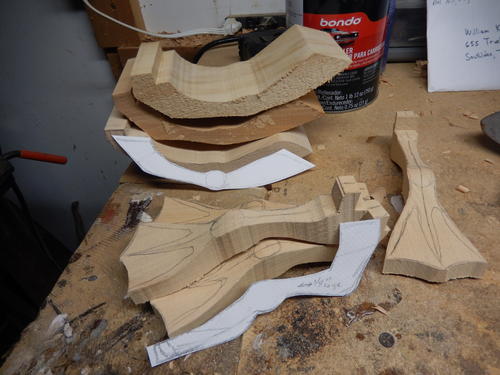
These photos give you the top and side patterns for the flyers, bodies and heads. I made several of the birds with open bills.
-
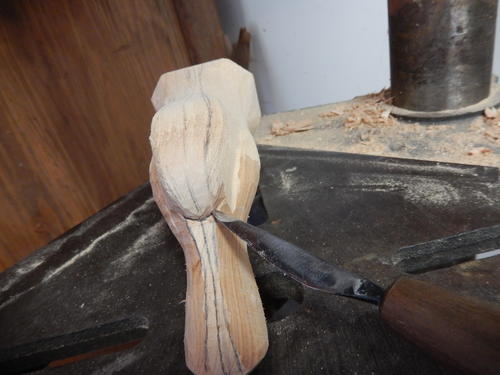
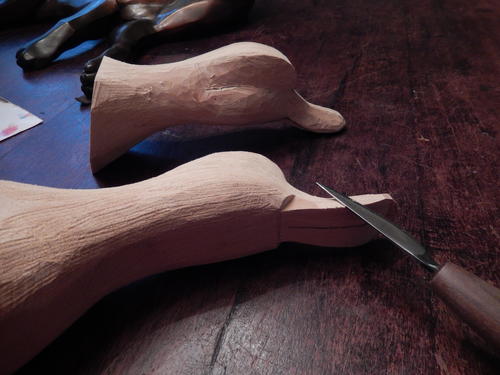
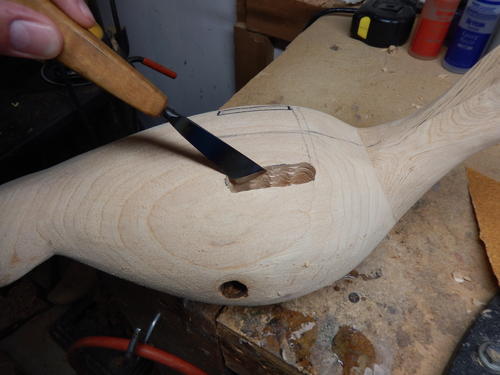
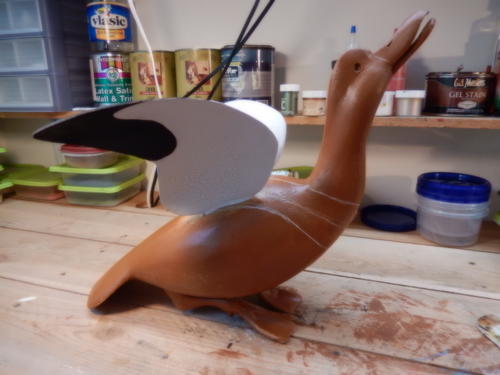
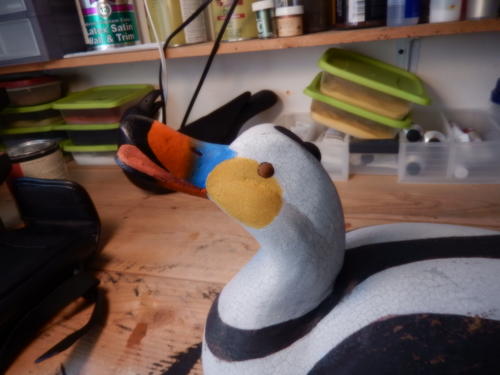
After cutting out the heads, I worked them down with traditional tools and added a bit of detail to give them some attitude and character.
-
I detailed the heads with a unique scallop blade, as well as rasps and a Cajun-style knife.
-
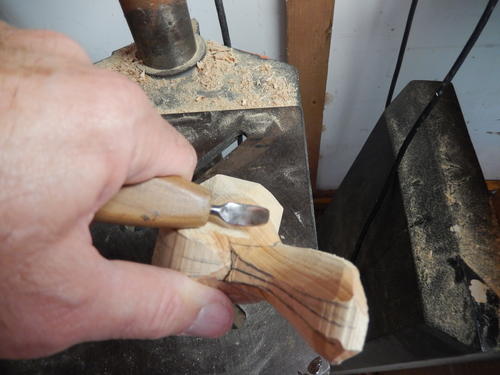
To work down the bodies, I used draw knives, spoke shaves, and rasps. I gave a bit of extra attention to the tail shapes, as they would be so prominent in the flying birds.
-
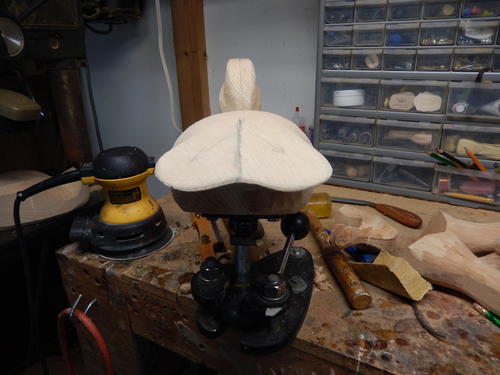
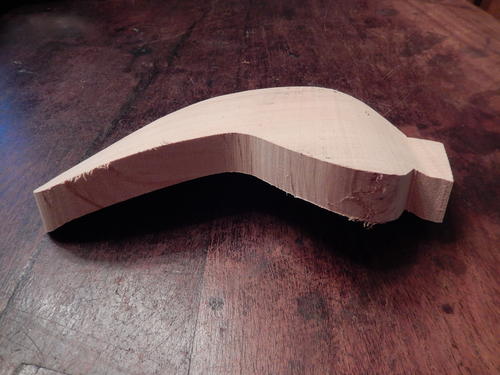
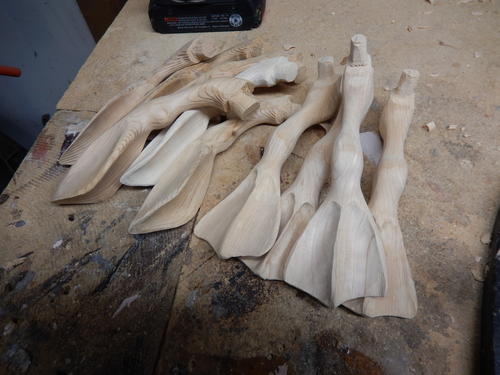
Wings, wings, wings . . . . This project was defined by the wings on display. I decided to do them in a very simple, stylized manner that I hoped would be pleasant and easy on the eye. I added no feather detail and painted with simple, gunning style patterns. I gave the wings a bit of a “cup” shape to add contour and interest, and left them relatively thick so they wouldn’t be too fragile.
-
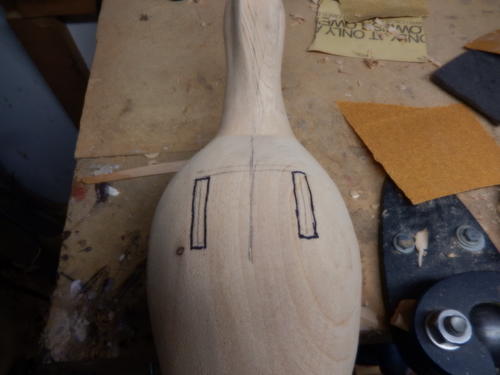
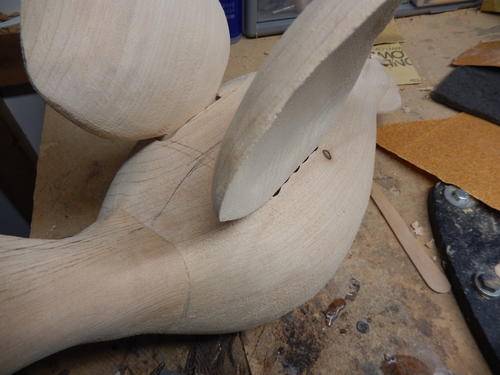
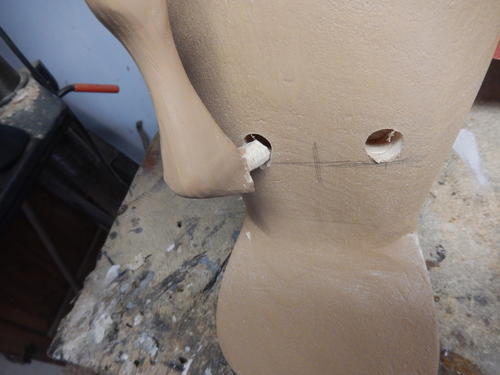
I laid out the wing insertion positions on the body blocks as shown here, and then cut the channels to accept the wings to a depth of about three quarters of an inch. That made a good, solid connection.
-
To insert the wings into the bodies, I drilled out most of the wood from the channels, and then finished up by squaring them with chisels. The cavities were just big enough to receive a stub I left on each wing for insertion into the body blocks.
-
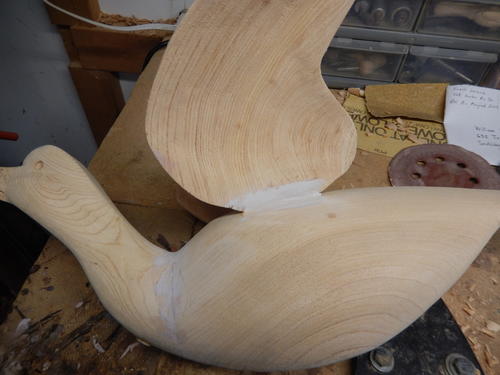
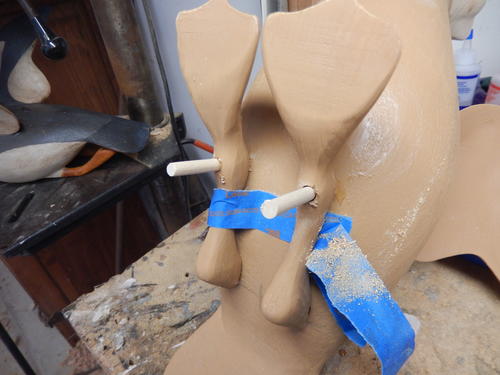
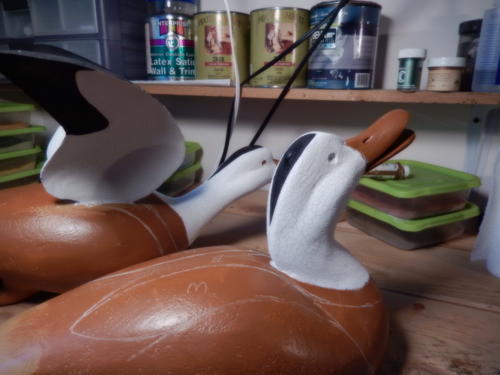
I set each wing in place with epoxy and then filled the remaining gaps with epoxy wood filler to create a smooth transition from the body blocks into the flow of the wings. (I’ve already attached the head on this duck—see the next step for details.)
-
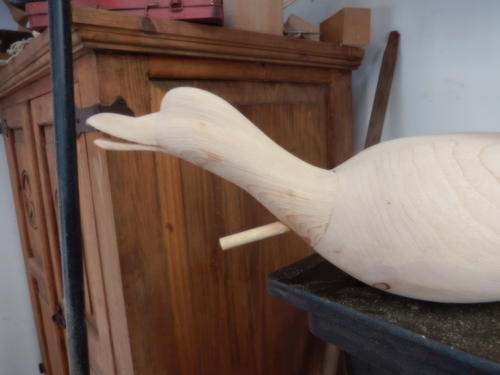
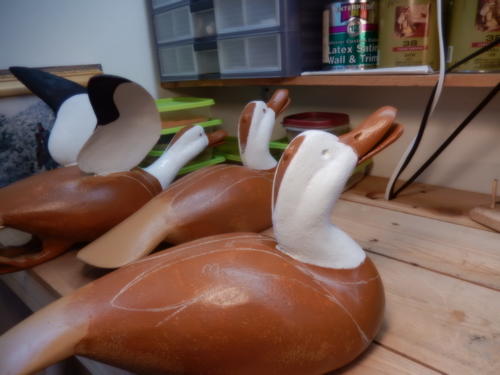
I drilled each of the heads for dowels and attached them to their bodies with three eighths dowels and epoxy. Where possible, I also set dowels through the base of the necks and into the bodies (second photo).
-
Five flying birds required a lot of feet. I made feet in two positions. Some had a forward look, as if splashdown were close. I made other feet to trail under the tails. The patterns were very simple in design, and I cut the feet from wood with enough depth to allow me to work “between the toes” to give them a bit of realism.
-
Before the feet were inserted, I primed and sanded the birds down. After the feet were set in place, I was ready for additional priming and some base paint color.
-
I decided to paint these birds in what I would call block colors, to reflect an old-fashioned, simple paint job— almost gunning paint. I decided to use Old Fashioned Milk Paint, which is mixed from powder. Once applied, it dries like concrete and it sands well, which helps soften the transitions, from black to white, for example. It is gritty while you paint, like painting with mud or glue. The final results make it worth the effort.
-
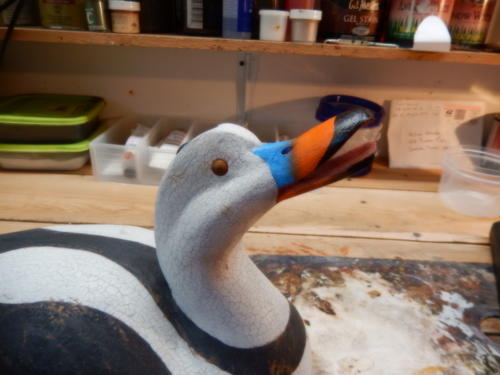
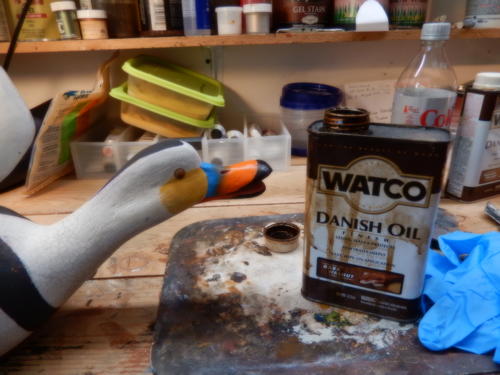
For the heads, I did the base colors in Milk Paint and then switched to Old Holland and Mussina oils for some blending and depth of color. I decided again to go with the “less is more” approach on the cheeks, opting for blocks of stylized color in circular patterns consistent with the gunner paint scheme on the rest of the bodies. When I got to the bills I did do a bit of blending in oils. When the birds were complete, I gave them a couple of rubdowns with Watco oils to give them a bit of mellow patina.
-
When I had finished all the birds, I did some mock ups and adjusted the flyers’ positions to achieve the desired look. I mounted the flyers with ¼" steel rods blued with gun metal blue and set into the base to a depth of about three inches. Once I was satisfied with the composition, all I had to do was make the delivery in Easton and pray that Frank would be pleased with the unexpected. His broad smile gave me his answer. Frank is a terrific fellow and you are in for a treat and a wonderful experience if he asks you to carve a Labrador or two for him.


Read NextQuetzal III