Pacific Brant, Part Two: Painting
In the final part of the series, Del explains how to paint a Pacific brant.

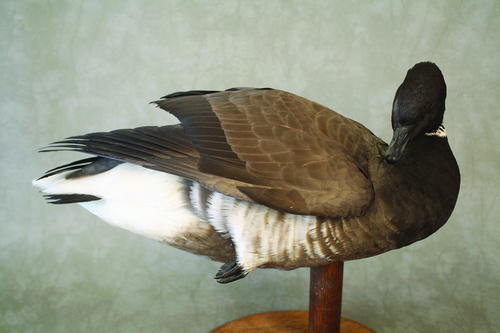
This is the mount I will be using as a primary reference for painting. If I squint when I look at the mount (intentionally taking it out of focus), I see the white rump and different hues of black and brown. I will try to emphasize this contrast in the completed project.
In the last issue, I carved and primed a brant. Since both the Atlantic and Pacific (or black) brant are anatomically the same, we could choose either species at this point. I chose to paint a black brant because I prefer the warmer dark tones on the head and back. Furthermore, the black brant normally has a larger neck collar, which I prefer.
As part of the painting process I first apply a stipple texture to the feathered surface of the bird. The medium I use is modeling paste and gesso (50/50) tinted with paint to match the base color of each area. I daub the mixture on the surface with an open cell synthetic sponge material. (You can experiment with different media consistencies and sponge materials to get your desired texture surface.) This texture has the added advantage of breaking up the light reflection from the final surface, thereby avoiding unwanted shine from the decoy.
ATTENTION CARVERS: If you are going to carve a brant, consider entering it in competition at the Pacific Brant Carving and Art show. The show has a best brant competition each year--and mail-ins are welcome. Visit www.thebrant.ca for more information.
Read the rest of this article in Wildfowl Carving Magazine's Winter 2014 issue!


